Welcome to Part 3 of our Republishing Content blog series!

So far in this series, we’ve covered why you should republish content, as well as how to identify the right posts to update and republish.
And last but not least, we’re going to discuss what to update when republishing content! We’ll explore how to actually republish a post, some key areas you might want to consider updating, and more.
Some Tips for Republishing Posts
Before we jump into the nitty-gritty details of what exactly to update, here are a few tips to keep in mind when republishing content:
- Give each post a personalized treatment. Each post on your blog is unique, so any changes you make when republishing should be specific to that particular post.
- Decide if you’re going to republish a post or just make a few small updates. If you’re just making a few small tweaks on a post, you might not want to adjust the date. But if you’re giving it a major overhaul, you might want to push it to the front of your blog (more on how to do that below).
- The higher the rank, the more conservative the changes. If a post ranks in the top 4 on Google, be careful not to change too much since it’s already performing really well. If a post isn’t ranking as high, you don’t have as much to lose when making updates.
- Look at some high-ranking content on Google to discover topic areas that might be important to include. You don’t want to directly copy someone else’s strategy, but it’s a good place to get an understanding of the broad categories that might be important to cover when writing a comprehensive blog post.
- Don’t change the date on a post if you’re not making updates to it. According to Google, changing the published dates on your posts without making changes to the content will not help improve your rankings. So if you’re not making significant changes to a post, don’t touch the date!
How to Republish Posts on Your Blog
When it comes to republishing existing blog posts, there are a few ways you can go about it. Here’s a quick overview:
Make updates to a post and just click ‘Update’
Let’s say you want to make a few changes to a post, but you don’t necessarily want to adjust the date or bring the post to the front of your blog.
In that case, all you would do is make the updates within the post editor in WordPress, then click ‘Update’ in the top righthand corner.
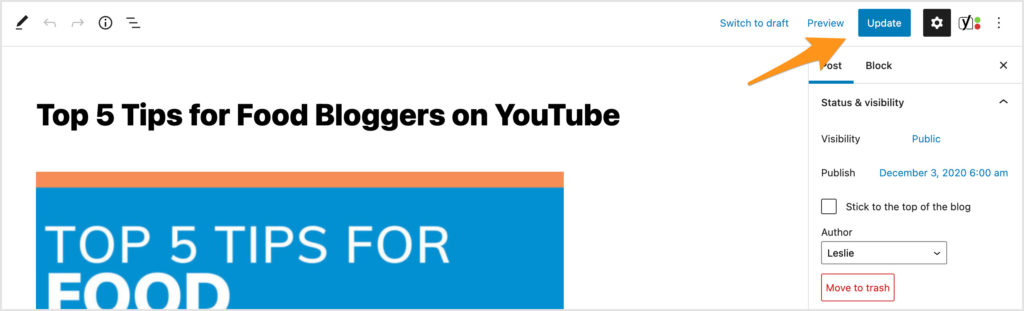
Your updates will appear on the blog post for your readers, but the post date won’t change!
Make updates to a post and push it to the front of your blog OR update the published date
If you want to push a republished post to the front of your blog, you would want to adjust that Published Date here, then click ‘Update.’
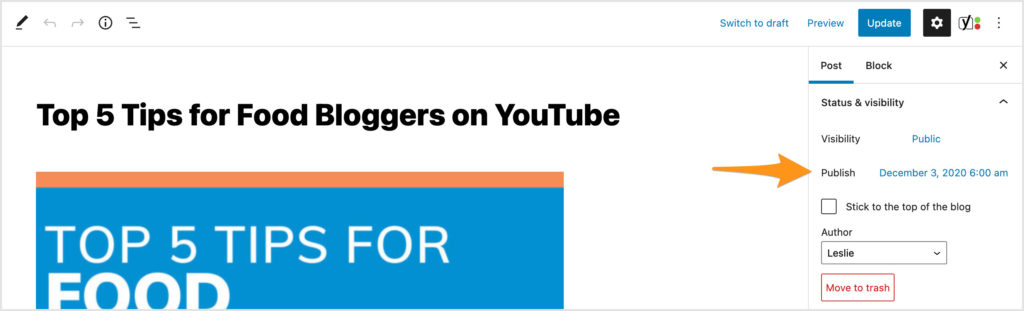
Adjusting that Published Date will jump the post to the front of your blog, and the new Published Date will update on the frontend of your site for your readers to see (except if you have dates in your URLs… more on that in a sec).
Quick tip! If you don’t have a traditional feed for your blog homepage, you’d need to update your homepage to feature that republished blog post.
If you’d like, can also choose to show both the ‘Published Date’ and the ‘Last Modified Date’ at the top of your posts. If you’re using a Genesis theme, you can use shortcodes to display this information.
An important note for those with dates in their permalinks!
Also! Take a quick look at the permalinks (aka URLs) on your site. You can find this information within WordPress by going to the Settings area → Permalinks tab.
If you have dates showing in your permalinks, you won’t want to adjust the Published Date on your posts when republishing.

If you have dates showing in your permalinks, adjusting the published date on your posts would change your republished post’s URL, which we don’t recommend. If you changed the URL for that post, you would have to add redirects to the new URL, and it could get really messy really fast.
Instead, you’d just want to follow the process of making changes to a post and just click ‘Update.’
Items to Update When Republishing a Post
Now that we’ve covered how to republish posts on your blog, let’s dive into what to actually update when republishing a post.
And when it comes to republishing content, there are a lot of areas you can look at to make improvements. We’re only going to cover a few of them here in this post, but if you want to access our full Republishing Checklist, you can snag that by joining Food Blogger Pro.
In the meantime, here are a few key areas we encourage you to start with:
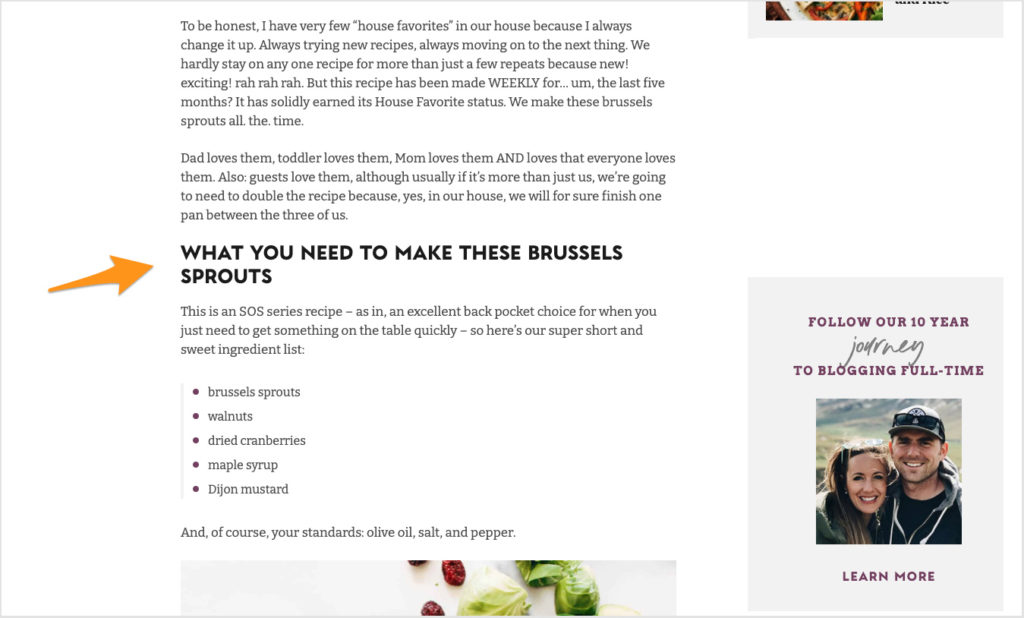
Add Headings to Divide Up the Post
First things first, it’s important to add headings to naturally divide up the post. Chances are, your readers will be more engaged and interested in your posts if they’re not just reading a huge wall of text.
And remember! You only want to use one H1 heading per page, and that should be for the title of the post. After that, you can use H2 and H3 headings to introduce different sections throughout the post, like this:
Adding headings can also make your site more accessible, and it can improve SEO. Headings help your readers understand what your post is all about, which can decrease your bounce rate and increase your rankings.
Here’s what Yoast has to say about headings:
With headings, you should always put the user first. Use them to add structure and signposts to your content, and to describe what each section is about. If your headings let users know what your article is about, they’ll help Google understand your content, too.
Shoot New Photos
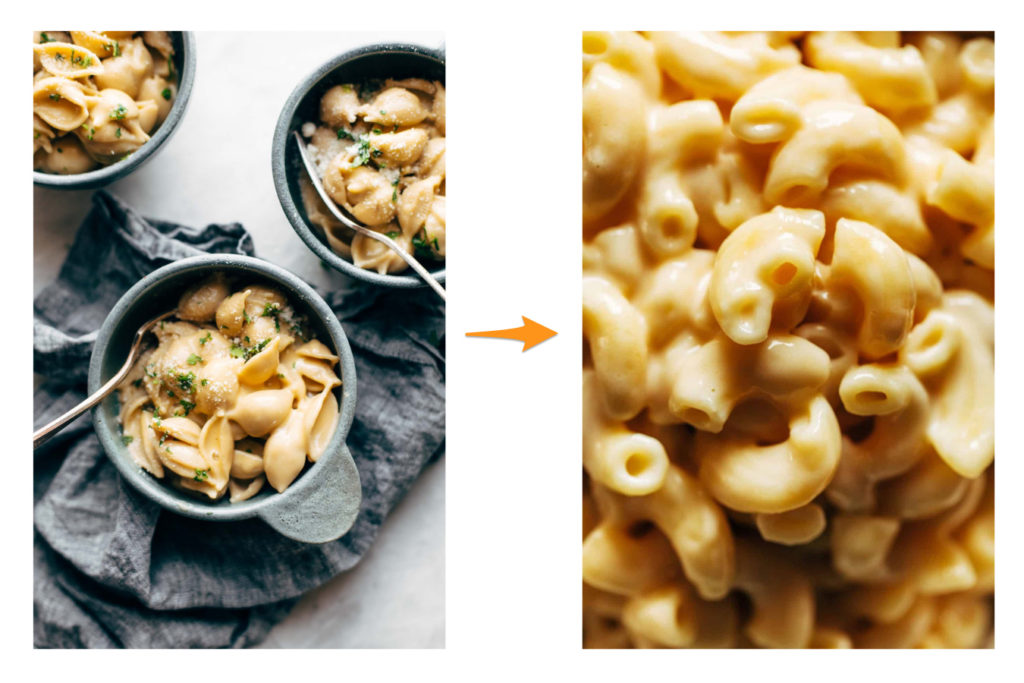
As I’m sure you know, photography is a skill that’s learned over time. And that means that some of your old photos from several years ago might not be as polished as you want them to be.
If that’s the case, you might want to consider shooting new photos when republishing a post.
Adding fresh, crisp photos to a post will make it seem new and exciting to your readers, and it will give you new content to share on social media. After shooting new photos for a recipe, you can create new pins for Pinterest, share a new photo on Instagram… the list goes on and on!
Add Internal and External Links
If you haven’t already, you might also want to consider adding internal and external links to posts that you’re republishing.
Internal links are links from one page of your site to another, while external links are links on your site that go to an external source.
You don’t want to just drop in links anywhere, but if they’re relevant and helpful for your readers, they can help improve both your user experience and SEO.
Plus! Don’t forget to add internal links on your other posts back to the republished blog post. That’s a great way to add more internal links to your site and get readers to check out the content you’re republishing.
And that’s just the tip of the iceberg!
We’ve talked about a few of the different areas you should look at when republishing posts, but there are many other items you might want to consider focusing on to optimize your posts as much as possible.
Want to access our full Republishing Checklist?That said, keep in mind that each post is unique, so one post might need a lot of updates, while another might just need a few small tweaks. Make sure to give each post a personalized treatment when republishing!
And that’s a wrap on our Republishing Content series!
We hope that this series showed you that growing your blog isn’t just about creating new content. It’s also about looking back at your old posts and making them the very best they can be. ⭐️
I know we covered a lot in this series, so if you have any questions about the republishing process, let us know in the comments. Or if you’re a Food Blogger Pro member, come start a conversation in the FBP forum!
Now we’re curious: What do you like to update on your posts when republishing? What’s the next series you want to see here on the blog?