In our member-only Live Q&A last month, we got a question about how to add a table of contents to a blog post.
And it was a great question!
Speaking personally, I love when tables of contents are included in the articles and posts I’m reading because it allows me to understand the structure of a post while giving me direct links to sections within that blog post that I can easily jump to.

You can check out the table of contents for this post (meta!) below:
- What are tables of contents for blog posts and why are they helpful?
- How to add a table of contents to a blog post
By the end of this post, you’ll understand multiple ways you can add tables of contents to your blog posts. Let’s jump in:
What are tables of contents for blog posts and why are they helpful?
Just like in a book, a table of contents in a blog post typically appears in the beginning and outlines the major points that will be discussed in the article.
Instead of the chapters you see in a book’s table of contents, a blog post table of contents usually corresponds to the different headings within the article. And it makes sense –– since headings are “used to introduce a new sub-topic.”
Plus, a blog post table of contents typically links to those headings (those links are also called anchor jumps), making it easy for readers to navigate through the post and jump to sections they want to read.

Not only is this a positive in terms of user experience (it makes it easier for your readers to access the information they’re looking for!), it may also benefit you in your search results, as your table of contents sections can be highlighted as extra links below the main result.

In short, tables of contents help transform an article into a resource that can more easily be read, shared, and digested.
How to add a table of contents to a blog post
There are two popular ways you can add a table of contents to your own blog posts: with a plugin and with code.
There isn’t a “right” or “wrong” way of doing it –– some people prefer using a plugin while others would rather spend a little extra time manually adding a table of contents over installing another plugin on their site.
Here’s how to do it either way:
With a WordPress plugin
Two popular WordPress plugins give you the ability to effortlessly add a table of contents to your posts:
- Yoast SEO (the premium version)
- The Feast Plugin
They work in a similar way; either plugin will give you access to a WordPress Block that automatically generates a table of contents for you.
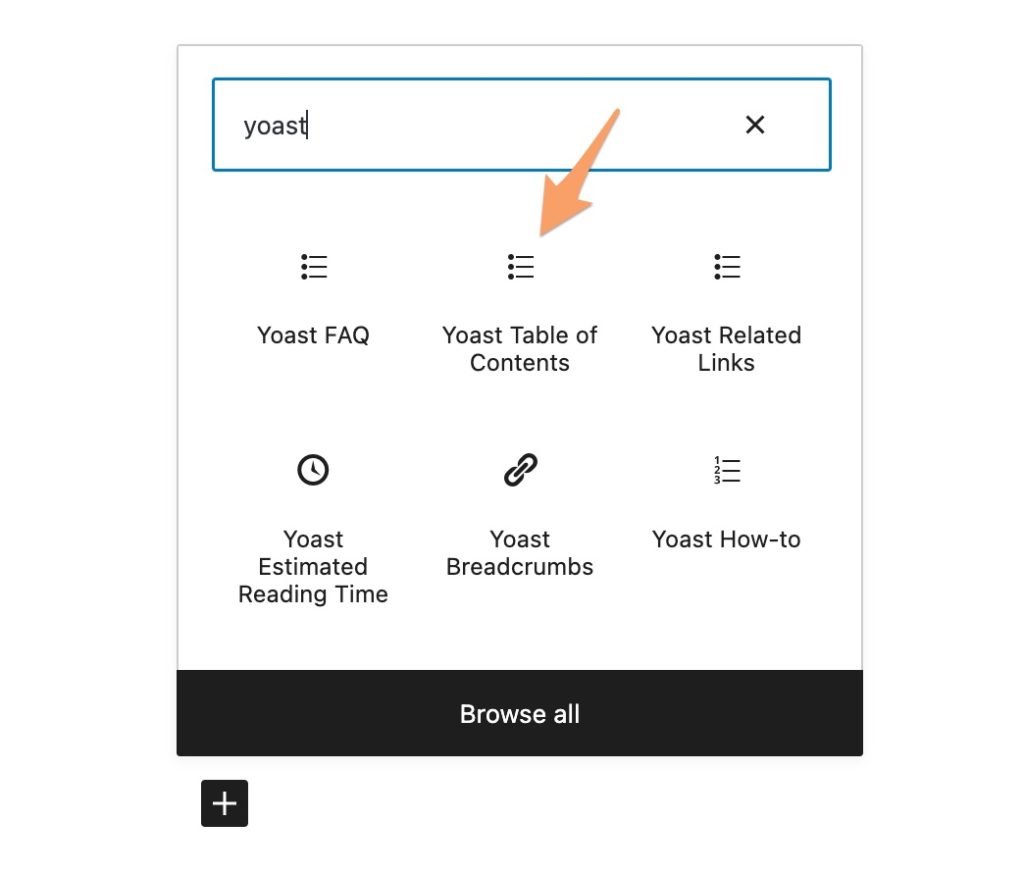
With Yoast SEO, you’ll need the premium (aka paid) version of the plugin. The block you’re looking for is called “Yoast Table of Contents.” By using this block, you’ll get an automatically-generated table of contents based off of all of the headings used throughout your post. The block will automatically update if you add more (or delete) headings as you’re writing your post as well.
Learn more about the Yoast Table of Contents block here.
If you have The Feast Plugin, the block is called “Advanced Jump To.” It will create a table of contents for you only out of the headings that are H2s in your post.
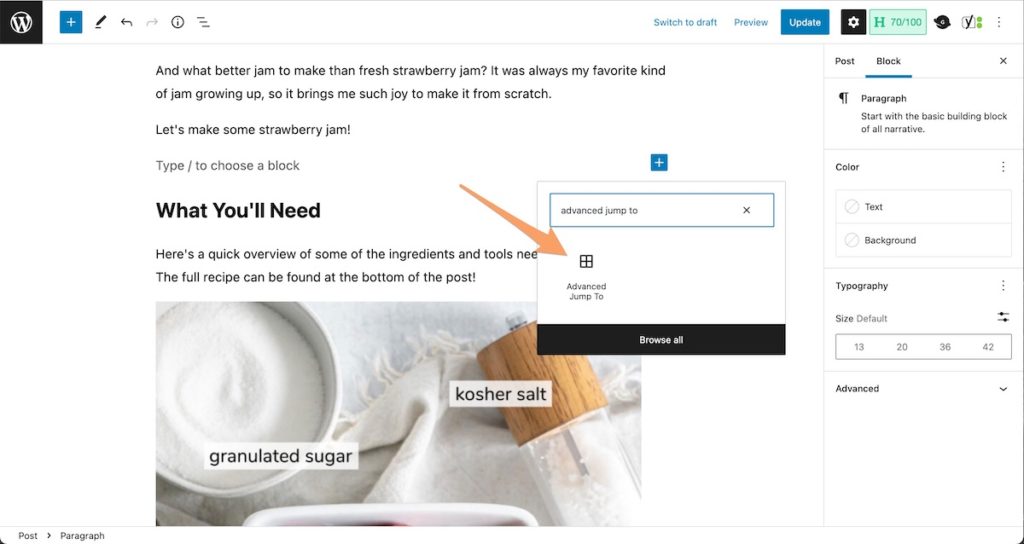
You can learn more about using the Advanced Jump To block in this article, and you can check out this post from our Member Success Manager, Leslie, to see a live example of this block in action!
With code
The other way to add a table of contents to your blog post is with code. If you’re not techy, don’t worry –– this process is relatively easy, quick, and it doesn’t require you to buy or install an extra plugin!
We’ll use the power of ids to create our tables of contents with code. While the id tag can be used to style text, it can also be used to create anchor links. Those links help you link to different sections in the same page, so they’re exactly what we need to use to create our tables of contents.
Here’s how to do it:
1. Add a heading to your post. You can add a heading block by using the + button or by typing ## ahead of the heading text.
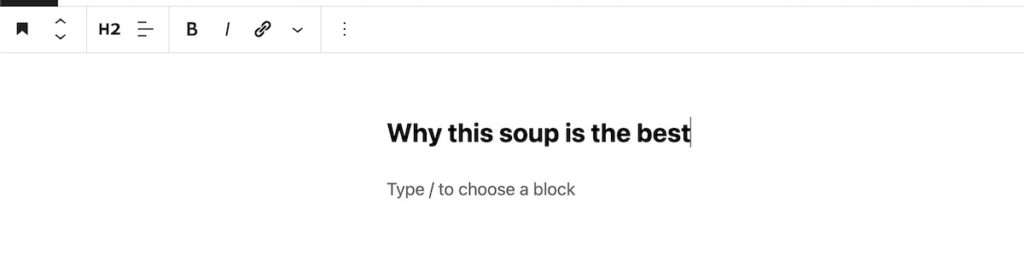
2. Make sure you still have that block selected, then click the Options button (it looks like this → ⋮).
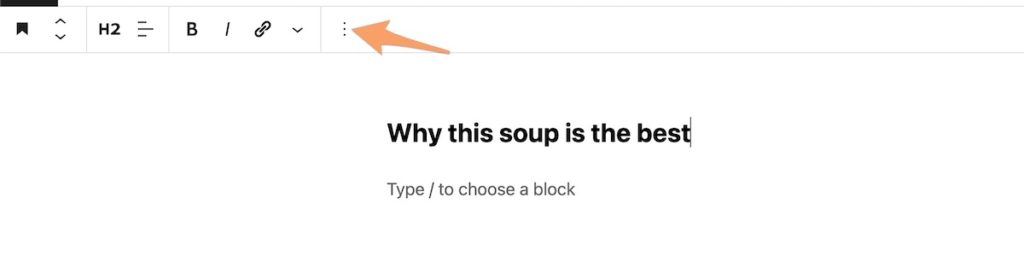
3. Click Edit as HTML.
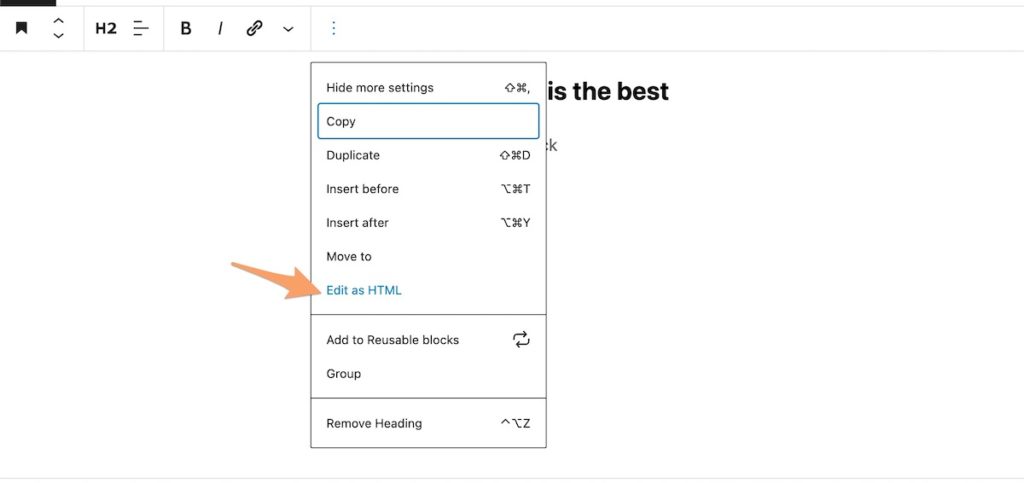
4. If you don’t already see an id in the code, add an id=" " element to your header. Add a descriptive word or hyphenated phrase between the quotation marks. If you do already see an id in the code, WordPress probably created the id for you. Feel free to edit the text to make it shorter and more succinct if desired.

5. Repeat steps 1-4 for all of your headings, noting the descriptive word or phrase you used for each heading id. The ids you use for your headings must be unique, so each heading should get its own id.
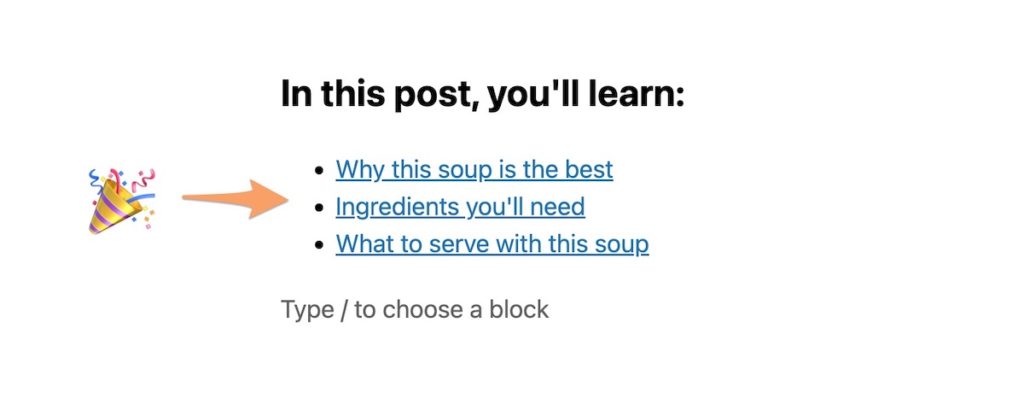
6. It’s table of contents time! Figure out where you want to add your table of contents. Create a bulleted list where each bullet point contains the same heading text you want to create the jump to.

7. Add your links. Simply highlight the text, click the link icon, and type #your-id-text, replacing your-id-text with the id text that corresponds to that heading.
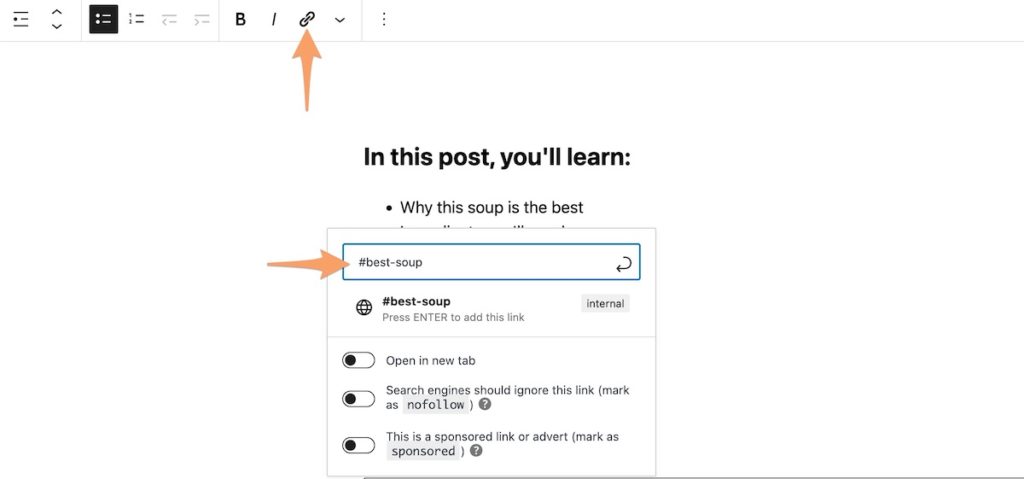
8. Repeat until you’ve linked to all of your headings!
Here’s what that looks like on the code side of things (the highlighted bits are the anchor links you just added!):
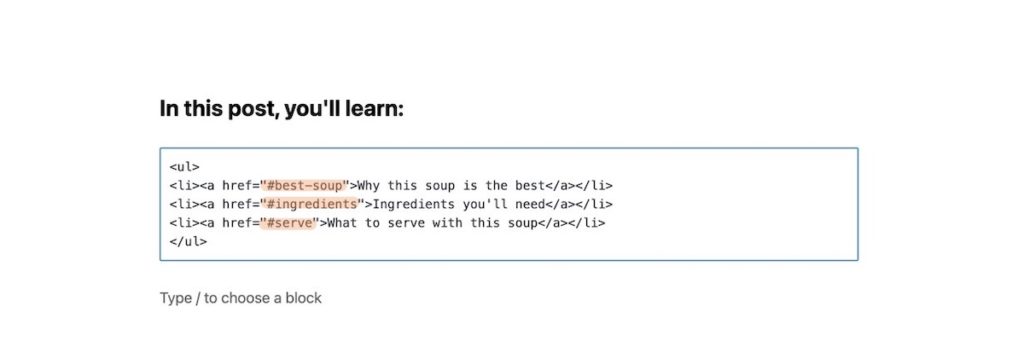
And when someone clicks on one of those links in your table of contents, they’ll be taken directly to that heading and the URL will reflect the jump (the id will be added to the end of the URL). If you’re a food blogger who is familiar with the “Jump to Recipe” button, it works in the same way!

It seems like a lot of steps, but once you do it once or twice, it becomes a super quick process. Plus, it gives you a helpful insight into the way your site works, and you can easily edit and tweak the ids and text as you see fit. This is actually how Pinch of Yum adds the tables of contents to some of their posts!
And that’s a wrap! We hope this article will help you more efficiently and effectively add tables of contents to your blog posts with plugins and with code.
What other questions do you have for us about adding tables of contents to your blog posts? Let us know in the comments!
Hi Guys! I get asked a lot… How does the table of contents affect ad revenue? Could you guys cover that a bit?
Hey, Mike! This is such a great question. I don’t know the specifics about how it affects ad revenue necessarily, but having a TOC probably does decrease time on page.
I see you are an FBP member — if you’re up for it, this might be an interesting question to post in the community forum! I would be curious to hear if any other FBP members have thoughts to share about this topic.
So I had been doing this manually for a while, not realizing that Yoast had a TOC plugin. But trying it out today it’s not refreshing with the sections I’m adding to my post. I have Yoast Premium but it doesn’t seem to be working – anyone else using this and see that it does actually work?
Hey, Ashley! I know a few FBP members have mentioned adding their TOC in using Yoast. Would you be up for posting this in the forum? I wonder if they could weigh in there!
Valueable content !!