If you missed part 1 of this 2-part series about setting up GA4, be sure to check it out here. You’ll need to create a GA4 property before you can connect it to your site!
In today’s blog post, we’re going to cover three different ways to connect your new GA4 property to your site. You don’t need to do all three; just pick the one you’re most comfortable with and the one that will give you the features you need.

The three ways are:
Check out the chart below for our “ease of connecting GA4 to your site with this method” breakdown:
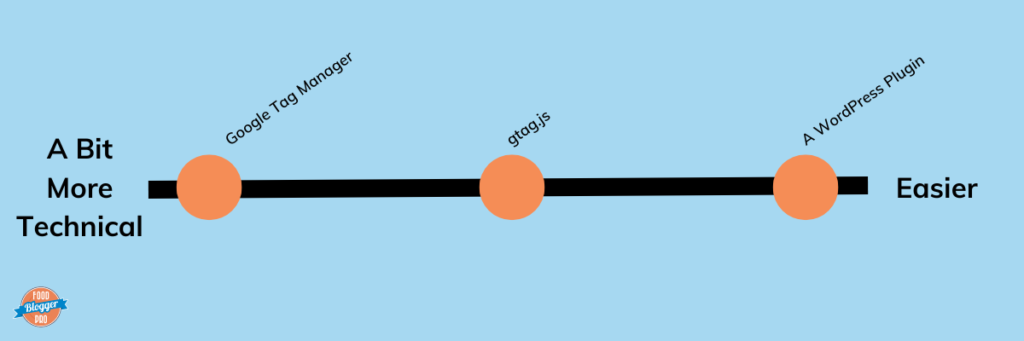
Let’s start with the easiest, shall we?
Installing GA4 with an Analytics WordPress Plugin
For: WordPress users and anyone uncomfortable with adding code to your site.
There are plenty of WordPress plugins available that can help you connect Google Analytics to your site, but the one plugin that’s the most popular amongst the Food Blogger Pro community is MonsterInsights.
There are free and premium versions of the plugin, and both versions will give you everything you need to connect your new GA4 property to your site:
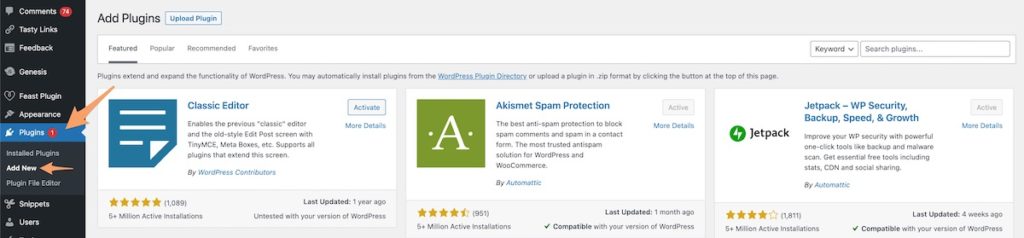
1. First, we’ll add the MonsterInsights plugin to your site. Log into your site, then go to Plugins > Add New.
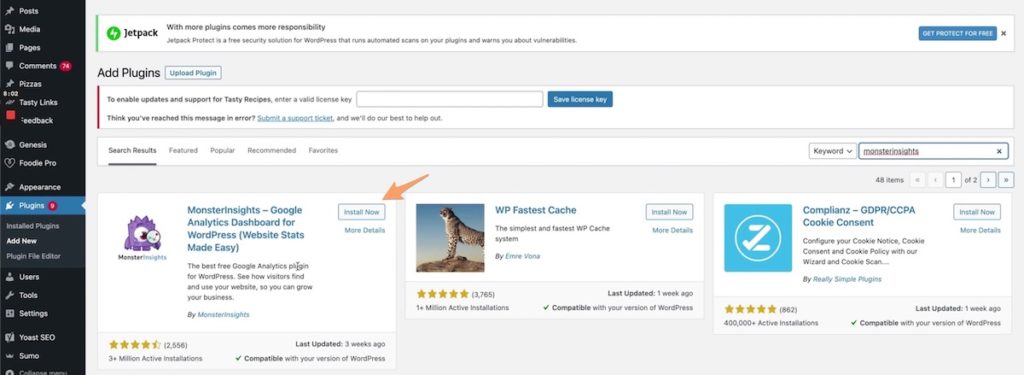
2. Search for MonsterInsights, then click Install Now.
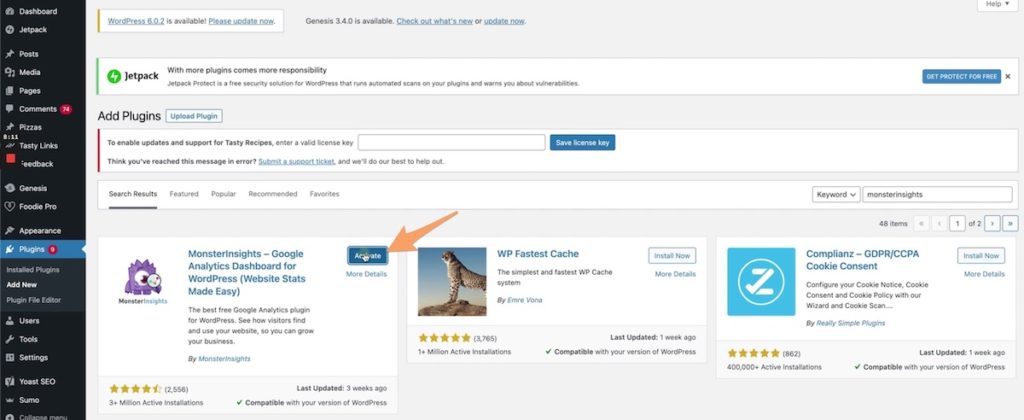
3. Once installed, click Activate.
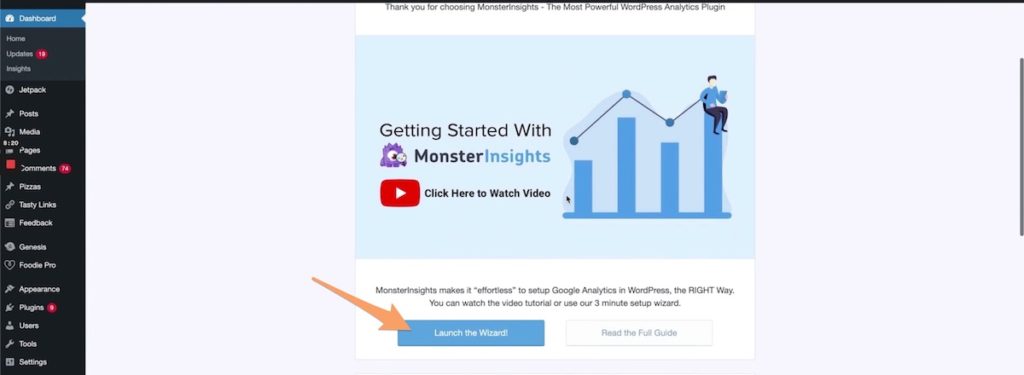
4. Once Activated, you should be taken to the MonsterInsights area. Click Launch the Wizard.
5. Choose the category that best describes your website, then click Save and Continue.

6. Click Connect MonsterInsights.

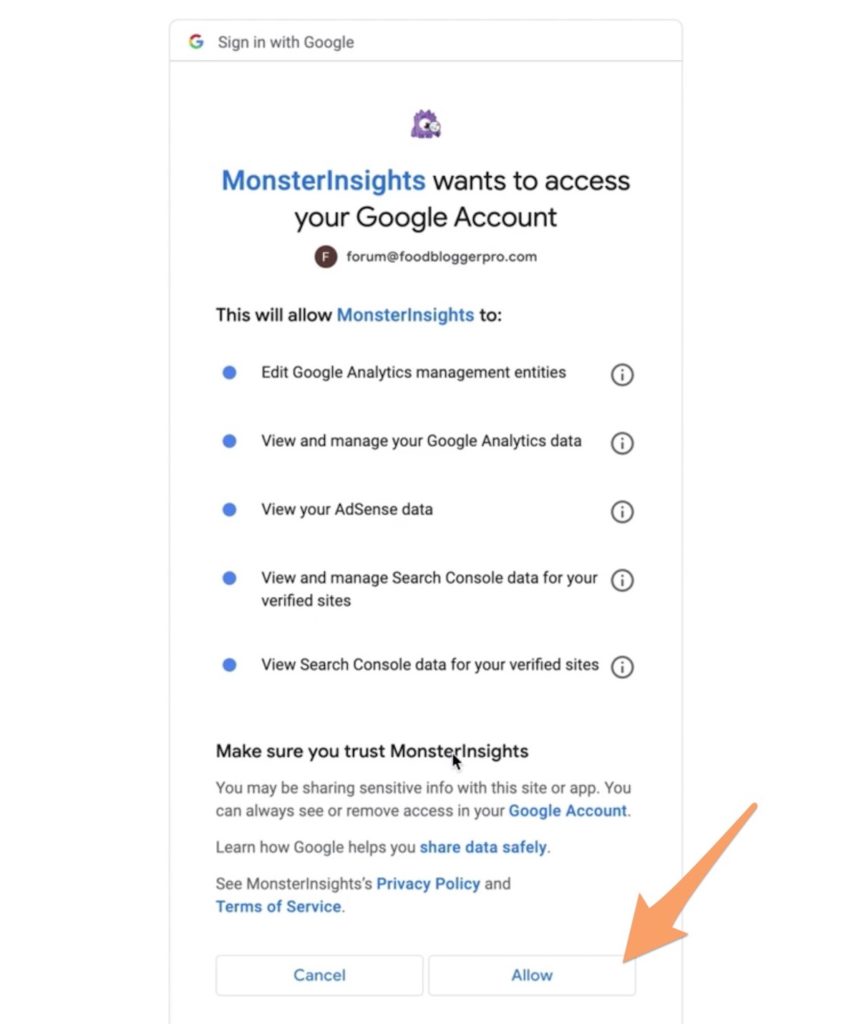
7. Choose the Gmail account you’re using for your Google Analytics account, and then click Allow.
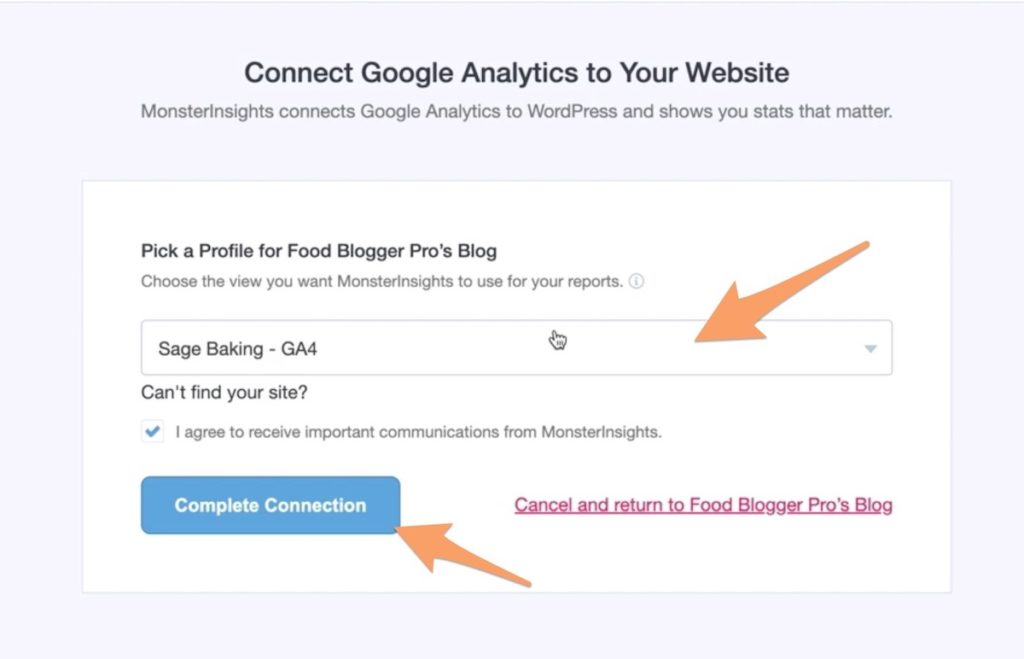
8. Choose your GA4 property, then click Complete Connection.
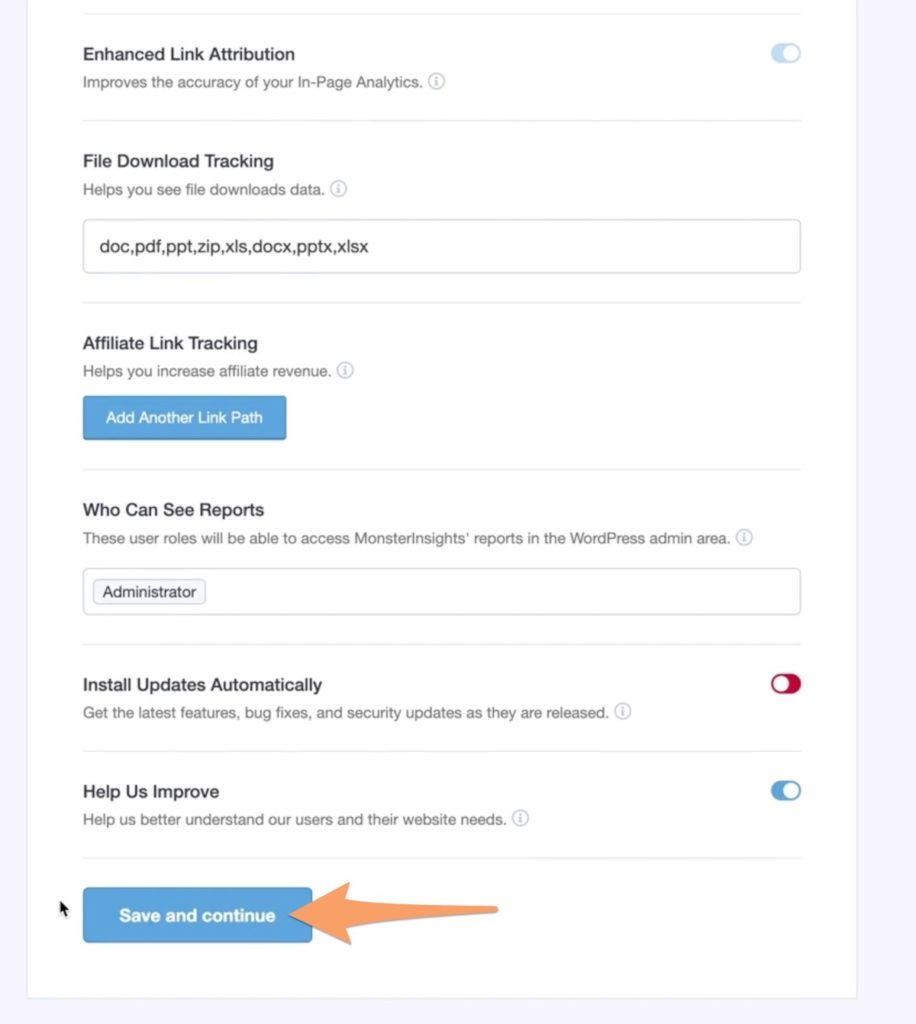
9. Review the recommended settings, make changes as necessary, and then click Save and continue.
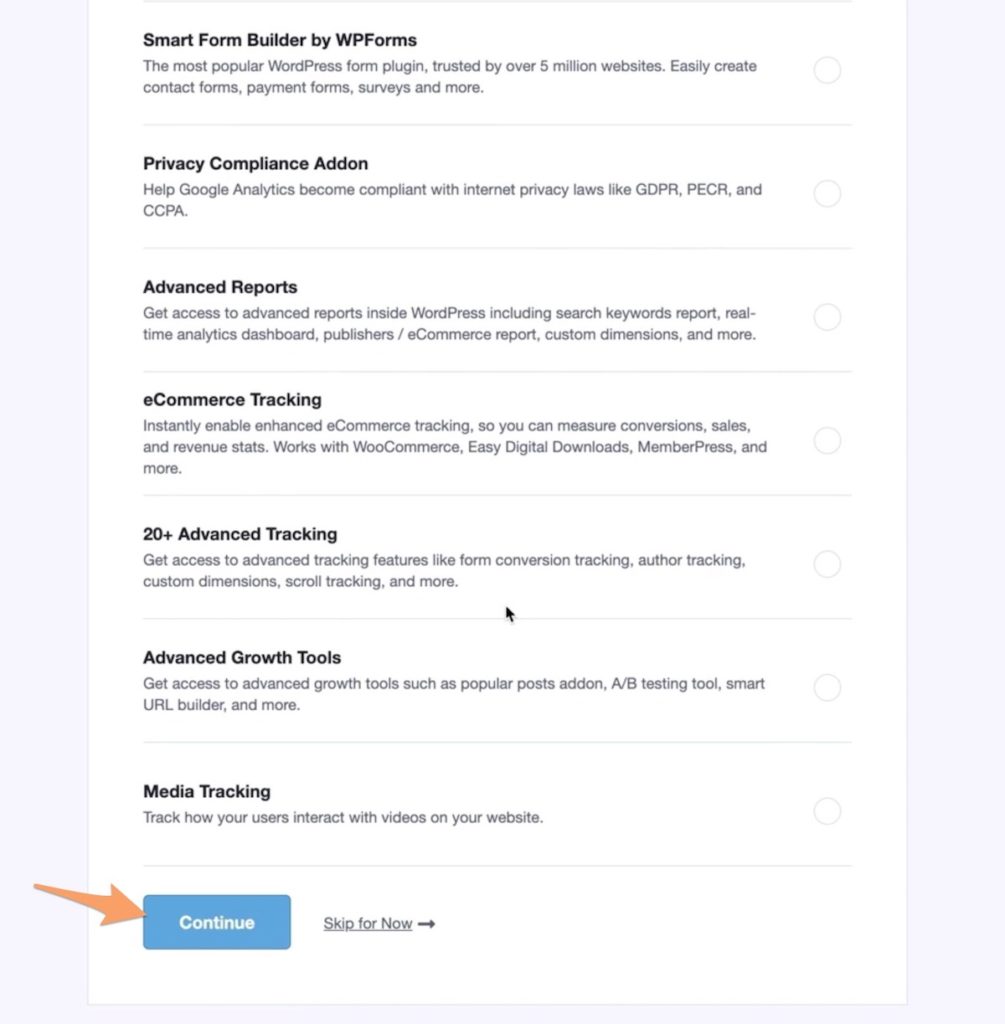
10. Review the recommended addons, make changes as necessary, and then click Continue (alternatively, you can skip this for now!).
Huzzah! Your GA4 property is now connected to your website! 🎉

Data can take a few hours to start appearing in GA4 and in your MonsterInsights Dashboard, so don’t panic if you don’t immediately see information.
Installing GA4 with Google Tag (gtag.js)
For: Anyone who feels comfortable adding code to their site header.
If you were able to use your existing gtag.js code during your GA4 property setup, you should be good to go! Your GA4 property should already be connected to your site (and data should start showing up on GA4 within a few hours).
If that option wasn’t available for you during your GA4 property setup (or maybe you created a brand new Google Analytics account), using the gtag.js code can be an effective and relatively simple way to connect GA4 to your site… provided you’re comfortable with adding a little bit of code to your site!
You’re going to want to add the gtag.js tag in the <head> element on your website. While this process is relatively simple, it’s always helpful to make a full site backup before you make any changes to the code on your website.
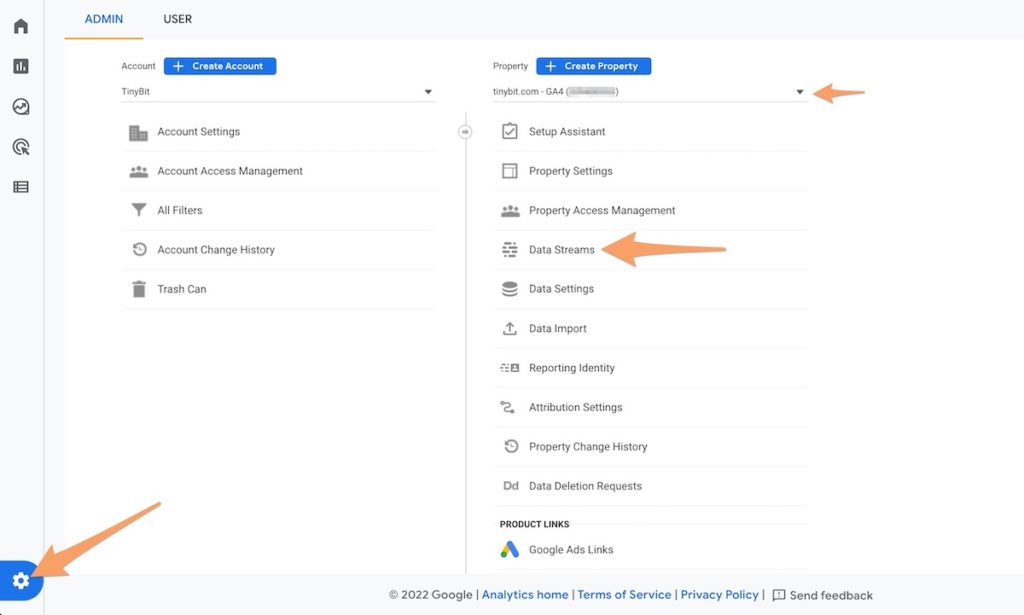
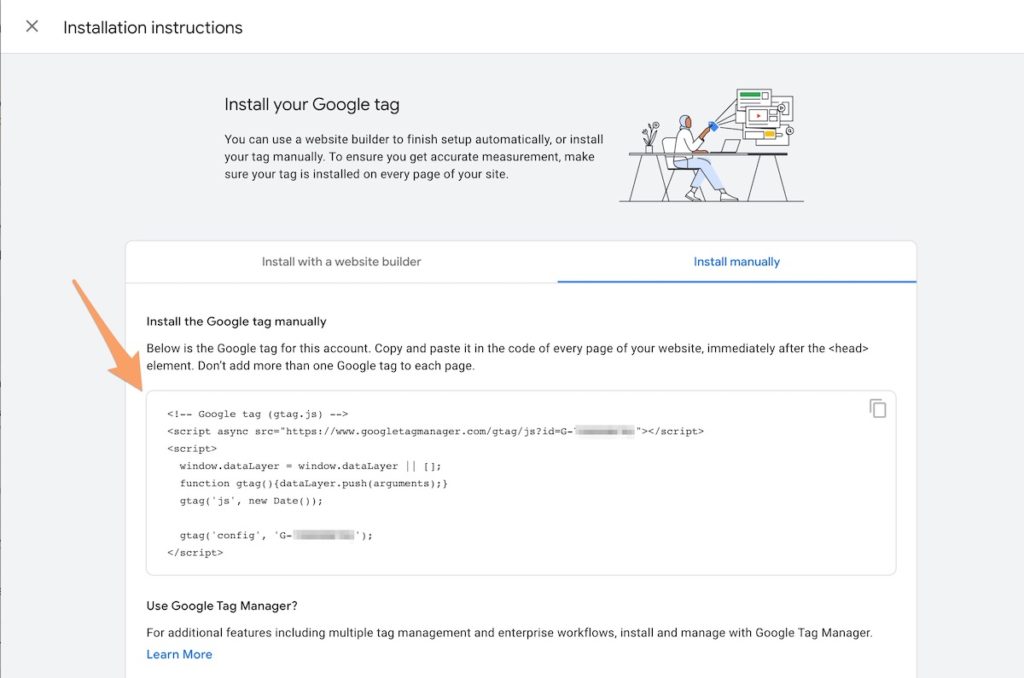
1. The first step is to copy your gtag.js code. Go to the Admin gear icon in the bottom-left corner in Google Analytics, and then click Data Streams (note: if you don’t see Data Streams, make sure that your GA4 property is selected in the drop-down menu).
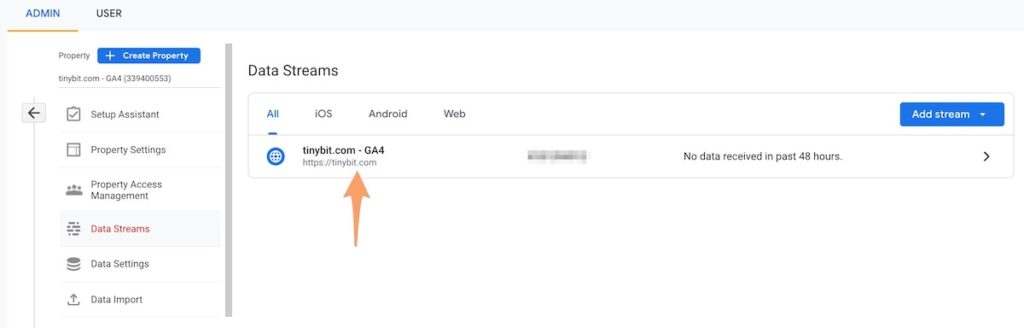
2. Click on the web data stream for your website.
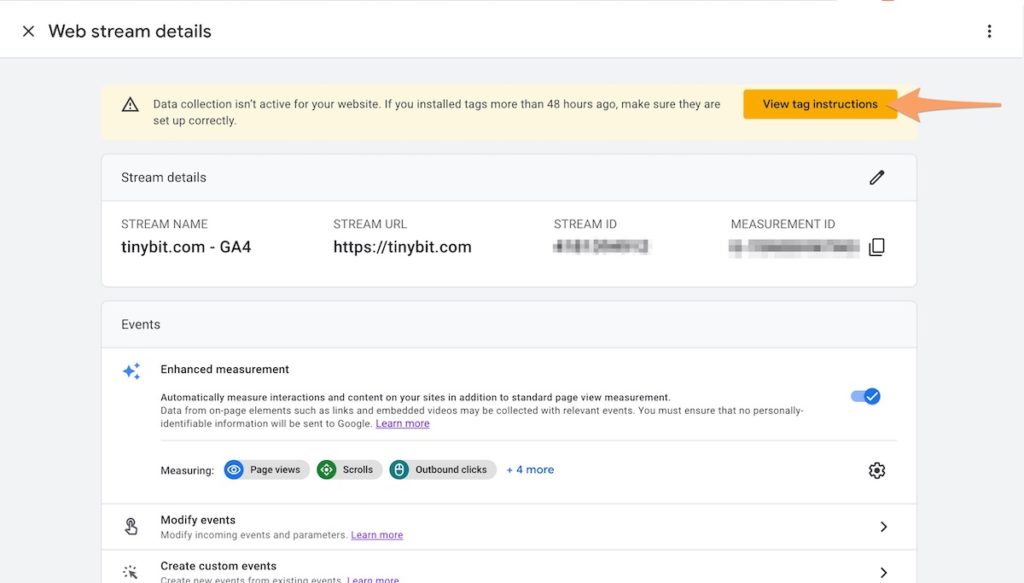
3. Click View tag instructions.
4. Click Install manually, and then copy the code below. This is your gtag.js code!
5. Now it’s time to add your code to the header of your website.
Certain themes have built-in places for you to add codes to your header, and Genesis, the popular “parent” theme to many “child” themes, is one of them.
That said, an important note here is that any code you add to your header is actually added to your theme’s code. So if you switch themes somewhere down the line, it’s important that you copy important header codes from your old theme (like your gtag.js code!) into your new theme’s header.
If you’re using the Genesis theme with a child theme, you can go to Genesis > Theme Settings, and then paste your gtag.js code into the Header Scripts area.
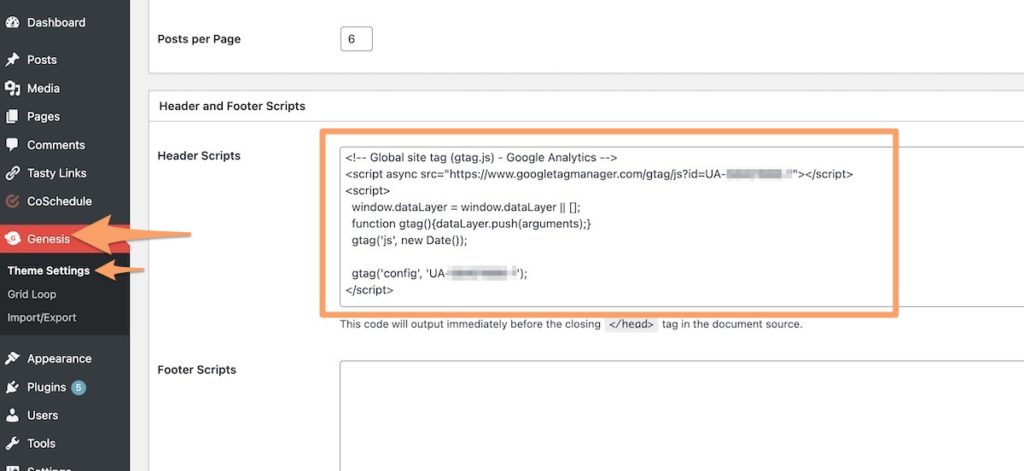
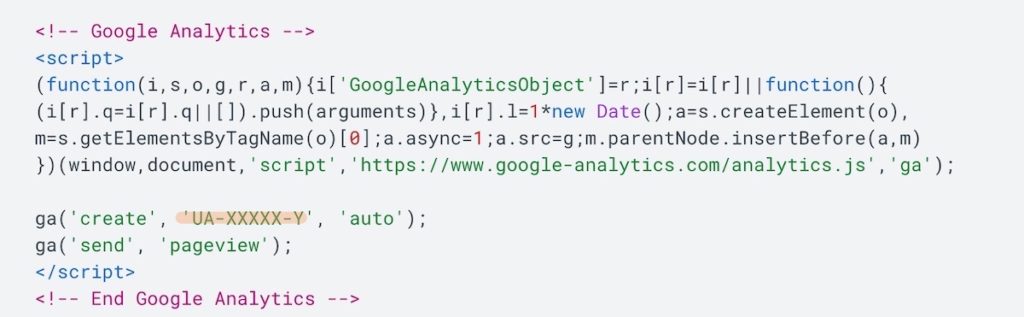
You can delete your UA tracking code from this area as well. It should look something like this, and it should contain a “UA-XXXXX-Y” code (highlighted below):
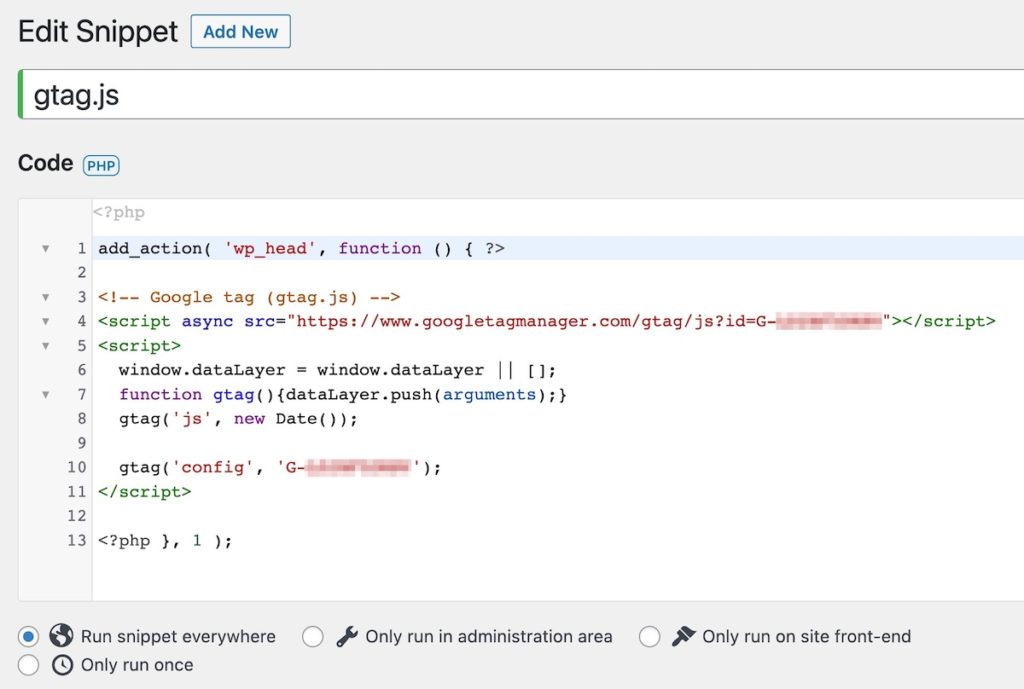
Alternatively, you can install a plugin called Code Snippets to help you add your gtag.js code. Once you install and activate that plugin:
- Go to Snippets > Add New
- Give the Snippet a name (like gtag.js)
- Then paste the following code into the code area, pasting your gtag.js code where it says “DELETE THIS LINE AND PASTE CODE HERE”
add_action( 'wp_head', function () { ?>

DELETE THIS LINE AND PASTE CODE HERE

<?php }, 1 );
It should look like this:
Then simply scroll to the bottom and click Save Changes.
Yay! 🎉 Your gtag.js code should now be in the header of every page on your site. To verify, you can view the page source on your website and search for “gtag.js.”

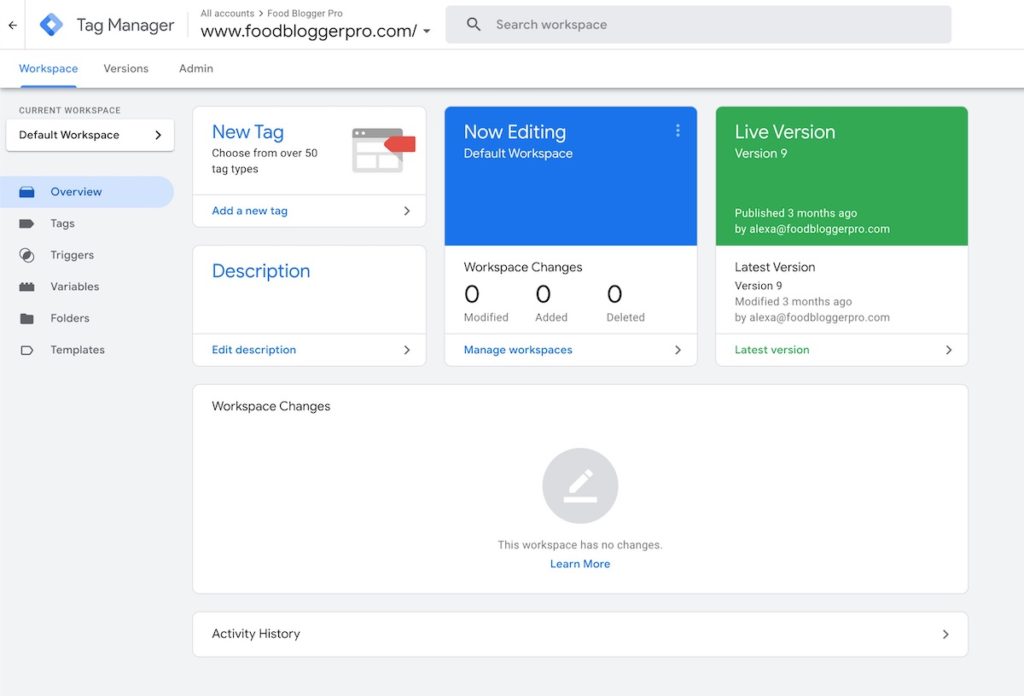
Installing GA4 with Google Tag Manager
For: Anyone who is comfortable with code and is interested in tracking lots of custom events with GA4.
Our last method requires the use of yet another free Google tool: Google Tag Manager.
Using Google Tag Manager is a nice way to avoid the pitfalls of installing your Google Analytics tracking code with a plugin, and it gives you the opportunity to configure your site with different tags, triggers, and variables in the future for things like conversion tracking and marketing.
Google has some points to consider before you start using Google Tag Manager, and, according to Google, you should consider using Google Tag Manager if you need:
- The ability to deploy and modify both Google and 3rd party tags
- The ability to deploy and modify tags for both web and mobile apps
- The ability to deploy and modify tags on the fly from a web interface
- Collaboration and versioning capabilities
If you don’t quite understand what those points mean, or if they’re not things that are particularly important for you and your blog, try out one of the other options above.
That said, if Google Tag Manager does sound like a good fit for you and your site, we’re going to refer you to Google’s documentation about the setup.
Why? Google updates their processes frequently, and, in turn, will always have up-to-date support documentation available for its users. Speaking of, here are Google’s support docs that will teach you how to:
- Create a new account and container
- Install the container on your site
- Add tags (this is the step where you’ll create a tag for your GA4 code!)
You can also review this video from Julius over at Analytics Mania if you need some visual help!
Troubleshooting & Learning More
If you’re having trouble connecting your GA4 property to your site, or if you’d like to dive even deeper into the wonderful world of Google Analytics:
- Refer to this support document from Google about common mistakes with the tag setup.
- Hop into the Food Blogger Pro Community Forum where our Analytics Expert, Ali, can help guide you through the process.
- Tune into this episode of The Food Blogger Pro Podcast with Alison Bechdol about what bloggers need to know about GA4.
- Check out our brand-new GA4 course on Food Blogger Pro:

PHEW! That does it for our mega GA4 blog series! 🎉
If you were able to create a GA4 property and connect it to your site using this guide, we’d love to hear from you in the comments! We’re excited for you and this new generation of site analytics. 😊
I can’t thank you enough for this blog post! I was struggling to make sense of it all and failing miserably. It occurred to me last night that I should check my foodblogger pro account and see if there was a post on How To add GA4. Thank goodness! I was finally able to make it happen thanks to you good folks….Just one more reason to be a member of Foodblogger…thank you, thank you, thank you! You all are the best!
This made our day! GA4 is definitely not the most intuitive. So glad this post was able to help you! We also have a full Google Analytics Course on FBP if you need more info!
Hello Sir you have given very good information about Analytics 4 but my problem is that after installing GA4 Analytic on my website website data is not showing complete in google search console what to do? thank you in advance
Hello! Could you provide some more detail on what is incomplete in GSC?