There are many things I love in this world.
For example, I love…
- My wife Lindsay
- Coffee
- Minnesota
- This video
- And this video
- Google Apps
- Backup plans
I’d love to talk about all of these things in this post, but I understand that you’re probably here to learn about those last two items: Google Apps and backup plans.
This post is a sequel to the 4 ways you should be backing up your computer and blog that I wrote back in May. If you haven’t read that post yet I’d encourage you to check it out after you’re done reading this.
So let’s talk about those last two items in my list of loves. First, Google Apps.
Google Apps
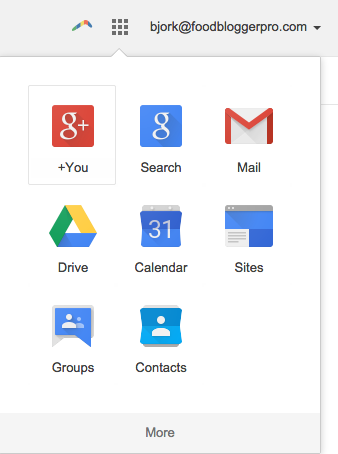 For those that aren’t familiar, Google Apps, or as it’s technically called Google Apps for Work, is the suite of cloud-based software from Google that most people think of as “Gmail that lets me use my domain name.” It includes Gmail, Drive (this used to be called Docs), Calendar, and a whole slew of other services.
There are two primary differences between a “regular” Gmail account and a Google Apps account (at least as far as it concerns a blogger).
- There is a small monthly fee to use Google Apps ($5/month per user at the time of writing this post).
- A Google Apps account allows you to have a custom email address (like bjork@yourdomainname.com instead of bjork@gmail.com).
That second item is a huge deal for branding.
Sending an email from [email protected] is a much better brand experience than sending an email from [email protected].
Food Blogger Pro members can learn how to set up Google Apps by going through the Setting Up Google Apps course.
Backup Plan
The second love of mine that I’d like to talk about today is backup plans.
Not backing up your data is like driving without insurance. Can you do it? Sure. Will it save you money? Yes. Will you regret that you didn’t set it up someday? Probably.
I’ll probably never need to use most of the backups that I have, but after setting up a backup plan I know that I can get rid of that pesky “I should really be backing stuff up” thought that takes up a sliver of space in my brain. The more I can silent those little brain snatching thoughts the better.
So, here are the primary benefits of backing up your data:
- Your data is backed up.
- You can silence the “I should be backing up my stuff” thought.
Your backup plan should cover all of these things:
- Computer to external hard drive
- Computer to cloud
- Blog to cloud
- Blog to computer
- Cloud to cloud
We talk about those first four in the post I mentioned before, and we’ll talk about that last one, cloud to cloud, in this post.
Why Back up Google Apps?
Google Apps is a cloud based service. Simply put, your Google Apps data is on a company’s server in some far off place that probably looks something like this.
Bottom line: it’s not stored on your computer.
I (almost) completely trust Google to safely store my data. I’ve never worried about logging in and not seeing my emails, calendar, or documents. My trust in Google isn’t the main issue.
The person that I don’t trust is myself. Have you ever accidentally deleted something? Yeah, me too. When it comes to the long-term safety of my online documents I know that I am my own worst enemy, which is the primary reason I feel the need to be backing up my Google Apps account.
Can you imagine if you accidentally deleted your primary calendar?
It would probably result in one of these faces:

This goes back to the “driving without insurance” analogy we mentioned before. Just like insurance, backups are something that you almost never need, but when do need them it’s usually in a really big way.
So what’s the best way to back up your Google Apps account?
Backupify
This month we started using Backupify to backup our Pinch of Yum and Food Blogger Pro Google Apps accounts. It’s a breeze to set it up and the user interface is awesome and easy to navigate.
Note: We’re not a Backupify sponsor or affiliate. It’s a solid solution to a real problem at an affordable rate, hence our reason for sharing it with you.
At the time of writing this post you can get a Backupify plan for $3/user. That means that if you have a Google Apps account and you’re the only user then you’ll pay $3/month. If it’s you and one employee then you’ll pay $6/month.
For Pinch of Yum we have Lindsay and I and two employees, so we pay $12/month. For Food Blogger Pro it’s just me right now, so that means $3/month. Pretty darn affordable if you ask me.
Backupify Dashboard
Let’s take a quick peek at Backupify so you know what you’ll be getting into.
The Dashboard shows the overview of your account. You can see with Pinch of Yum that we have four active users and one that’s not protected. The not protected user is a Google Apps user we have setup but aren’t currently using.
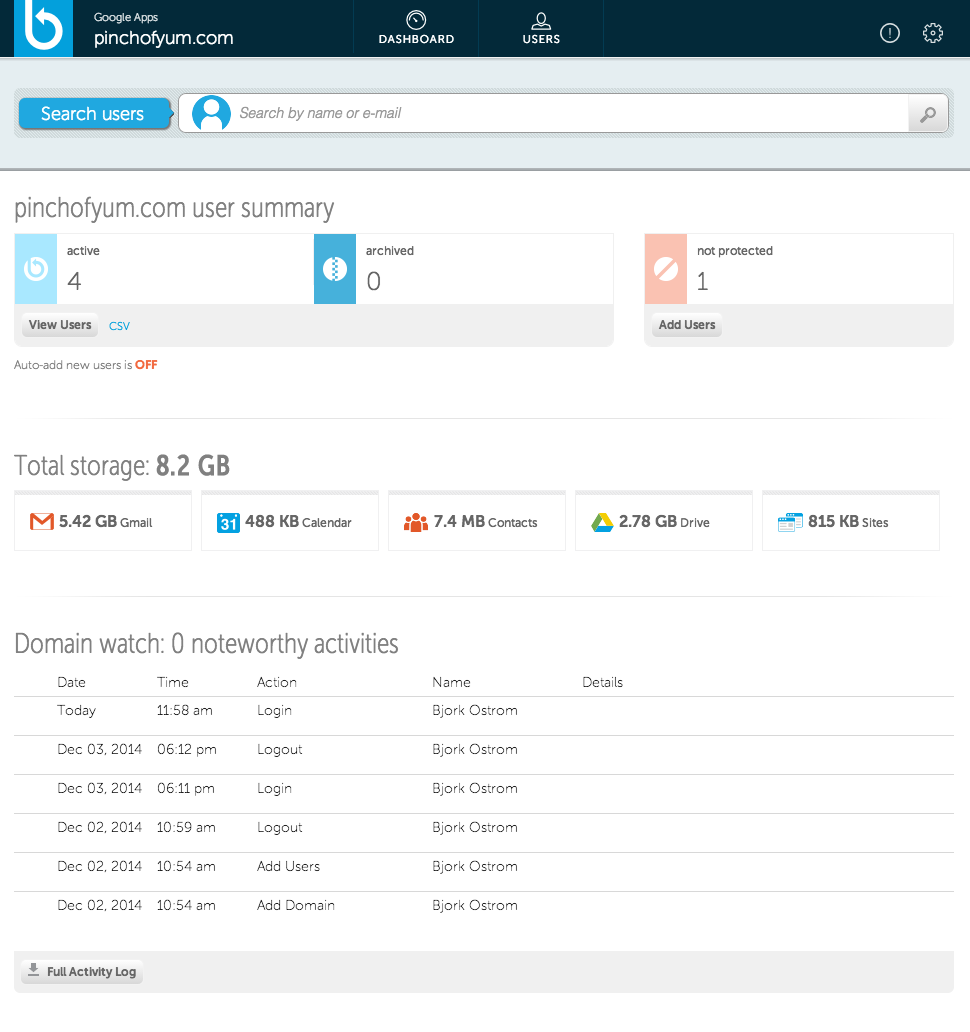
The total storage area shows you how much total data storage you’re using as well as how much each Google Apps service is using. You can see that the majority of data storage for Pinch of Yum is with Gmail, followed by Drive.
Restoring Data
Let’s say you delete an email and realize that you need it, but you realize that you need it 3 months after you deleted it. Grabbing that email from Backupify would be easy. You’d just…
- Login to your account
- Click on Users
- Select the user
- Click on Gmail
- Search for the old email
- Check the box next to the email and click “Restore”
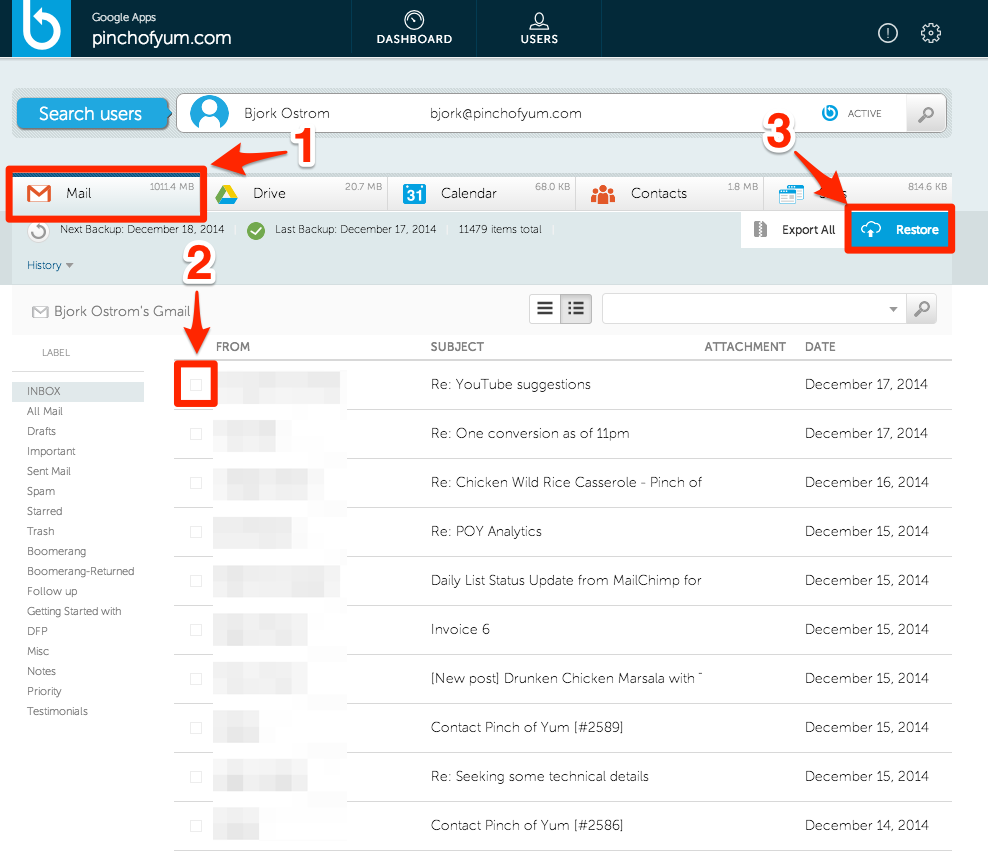
Backupify restores the email back into your account.
The same process can be used for other services, like Drive, Calendar, Contacts, and Sites.
Super slick. Super simple.
Setting up Backupify
We’re not going to dig deep into the setup process with Backupify because they do a good job of walking you through it when you first sign up. Here’s the high level overview:
- Login to your Google Apps Gmail account.
- Pick your Backupify plan (we suggest starting with the Professional plan) and click the “Trial” button.
- You’ll need to install the Backupify App into Google Apps and give it access to your Google Apps account.
This will get you up and running with the trial version. If you decide that you want to stick with it and become a paying customer then you’ll need to login to Backupify and enter your billing details.
Pretty simple, eh?
Action plan
Here’s what I’d suggest as your action plan after reading this blog post:
- Setup Google Apps for your business if you haven’t.
- Setup the four types of backups that we suggest in this post.
- Setup Backupify for your Google Apps account.
Have you done all of that?
Give yourself a pat on the back and go buy a mocha. You deserve it.
Hi, I work for a team developing a freeware desktop product UpSafe Gmail Backup that helps back up your GMail to a local computer. http://www.upsafe.com/
I am wondering if you would be interested in reviewing it.
Thank you in advance!