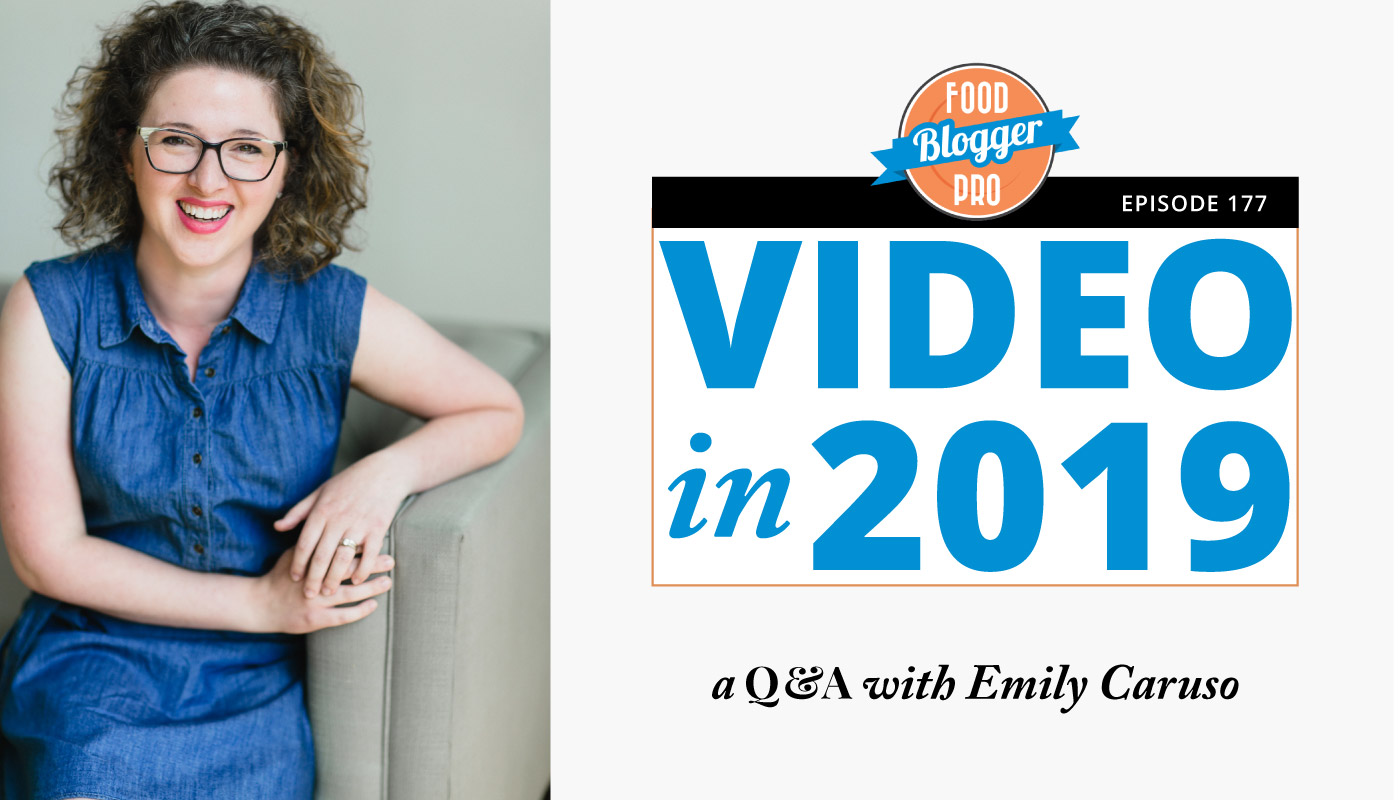
Welcome to episode 177 of the Food Blogger Pro podcast! This week on the podcast, Bjork interviews Emily Caruso, Pinch of Yum’s Video Specialist, as part of our recent Video in 2019 Summit.
Last week on the podcast, Bjork chatted with Chris Guthrie about making affiliate marketing work for you. To go back and listen to that episode, click here.
A Video in 2019 Q&A
We recently held a free event called the Video in 2019 Summit, and it focused on ways you can level-up your recipe videos in the new year.
Our last session of the day was a Q&A with Pinch of Yum’s Video Specialist, Emily Caruso, and she answered listener-submitted questions about style, lighting, tools, and more.
Emily creates awesome Pinch of Yum recipe videos all by herself in her home, so if you’re producing videos without a fancy studio, you’ll find this episode inspirational, motivational, and full of helpful tips!
In this episode, Emily shares:
- How she created different videos for different platforms
- How to fade music at the end of your videos
- What it’s like to shoot videos by herself
- How to figure out your rate for making videos for brands
- How to level your camera
- The importance of hooks
- Tips for finding your style
- If she treats lighting the same as she does with photography
- How video ads work
- How to deal with the nuances of natural lighting
Listen to the Food Blogger Pro Podcast below or check it out on iTunes, Google Play Music, or Spotify:
Resources:
- Premium Beat
- The Gear We Use for Recipe Videos
- Glide Gear OH 100
- Cell Phone Mount
- 099: Sponsored Content and Getting Paid What Your Work is Worth with Danielle Liss
- Google Drive File Stream
If you have any comments, questions, or suggestions for interviews, be sure to email them to [email protected].
Thanks to our Reviewer of the Week, Emily from Layers of Happiness! If you’d like to be featured, leave a review for us on iTunes and include your name and blog name in the review.
If you’d like to jump to the comments section, click here.
Transcript:
Alexa Peduzzi: In this episode, I talk about making the most out of your quarter four traffic and then Bjork talks to Pinch of Yum video specialist Emily Caruso as part of our recent Video in 2019 Summit. Hey, hey, friend. You are listening to the Food Blogger Pro Podcast. I’m Alexa and we are just so excited that you’re here. Thanks for making the podcast a part of your day today. This episode is sponsored by our friends and sister company WP Tasty. WP Tasty makes plugins for bloggers that take care of all of that technical stuff so that you can focus on doing what you love, the creating, the photographing, the writing, and more. You can learn more at wptasty.com.
Alexa Peduzzi: With the information about our sponsor, we also like to include a helpful actionable tip for you called The Tasty Tip. Today’s tasty tip is all about quarter four. Quarter four or Q4 is always a busy time of the year for food bloggers and it makes up those last three months of the year. Everyone is always looking for recipes for end of the year and holiday festivities, so food bloggers typically see a boost of traffic this time of year. That’s super exciting, right? Absolutely. But how do you know that you’re making the most out of your quarter four traffic? That is a really great question.
Alexa Peduzzi: The folks at WP Tasty recently published an article about this very topic and it covers six different ways to make the most out of your quarter four traffic. They chat about unique ways to capture email addresses, having your followers share your content, giving your blog a holiday feel, and so much more. Check out the whole article at wptasty.com/q4. Now the episode. We recently held a free one day event called the Video in 2019 Summit. It was just such a great day. I love these events so much and it was so fun to connect with so many different bloggers that day. We talked to Emily Caruso, Pinch of Yum’s video specialist, three different times throughout the day.
Alexa Peduzzi: We first talked about the gear Pinch of Yum uses for SP videos, then we talked about 10 ways to level up your SP videos, and we finished out the day with a recipe video Q and A, which is what you’re just about to hear. Emily chats about finding your style, shooting videos solo, creating different videos for different platforms, and more. If you’re already making recipe videos or maybe making recipe videos is on your to do list for the next year, like it is mine, you’ll definitely learn something from this episode. Bjork, take it away.
Bjork Ostrom: All right. Here we are. We are coming into our last session of the day. It is the Q and A session. This is always really fun. We’re actually going to be recording this and publishing it as a podcast as well. Some of you might have your questions featured on the Food Blogger Pro Podcast. We are going to jump in here in a little bit. As a recap, we are doing this last session of the day as a Q and A session. We have some of the questions that have come through already. We have been building up that queue and we’ll hit through those, but also if you have any questions and you’re a part of the live Q and A or you’re part of the live chat, you can go ahead and leave those in the chat area and we’ll make sure to hit those as well.
Bjork Ostrom: We have lots of good content to move through here today. We’re going to be doing that as quickly and efficiently as possible, but also giving enough time to any of the questions that we need to dive deep on. What I’m going to do is I’m actually going to welcome Emily on. Emily’s going to be answering the questions, most of the questions. There’s also a couple questions that are coming through that I’m going to hit as well, so we’re going to kind of ping pong back and forth. I’m going to his some of the questions and then I’m going to ask Emily some of those questions as well as it relates to specific video stuff that she’ll be able to answer.
Bjork Ostrom: I’m going to invite her on and then what we’re going to do is go through some of the questions that we have in our queue, but we’ll also be answering any questions that come through for those of you that are part of the live chat as well. In just a minute here, we’re going to be welcoming Emily on. I’m going to do that by inviting her. I’m trying to do two things at once. There we go. I just sent her that link, so she’ll be coming on in a little bit here. As a recap, this is the last session of the day from our Video in 2019 Summit. The goal has been to pack as much information as possible about video. We focused in the first two sessions on … We looked at gear, the gear that we use with Pinch of Yum.
Bjork Ostrom: We talked about that. Then in the second session, we talked about hey, here’s some of the tips that you can apply as you think about starting to edit videos, as you think about starting to shoot video. Emily talked through some of those tips and that advice as well. If you’re listening to this on the Food Blogger Pro Podcast and you’re a Food Blogger Pro member and you missed it, these sessions are going to be the first two sessions where we talked about the gear that we use, as well as the advice that Emily has. Some of the organizational tips that she has. She talks about how she adds animation, things like that. All of that is going to be available to Food Blogger Pro members.
Bjork Ostrom: Make sure that you check that out in the boot camps area of Food Blogger Pro. All right. I’m going to welcome Emily on here. She will be coming on and then we’ll be able to jump into some of the Q and A questions that we have. Emily, welcome.
Emily Caruso: Hi. How are you?
Bjork Ostrom: Good. Good to see you again today. It’s a little bit weird because we work as a remote team. For us to have three different times throughout the day where we see each other, even if seeing each other is on video, is an abnormally great day for me. Good to see you.
Emily Caruso: Good to see you too.
Bjork Ostrom: Excited to talk through some of these questions here that are coming in. I think we should just jump in right away. How does that sound?
Emily Caruso: Yeah. Sounds good.
Bjork Ostrom: Great. Here’s a question that’s coming in from somebody. I don’t remember if it was the first session or the second session where you talked about the different end cards that you have for different social platforms, as well as the different sizes. Somebody is saying, “How does it work when you need a video for several different platforms when you have a different end card with a different prompt, as well as different sizes? What does that look like and what’s your advice for doing that efficiently if people want to create multiple versions?”
Emily Caruso: It actually doesn’t take a lot of extra effort to edit for the different platforms. I always start with the standard video that’s going to get posted on YouTube and then embed it into the blog post if that’s the type of video that we’re doing. I kind of go through everything just standard size, edit it how we want the video to be, and then I add our YouTube end card and that has the text for the different things that I know Abby will put in when she uploads things to YouTube like the links to the Pinch of Yum YouTube page, the blog post itself or the blog, and then like check out more of our videos. It’s got those spaces designed so that the YouTube end cards can kind of populate those in over the top of the video.
Emily Caruso: Typically then after I edit that, it goes to Lindsay or Jenna right now for approval. Then if everyone gives the thumbs up, I then take it and edit it into a square version. I create a new project within final cut creating a square dimension. Then I honestly just go back in and copy and paste all of the information that I’ve edited into the new one. Then sometimes it takes a little tweaking and stretching to make sure that it fits the frame or shifting a shot left or right to make sure it’s centered in that square. But this usually just takes about 10 additional minutes to edit for a square and then I just replace the end card with either Instagram end card or Facebook. That’s usually it.
Bjork Ostrom: That’s great. I think that extra 10 to 15 minutes can make a really big difference. If you’re just to take a horizontal video and you plopped it into a square, if you’re really intentional as you’re editing that, you might be able to edit everything so it’s in the square part, but even taking that extra 10 minutes just to tweak and change and adjust to make sure everything is perfect for a square video really makes a big difference. I think it’s important to know, it’s not that you’re trying to create a single video that works all across the board.
Bjork Ostrom: It’s creating first that horizontal video, a 1920 by 1080, which people are used to, and then creating a new different separate file that’s a square and then taking all the information, pasting that into there, kind of a copy and paste, and then tweaking and adjusting as needed so it looks really good in the square version. Definitely worth it. The other thing that you mentioned that I think is really important to point out is that we have these cards at the end, and by cards it’s just like little graphics and prompts, but that’s something that we’ve tried to do to give people a next step. Let’s say somebody gets to the end. Instead of the video just ending, well, what do you do now?
Bjork Ostrom: We want to prompt people to either follow along if it’s on Instagram or if it’s on YouTube, we can include some clickable links to other places. Being really strategic about the different platforms and how we want to prompt people at the end. Some great takeaways there. Somebody asked about music and they’re wondering about fading music at the end. We all know songs, like if you’re listening to a song, sometimes a song will just kind of have a slow fade. What about videos? Do you fade music at the end of your videos? How do you end a video so it’s natural? What does that process look like within an editor and you can speak to your process within Final Cut Pro, which is your preferred editor?
Bjork Ostrom: Is that something that we do? If it is, what does that look like and how does that work?
Emily Caruso: Yes. I know we talked about this in the last session, but when we purchase the music, and again we get the majority of our music from PremiumBeat, you get several different versions. You have a really long version that’s two to three minutes, which we typically don’t use that version very often because it’s long and you for sure have to cut it off. I will usually try to pick the version that is closest to the length of the video that we have. Sometimes taking an edit where the music naturally fades off the way it’s written, and it fits perfectly with the end of the video, and it’s great, but a lot of times I have to shorten it a little bit.
Emily Caruso: What you can do in Final Cut is if you hover over the music track that’s below the video, oftentimes it’s green, a little white horizontal line will show up in the track and there’s a dot at either end at the very edge. You can grab that dot and slide it over to the left and that will create a gradual fade of the music so it’s not just like popping along and all of a sudden it’s over. You can kind of slide that dot over as far as you want as long as you want like a gradual fade to the end of the music. That’s just a really quick and easy way to have things end a little bit less abruptly.
Bjork Ostrom: Got it. Yeah. I think we all can relate to that where we’re watching a video and then it just like ends really quickly and there’s nothing about it where it’s like you want a little bit of a heads up if something is going to end. The other thing you had mentioned is where we get our royalty free music. Royalty free is interesting because it has the word free in it so we think, “Oh, this is free music.” It doesn’t mean that it’s free. We still pay for it, but we don’t have to pay royalties, which means that you don’t have to pay every time there’s a usage of that song somewhere. If you were to play a Taylor Swift song on your local radio station, they have to pay a royalty in order to play that song.
Bjork Ostrom: But royalty free music you don’t have to pay every time that you use it. The other thing that you mentioned though, and I think this is really important for people, is that certain royalty free music has different rights. For some music, you might be able to use it royalty free, but only for one video. You talked about one of the companies that we use, PremiumBeat. The way the licenses work that we use with PremiumBeat says, “Hey, we can get this song and we can use that in a way where if we want to use it on two different videos, we’re not paying royalties and we can use it in multiple occasions or with multiple assets or on multiple videos,” but that’s not true across the board.
Bjork Ostrom: For those of you that are listening or watching, make sure that the royalty free music you get also allows you to use it on multiple videos if you’re going to be doing that. Just a little takeaway there. Here’s a question that I think a lot of people can relate to. They’re asking about what it’s like to shoot solo video. Before when we’re shooting video here on site, we would have a team where maybe Lindsay was a part of it. We had a shoot assistant, somebody who’s shooting video or at least it was two people, but this is just you, Emily, and you’re still getting great video. I’m guessing most people can relate to that where they have one person that’s shooting the video and they’re doing the recipe development.
Bjork Ostrom: They’re preparing the recipe. They’re shooting the recipe. They’re doing the styling. They’re doing all of it. What is your advice in terms of ways to create really quality videos when it’s only you as all of the roles in order to produce, shoot and edit the video?
Emily Caruso: Okay. I’ll try to keep this as like concise. I would say first thing’s first, I struggle with this. I’m not necessarily a naturally super organized person, but I have learned that you sort of need to create a schedule and some kind of plan for even your week. For me, knowing that on a normal week I usually will be able to like if we just have regular stuff going on, regular schedule, I usually can shoot four videos and edit four videos. Edit those four videos in a week’s time.
Emily Caruso: In order to do that, I will shoot two videos on one day and two videos on another day and then spend the rest of the week editing or sometimes it’s shooting say Thursday, Friday and then spending Monday, Tuesday, Wednesday editing those previous week’s videos to turn in for review and feedback and then planning for a new shoot on Thursday and Friday. It’s kind of batch working. I’m not trying to shoot and edit and kind of do all these different things in one day. It’s I’m in shoot mode, so I’m shooting and filming one recipe after another or one recipe after another and then the second day.
Emily Caruso: Another way, if I know the videos that I’m working on, I can kind of look at the ingredients and say, “I need a bunch of chopped cilantro for two of the recipes and the other two don’t need cilantro at all.” Well, I’m going to shoot those two cilantro recipes in the same day because that’s going to help me sort of well, this is the ingredient that I need and it will kind of overlap and again make things a little bit easier prep. I kind of look at the videos of the recipes that I’m working with and sort of see what makes the most sense to shoot back to back and try as much as you can organized that way. Then I really rely on, as far as the actual shooting goes, tethering.
Emily Caruso: Using like we talked about the side camera tethering to my big monitor on the computer, so as I’m sitting or standing at the table shooting, I can see very clearly what my side camera is getting. I can see that red circle, making sure everything is recording. Then I have the monitor overhead so from one spot I can glance around and see what I’m recording all from one spot and make sure that it’s actually recording.
Bjork Ostrom: Got it. Yup. We’ll link to the blog post that we have on Food Blogger Pro where you talked about or our team kind of have compiled this, the gear that we use for Pinch of Yum videos. Just to refresh, so you’re talking about … We have the overhead, the camera, and that has a monitor on it, a little monitor, and then tethering, which allows you to see on your computer screen what is on the second camera. There’s two cameras. There’s a certain type of tripod that you use. Well, you use a tripod and then you use this … It’s a Glide Gear, but it’s a overhead camera platform. It’s a $200 platform, which we also link to in the show notes so people can check that out.
Bjork Ostrom: We’ll link to that for those that are watching live so you can see that. All of those things, essentially what you’re saying, allow you to not have to like get up on a ladder to see what the angle is or to see if your hands are in the picture. You’re able to see from one spot everything that you needed to see by tethering and by having the monitor on the overhead camera. We won’t go step-by-step through all of the gear that we use. We did that in the first session, but for people listening on the podcast, we’ll link to that in the show notes as well. Then for people watching live, Alexa is putting those links in at the chat area.
Bjork Ostrom: There’s actually a follow-up question and somebody was asking about that specific overhead … I want to call it a tripod, but it’s an overhead … They call it an overhead camera platform. For those that aren’t familiar, can you talk just briefly about what that is? Then the question was if I don’t have a DSLR camera, could I still use that little platform with an iPhone? Could I use it with my phone if I don’t have a DSLR camera?
Emily Caruso: Yes. I always kind of refer to it as the stand overhead stand. They call it a platform.
Bjork Ostrom: It sounds better to say stand than platform.
Emily Caruso: Yeah, because it’s not really … I don’t know, but it’s got two vertical … It’s got kind of two flat long sort of feet that just sit on the table. It’s wide enough to put a surface in between or to sit this thing directly on your surface. Then there’s two vertical sides that go up and then a bar that goes across the top. On that bar across the top, there is a place to connect your camera so your camera’s pointing down right over where you’re shooting. Yes, you can connect a phone to it. Now you will need an additional piece of equipment, which I know I sent this over to Alexa so that she can add it to the gear page, but the one that I have, there’s different brands, I actually have a Manfrotto one.
Emily Caruso: It’s a clamp that can stretch and clamp around the sides of your phone, and there’s a threaded, I don’t know, little coupler thing here at the bottom that you can thread onto the Glide Gear stand and position your camera in the clamp. You would need this additional piece of equipment, but I think it’s maybe $10, so-
Bjork Ostrom: Got it.
Emily Caruso: … it’s not too bad, but yes.
Bjork Ostrom: Like we talked about before, I think it’s really important to point out with any of this gear, use what you have first and then kind of layer on top of that. What I love about that question is hey, I want to use this stand. I’m interested in using this, but I don’t have an expensive DSLR. You can use your phone and maybe that can be the next step up for you. You have the stand that’ll …
Bjork Ostrom: Maybe that can be the next step up for you. You have this stand that allows you to do really easy overhead shots, and instead of buying a $1000 DSLR camera, you can spend $200 and get this nice stand or platform, whatever you want to call it, and start to build out your equipment over time. Great question.
Bjork Ostrom: I’m going to hit a question here, so couple questions came in related to video. Somebody asked a question here, how do you figure out your video rate when working with brands? We talked about how brands and sponsors, how that’s such an important thing as we move into a video-centric way of consuming media. Video is becoming the thing that a lot of brands are interested in. They want to have their products as a part of a video. What I would say is, instead of explaining on this, check out, there’s a podcast episode that we did, again we’ll link to this in the show notes, with Danielle Liss, and she is an expert in all things sponsor content, and she has an agency called Hashtag Legal. They are attorneys, they work with this. She talks about the process that they went through, and that they go through, for finding a good rate.
Bjork Ostrom: Also, if you’re a Food Blogger Pro member, we have an entire library devoted to this. It was actually one of these summits that we did all about sponsor content, so be sure to check that out as well if you want a better idea of how to go about finding your rate, so an option for podcast listeners as well as Food Blogger Pro members to check that out. And it’s a good thing to be aware of, because as you’re doing more video, you’ll undoubtedly have people that connect with you and say, “Hey, would love to work with you in some type of partnership.”
Bjork Ostrom: Another question that came in was about longterm archiving and storage of files with Adobe Premiere. We talked about how we compress files, and we store those on Drive File Stream, Google Drive File Stream, because it’s nice because we can all have access to those, without them taking up a bunch of space on our computers, which is why we use Drive File Stream, and we’ve switched away from Dropbox. Somebody asked, “Is the process the same for Adobe Premiere?” Adobe Premiere, any of the video editing software, as far as I understand, you can correct me if you understand this differently, Emily, but they’ll create these rendered files that will help you to edit, but they aren’t necessarily necessary for you to have when you’re storing something.
Bjork Ostrom: What we do, when we’re storing after we’ve gone through the process of creating a video, we’re all done with it, what we do in order to create something that’s as light as possible, even though Drive File Stream has unlimited storage, we don’t want to just have these bloated server with a bunch of video stuff that we don’t need, we go through the process of deleting the rendered files for the Final Cut Pro library, and then what we do is we take one more step, we compress, which is getting a little bit technical, but it’s that .zip, maybe people see that file every once in a while. We zip it up, or compress it, so all of that stuff is stored together.
Bjork Ostrom: We do that because sometimes Dropbox or Drive File Stream, if you’re sharing files, they don’t understand certain types of files, and Final Cut is an example of one of those, so we don’t want it to break when we store it, so we compress it, and then we put it away. That process would be very similar for other editing software that you use. It’s not necessary, but it’s something that we like to do to keep files nice and light, and then also to get them off of our computers and to store them somewhere else.
Bjork Ostrom: All right. Couple of questions here coming in for you, Emily. Somebody’s asking about the level of the camera. Is there a way to level the camera on the tripod or the overhead stand, so that there are no weird angles? I would guess this, would assume mostly to if you’re trying to shoot top down, and maybe it’s just tilted a little bit weird, or just in general, how do you go about ensuring that once you bring files in, that you know that they’re not this terrible angle, and then you’re like, “Shoot,” either you have to have a video with terrible angles, or go and shoot it again. Advice that you have around that?
Emily Caruso: I do. Okay. One thing that I have found if I am shooting at too wide of an angle, sometimes you start to get a little bit of that distorted. It’s some of the … We’re talking really wide. The lens I use, I think, is 18 to 135. I wouldn’t shoot at 18. Things would be just very curved and things at the edges. I typically like to zoom in enough where it feels like a natural look, so that you don’t feel like things are getting distorted at the edges.
Emily Caruso: But as far as leveling goes, I do have ways that sometimes I will find, depending on some of our marble surfaces, that the feet are a little bit off. I actually have an app on my phone, a leveling app, that I will pull out and put that on my marble surface, or whatever surface I’m using, to make sure that’s level. Then I actually hold it up so the lens is coming down like this, and I’ll hold up the level just across the lens, without actually touching the glass, but just it will hit the rim, and to make sure that the lens both ways is level. If I find that the camera is off from the surface, I can either prop up the surface, or I can prop up the stand a little bit, or adjust the camera this way or this way how it’s attached. I do take that step, and it only takes, again, a minute or two to just, whether you have an actual level or you can get a free app on your phone, and just check and make sure everything is level relative to each other.
Bjork Ostrom: Got it. Yeah, that’s a great little tip. Essentially, when you set up your camera on the overhead tripod, or overhead stand or platform, taking a level and making sure that the lens is actually spot-on level. You can do that by, you talked about an app that you use on your phone, or if you have, sometimes you’ll have those little levels where you can just put that up, and make sure that’s on both ways. The other thing is, somebody asked before about shooting with your phone, a lot of phones now will have the overhead leveler built in, so they’ll make sure that they’ll be kind of cross hairs, and those cross hairs will line up. If you’re shooting with your phone, that’s another thing, setting, that you want to make sure that you have on to make sure that that’s level and right above, especially nice when you’re doing photographs as well.
Bjork Ostrom: Some other questions that are coming in here. You had talked about this a little bit before, but somebody was asking about posting the same video to multiple sites, so YouTube, Vimeo, Instagram. We talked about Pinterest, how we’re starting to use video on Pinterest a little bit more, and how that’s been a really successful thing. Number one, do you post the same video, and if not what’s different about it? Then, we can talk about the impact of that, I can talk about the effects of video as it relates to, somebody asked about SEO. How close is the video that we’re posting, in terms of exactly the same or kind of different?
Emily Caruso: I would say for the most part, they’re pretty similar, but like we talked about earlier, I will change the end cards for the different platforms. Then, through trial and error, sometimes certain platforms, your audience … One of the things we experiment with is, do we put a little teaser at the beginning of our videos, or do we not? We sort of go back and forth depending on what people are responding to. That is something that I know Abby and Jenna are always totally on top of, keeping track of how did videos do this month.
Emily Caruso: We go back and look at how many videos had a little teaser trailer at the beginning, maybe before just jumping right into the video, you show a cheese pour, or something that’s kind of interesting to sort of grab somebody like that, one of those hooks that we talked about. Some platforms we will tweak things, and maybe add a little bit of a hook at the beginning. We do this a lot sometimes for Facebook. That seems to be a platform that for us sometimes enjoys a teaser. For the most part, it’s pretty much the same exact video, with just a few tweaks, like the end card, the ratio size, and occasionally we’ll put a teaser at the beginning of some of these social videos, if we feel that that video needs it, or our viewers would respond better to it.
Bjork Ostrom: Yep, yep, that’s great. One of the questions, this actually didn’t come in, but I just thought of this. I would assume that a lot of people that are watching this are maybe early on in their video journey, whatever you’d want to call it, creative process, as they get started creating videos. What would your advice be in terms of a good place for people to start? Let’s say somebody hasn’t really shot a video before, hasn’t really edited before. Even from a recipe standpoint, what would be an easy, approachable piece of content for somebody to create? Even kind of talking them through, coach somebody through the first shoot that they would do, and advice you would have for them to make it as easy as possible.
Emily Caruso: First, I would say pick a recipe that you’re familiar with, or at least a cooking method. Maybe don’t try deep frying a turkey for the very first time and try to record it on film, because that could be a little tricky. Maybe pick something that you know that recipe, or at least that cooking method, inside and out, so you’re not going to be sitting there worried about how the recipe is turning out, when you have your mind focusing on all this new video stuff. I would say, first start with that. Then, maybe before you start incorporating two cameras, maybe start with just one. Whether that’s a side camera, because you can do an entire video with a side angle, and that’s a completely valid way to do video, but if you want to start with the overhead, that’s great too. They’re so popular, and people really respond well to them. But you can just have one camera, set it up above you, and just record yourself making this video.
Emily Caruso: Another thing that I know really helped, I think is very helpful, is pay attention to videos that you respond to when you’re following blogs or on social media. What are the types of things that you respond to? It’s not that you want to copy those things, but maybe ask yourself, “Why do I like this video better than this video? What is it about this video that I enjoy, and I am responding to and want to watch more of, compared to another video?” Try to pick apart those elements. That’s something that I know I like doing too. Sometimes really you do have to sort of think, “What is the difference? Is it the video quality? Is it the lighting? Is it the angles? Is it the speed of the video? Is it the music? What is it about this?” I think finding the things that you respond to, and then trying to maybe start with that, so that you’re creating a video that you like. I think starting with something you’re comfortable with, and maybe just starting with one camera would be a good place to start.
Bjork Ostrom: Yeah. Lindsay and I talk about this idea, maybe she’s mentioned this to you as well, but magic fairy dust. This idea of some, it could be a person, if it’s an influencer or celebrity or whatever has magic fairy dust, but it also can be content. I love thinking about consuming certain types of content, and trying to figure out, what is the magic fairy dust? Sometimes you can’t really figure out it’s just the way something is, and it’s just that way, and that’s the magic of the magic fairly dust, but sometimes you are able to pinpoint it, and say, “I think this is why this certain piece of content is doing really well.” But you have to be present to it and intentional, because a lot of it can even be subconscious like, “I just decided to watch this all the way through.” Well, why was that? What was it about that that kept you engaged, versus the other video that you watch, and then you turned it off after 10 seconds, being observant of yourself as you do that, which I think is a great learning process as you think about creating engaging content.
Bjork Ostrom: Somebody had a question about the batching. You talked a little bit about trying to shoot two recipes in a day, and then editing as well. The question’s specifically from a productivity side of things. Do you batch videos to reduce the setup and take down process? Now, in your case it’s a little bit unique, because you kind of have a semi-permanent studio set up, is that right?
Emily Caruso: I do, yes. I have a designated studio in my house, that’s all that room is for. It’s all video camera equipment. But even thinking about it as if I didn’t have this, it would still make the most sense to work, rather than setting up and taking down, setting up and taking down, multiple days a week. The average person, or my situation’s a little bit different in that pretty much all I do for the most part is the videos, so that I am shooting two solid days of video, whereas maybe one person, somebody else has maybe my goal is to make one video a week. You can set up your equipment one day, shoot, maybe if it’s the same equipment that you use for your photography, do your photography that same day, and then you can spend the rest of the day editing, or the rest of the week editing and writing your blog posts, and things like that, so that it’s minimal equipment setup and take down.
Bjork Ostrom: Yep. The other thing that we’ve learned, when we were doing more photography and some video stuff here, is as much as possible, find ways to not have to completely tear down. That’s such a bummer part of the process is setting up and tearing down. If there’s a way where, even if it’s a closet or something like that and you can store some stuff away and then you don’t have to completely break it down all the way, because that does end up being such a huge part of it, and batching is such an incredible thing that you can do. Also, maybe you’re not completely outsourcing everything that you do, but if you really like shooting, maybe you shoot, and then you can find somebody to help edit. Think creatively around ways that you can be a little bit more efficient in the creation process with that.
Bjork Ostrom: The follow-up question that somebody asked was, it was specifically around this, how long would you recommend setting aside for a total video. If you were to say start-to-finish, what does that look like with the video? Knowing that there’s all of the components of getting all the recipes, actually making it, recording it, editing it, and then queuing it up for social media, or the blog.
Emily Caruso: I would definitely say this has changed over time for me. I think it depends on how much experience you have with the process. If you’re just starting out, I know videos used to take me forever. I mean, it would take me an entire day to shoot one video, and then a whole week then following to edit the video, because I was trying to learn the editing software while I’m trying to edit this video. Back five years ago when I started doing this, it would take me a really long time. But it felt so good when it was done, and I had something to show for it. It was a really satisfying thing.
Emily Caruso: While it might take you a long time to start, please don’t be discouraged by it, because it will get a lot faster. As far as shooting goes, depending on the recipe, unless it’s a really long, kind of lengthy, involved recipe, I know the crunch wrap recipes that we’ve done, there’s a lot of components that you have to get ready first, so those ones took a little bit longer to film, so depending on the recipe, again, I’ve gotten to the point that I can shoot two in a day, and then usually it takes me maybe a couple of hours, start to finish, to completely edit it. But, again, it depends on how involved the recipe and how much experience you have. It sort of went from taking me an entire week start-to-finish of working on this thing, to really I could shoot one and edit one and have it done completely in probably less than a day if I didn’t have anything else I had to do.
Bjork Ostrom: Yep. Yes, yeah. That’s great. I think it’s like any skill, where you get into it and it’s so painful. I remember when I was learning guitar, I was like, “Why can’t my fingers just go where they should go?” But eventually, over time, repetition, you start to get there, and the same can be true with video editing. It just feels so … or shooting for that matter. It feels so hard in the beginning, but over time, you’ll learn it and you’ll become more efficient, and can do what you want to do quicker.
Bjork Ostrom: Speaking of shooting video, somebody asked a great question, specifically around lighting. The question here’s from Kelly, she says, “Do you approach the lighting the same for videos as you would still photography? Are there things that you do different as you are setting up the lighting for video versus photography? If so, what is the difference?”
Emily Caruso: I would say, my entire approach to video is pretty in line with how I approach photography, because in my mind it’s just more approachable that way. When I started doing video, I was already very comfortable with photography, so I thought, well, rather than reinventing the wheel, I’m going to think about this composition-wise, lighting-wise, when something is back lit or side lit. The same way I know when we talk about food photography, you don’t want that light coming and shining right on the front of your food, that’s probably something people have heard before, it kind of flattens everything out, and the same way with video, I tend to like a side light or a back light for video. Again, sometimes you need to balance or fill like we talked about with the equipment, if there’s a really dark shadow area. But whether you’re using natural or artificial light, I feel like you don’t need to get overly fancy with it. If you just have that straightforward approach of, “How would I light this if I was take a photograph?” Same kind of things.
Bjork Ostrom: Cool, that’s great. Yep. Like we talked about in the other sessions, one of the nice things is if the recipe, if it’s an adequate recipe that allows you to do this, you can sometimes roll both of those things into the same session, so you can do a video and a photography session. Probably not going to be doing it throughout at the same time, but maybe towards the end, you can switch over, start to do photography, and document the creation process via video. It is especially nice then if the lighting is similar throughout. Do you use, for the videos that you’re doing, natural light, artificial light, what would you recommend for people that are just getting started?
Emily Caruso: I definitely would say, if you’re just getting started video, start with natural light, because it’s free. It’s free, chances are there’s somewhere where you’re already shooting your photography that there would be adequate natural light to start shooting video with. Because, again, video is, I absolutely love it, I think it’s a ton of fun, but it can be frustrating at first, and it will make it more frustrating if you’ve just now sunk hundreds of dollars into artificial light and you take one video and you’re frustrated and things aren’t going well.
Emily Caruso: You can you take one video and you’re frustrated, and things aren’t going well? It’s going to just make it feel worse. So start with what you have and for most of us, we have some natural light available to us. So definitely start with natural light, but know that if naturally it does have its limitations in video because of the length of time it takes to shoot. We talked about flickering and now that we’re getting into winter for those of us that live in places where it gets dark at 5 o’clock or 4:30 it does limit your time that you can work. So natural or artificial light is something that I know we’re going to talk about a little bit coming up on Food Blogger Pro. We’re working on some courses and things, some updated courses and information on that. So there are some really good artificial light options out there that can then take you a little bit further where maybe naturally it has sometimes can be limiting depending on where you live or what your setup is.
Bjork Ostrom: The great thing about artificial light is that you can do that anytime and it’s going to be a consistent look and the light isn’t going to change. So there are some advantages of that, like you said, it comes at a cost, but I’m excited about some of that content that you’ve been working on for Food Blogger Pro to talk about what that looks like. Again, with this question, it’s a great question coming in from the chat guest 3829, always these mysteries, we don’t know who these people are. With Google’s increased emphasis on video, do you think it’s necessary to have a video in every recipe post, is this something Pinch of Yum is working towards?
Bjork Ostrom: Yes, we’re working towards that, not necessarily checking every single box of every single post, but the posts that have the most traction, the recipes that have the most traction, we then go and try, and create a video for all of those, and we’ve been working through those.
Bjork Ostrom: One of the reasons why we think it’s important. Number one, it’s not necessarily because if you include a video then you’re automatically going to perform better in it with a poster recipe in Google, but there are some things around that, that will be indicators that it’s a quality piece of content. For instance, typically a post that has a video will mean that people stay there a little bit longer. So if somebody’s staying at a post a little bit longer, if they’re not leaving that piece of content, if they’re engaging with it, it’s going to be a better indicator for search engines that this is a quality piece of content. So that’s just a really easy example of why video’s helpful from the search perspective and traffic perspective.
Bjork Ostrom: The other thing that’s really great about video is that there’s a really high CPM on ads, so if you work with an ad network like AdThrive or Mediavine, some of these popular ad network companies, and you use their video editor, there’s going to be a high CPM on that. Now, for us and I don’t feel like the … I think they’ll probably get there in 2019, maybe 2020. I don’t feel like the embeddable players are quite there yet in terms of like you UI/UX, user experience for that. We’ve tested them out a little bit here and there, but for us we’re still used for the most part YouTube videos, when we’re embedding into a post, just because that player is so easy for people to understand and we are leaning towards UI/UX over CPM on ads at this point for our videos.
Bjork Ostrom: Not that, that will be forever, and like I said, I think that’ll change over time, but that’s kind of where we land right now in terms of embedding content within a post, but yes, for sure. I think it’s a super valuable thing and one of the things that I’ve been trying to remind people about is that it doesn’t have to be a super polished video. You could take your phone out and you could record yourself and say, “Hey, here’s a real quick tip or a piece of advice as it relates to this specific step.” You don’t even have to edit it, you could upload it straight to YouTube and that could be a video that you include in a piece of content as long as the core thing that you were talking about is actually helpful to people. It doesn’t have to have a super polished and look or feel to it. So think creatively around what video might look like for you and know that you can be flexible in the type of content that you’re creating.
Bjork Ostrom: We’ll keep moving through a couple of other questions here that are coming in. Somebody asked, some specifics about natural light. So if you’re shooting in natural light on manual mode, on a partially cloudy day and you are changing your settings, so ISO f-stops, ISO, what is it? I always forget, do you say ISO or I-S-O?
Emily Caruso: I say I-S-O.
Bjork Ostrom: I-S-O. I think it’s I-S-O, and for a long time I said ISO and then somebody was like, it’s actually not what you should be saying, and then I still said it on a podcast and published it to thousands of people. So the question here, do you see a shift in coloring of the surface and other elements between clips or does the custom white balance help handle that? So we talked about custom white balance, how you use a gray card and that was in one of the sessions, a super helpful tip and I think a lot of people will start to use that, but what about when it’s a cloudy day and then it’s kind of sunny, you’re kind of having to maybe shift how you’re shooting and then you bring it in, it’s all different. What’s your recommendation for dealing with that?
Emily Caruso: Unfortunately, shooting with natural light, that is a limitation in that if you’re having some wild weather changes during your video shoot, the custom white balance will help reduce that, but it’s not necessarily going to change it completely if you find that you have to adjust your settings. I would say, try not to adjust them and you mean like keep the adjustments to a minimum, but one thing that I have found sometimes in editing is helpful, if say you’re doing a long track of overhead shooting and you have a big color shift, maybe something went behind a cloud and whether the color temperature change or just the overall exposure change, maybe it went down and you need to adjust just one part.
Emily Caruso: If you break up that clip with one of your side angle clips, but when you’re going from overhead to a side angle in the final video and then back to overhead, people aren’t going to notice necessarily too much if those two overhead shots that were actually originally one clip, are needed to be adjusted slightly differently because you’ve visually broken it up with that side angle, that helps not notice those big changes. So sometimes having that second side angle has been a little bit of a saving grace, because you can do some creative editing to break up if you have some really harsh changes then in editing you have to clip up and edit separately.
Bjork Ostrom: I get that.
Emily Caruso: I’ve done that sometimes to mask some change.
Bjork Ostrom: Yeah. One of the interesting things that I’ve started to learn about video is that B-roll is, number one, really helpful for creating an engaging piece of content, but number two, really helpful if you want to cut something out and make a jump to another place. So let’s say you only have one angle and you’re shooting down from it, you can either do a jump cut which is like a cut in between, but sometimes, like let’s say if it’s an interview, that would feel a little bit weird and you need to splice something together, so you can use B-roll, maybe a shot of the crowd or something, and then you can make that cut and nobody would ever know. So B-roll can be really helpful in lots of instances like that as well that you were talking about where there’s a big shift in how it looks visually, we won’t notice that as drastically or as much if we put that B-roll in between to give people a little bit of breathing room in between.
Bjork Ostrom: Great. A couple more questions that we’ll hit here and then we will wrap up for the day. One of the questions that came in, this is coming in from Bob specifically, Bob Guy. He says, can you talk a little bit about the audio part of a speaking type video? So we don’t do … We do what we call, the hands and pans, but there’s a lot of people that would also do the traditional like food network, “I’m behind a kitchen table and talking through this recipe that I’m going to create.” If somebody is interested in producing something like that and being the star of the video, what are some important considerations that they should make as they think about producing a video with somebody actually in it versus the typical hands and pans?
Emily Caruso: I don’t have a ton of experience doing the onscreen video, but I think a few things I would … Just from the couple times that I’ve done it and just what I know of video, I would definitely make sure to look into some kind of microphone and, Bjork, you might have some suggestions on the type of maybe … I can’t think what that does, like the Lavalier mics and the equipment that you would need to record either a separate track of audio, and then sink it in to your video later after the fact.
Bjork Ostrom: Yeah, it’s funny, they say like, people will watch a video … If it’s audio and video, they’ll watch a video with really bad video, but good audio, but it’s a lot harder to watch a really good video with terrible audio, especially if it’s somebody talking. So I think what you said is so true that you need superstrong audio and actually in that gear post that we’ll link to both for people that are listening live, we’ll link to that. We’ll also share it in the show notes for people listening to the podcast, that actually has the gear that we would use and have used in the past. It’s a really high quality mic. It’s a wireless one. It’s not super cheap, but it’s one that’s going to get a really good quality sound and then after we go in and sync that up, there’s actually something you can do within final cut where it’s essentially, I forget what it’s called, but it’s just like, “Hey, these two should be synced in.”
Bjork Ostrom: There’s a cooler name for it than that, and it’s not quite as long, but the idea is like, it can intelligently sync up based on the audio track, and what you’ll notice, especially with DSLR, is the audio is going to be terrible. So you want to make sure to have that audio included, and the other thing would be, Bob for your question, the B-roll piece would be important again, because you’re going to need to be cutting a lot, and there’ll probably be a lot of start and stop type stuff with hands and pans videos it’s easier to do. When you’re shooting somebody on screen and you have to do a weird cut it’s going to feel really jerky and strange if you only have one angle, so as much as possible have B-roll that you can cut to or layer over, it’ll be super helpful. So great question.
Bjork Ostrom: Let’s see if we have … Was there any other ones as you think about the questions that you saw coming, Emily, that you would like to hit or want to make sure that we talk through as you look through the list of questions that we have?
Emily Caruso: Kind of looking through now to see. I like the one about … Somebody asked about humor or bloopers in a video. I would enjoy watching that. I don’t know if it was the end of last year, Elana edited together a blooper reel that Pinch of Yum, because inevitably you’re filming and something explodes, or something spills, or something and you have all that footage because you’re recording. So I thought that was a funny thing because I think your audience probably would enjoy servicing, like, “You know what? Not everything’s perfect all the time. So I don’t know, I think there’s a lot of different ways you could approach, maybe not in every single video, but sort of showing that life happens and that … I don’t know. I would enjoy personally watching that kind of thing, but everybody’s different
Bjork Ostrom: For sure, and I think the other thing that is worth pointing out with that is to think strategically and think creatively around what type of content you can produce. I think one thing that’s really easy to do is to see what somebody else does and do something similar, or to just do the same thing that you’ve always been doing, but think creatively, “Hey, maybe there’s another type of way that we can be shooting, maybe there’s a small tweak we can make, maybe there’s a big tweak that we can make and do things drastically different,” and not only for yourself to keep it fresh and to keep it exciting, but also for the people that follow along with you, for your fans and followers, to give something new and to know that you’re continually evolving.
Bjork Ostrom: So, we’re coming to the end here. We had some great questions, but before we do, Emily, we would love to hear from you just advice that you’d have for people, let’s say they’re early stages, maybe they’re feeling a little bit intimidated or just a little bit discouraged by the amount of work and energy it takes, what would your encouraging words to them be as they start to do more video and get into the creative process of video recording and editing?
Emily Caruso: I think my biggest point that I would hope people take away from this is that video can be however you want it to be, to what you were just saying, just because one blog or one blogger is doing video this one way, that doesn’t necessarily mean that, that’s the way that you have to do it if that doesn’t speak to you as a creator. So use your own creativity and trust the fact that you have something unique to say and put out there and let that translate into your video too. So don’t feel like, “Well, I can’t get my videos to look just like this person’s, or this blog’s.” That’s okay, because they’ve got that covered and you can do your thing and you have a unique voice and a unique perspective that people want to see.
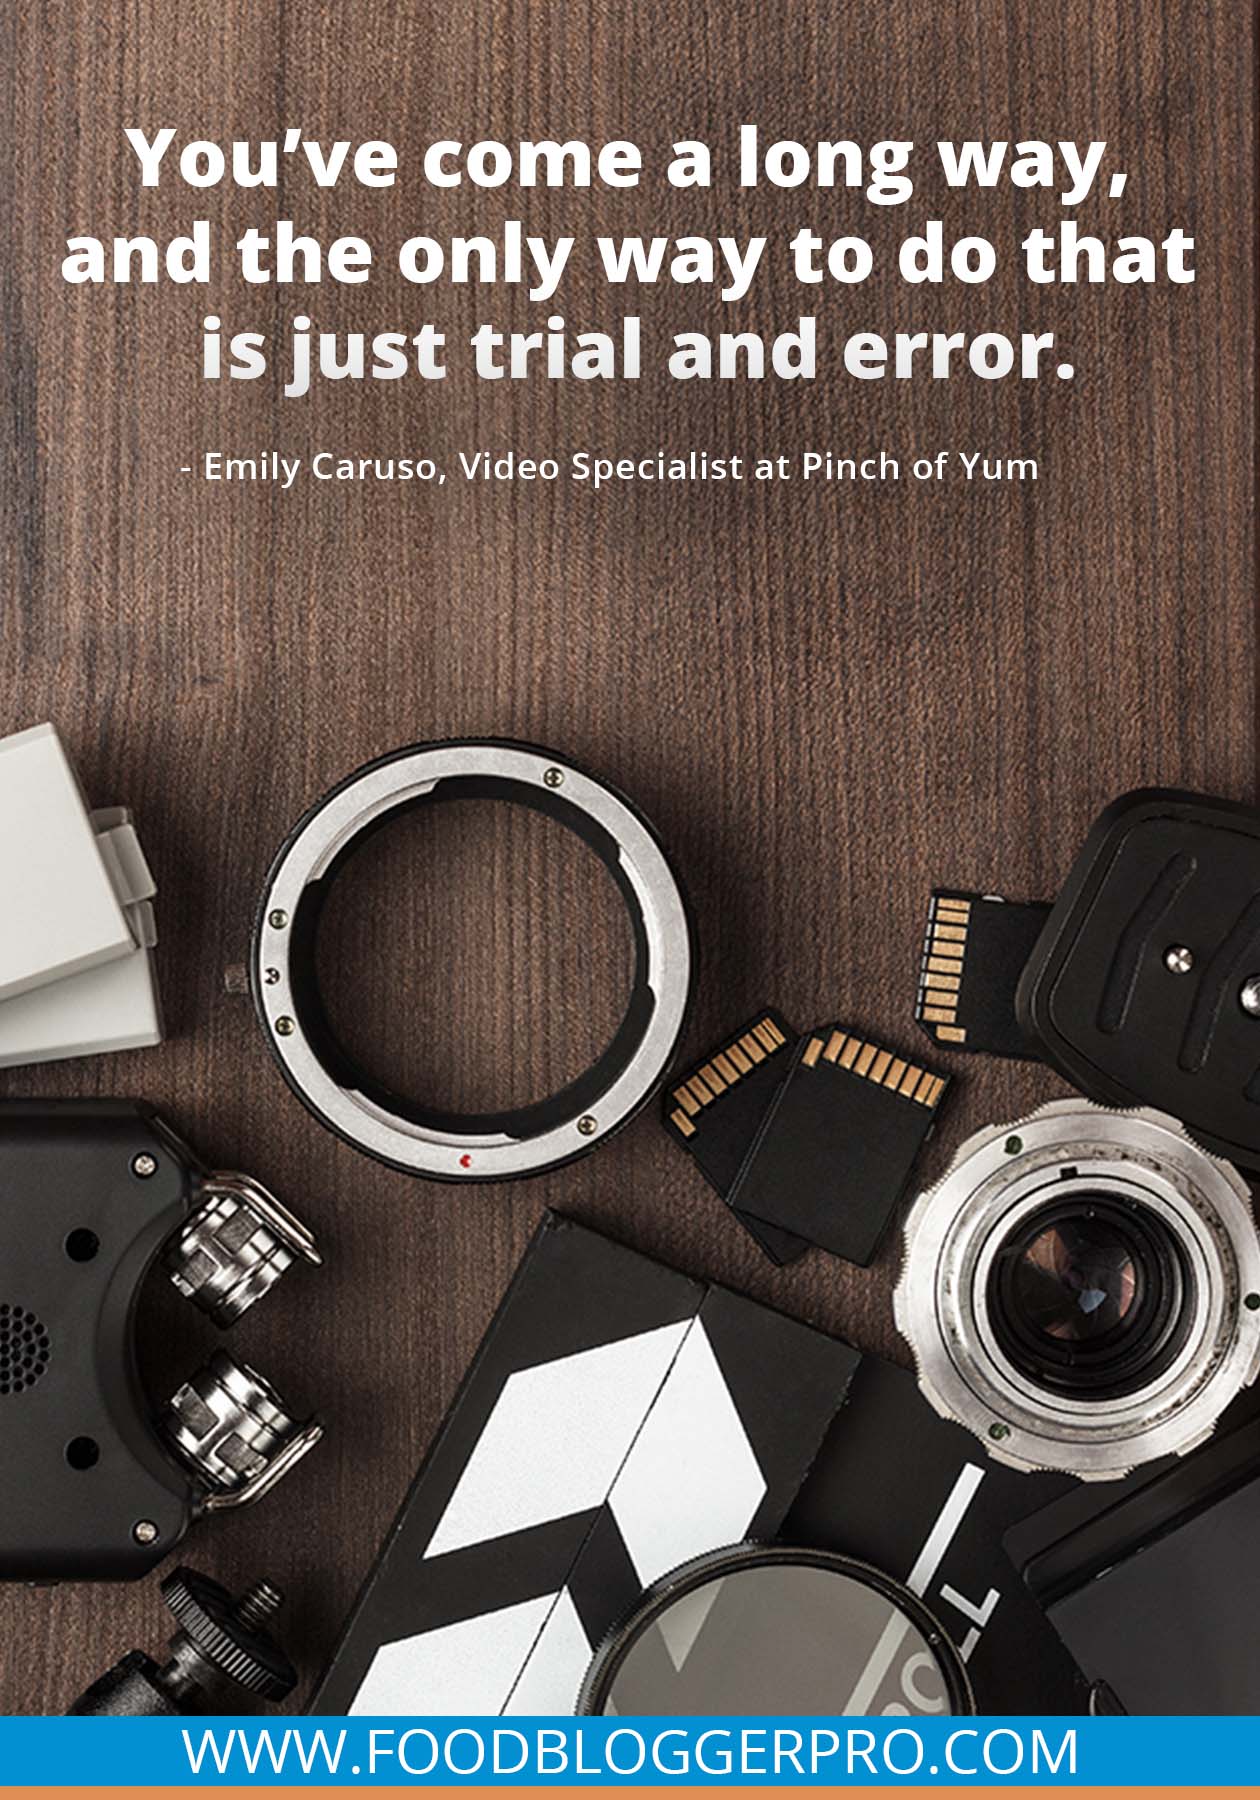
Emily Caruso: So that means you can do your video however it makes sense, and with your brand and the way your style work, and as far as actually creating video, I know it’s tough at first. It’s tough, it’s frustrating, you will run into problems, but that is the only way you’re really going to learn how to do it. Just like if you think back to the time maybe when you first started blogging or maybe you’re still even new to blogging, but look at how you’ve maybe learned, whether it’s cooking or photography, or even just navigating around WordPress, or whatever it is. You’ve come a long way and the only way to do that is to just kind of trial and error, and experimenting and doing it.
Emily Caruso: So you can do all the research and reading about it and everything, but until you really get in there and start doing it, you’re not going to really be able to learn how to do it, and there’s a little bit of a learning curve, but when you get that first video edited, it is so satisfying, even if you look at it and you see all these mistakes, you know what? You shot that video, it’s edited, it’s done, and the next one’s going to be easier and better and it’s just going to get better from there.
Bjork Ostrom: Exactly, and there’s so much wisdom in that and it’s hard to do, it’s hard to jump in and do it. It’s also hard to publish it once you have done it, but I think people will find that it’s encouraging and they’ll want to get onto the next one once they do. Emily, thanks so much for being a part of this, throughout the entire day for this last Q&A session. I know that people got a lot out of it, it was really fun to follow along with the live chat, when people were asking questions and giving feedback and I know a lot of people will watch it after the fact as well. So let’s all give a virtual round of applause for Emily, for tuning in. Thanks so much for being a part of it. I have a couple more things that I’ll talk about, but I will officially let you head out of the zoom session so you don’t have to awkwardly watch me on video as I wrap up. Thanks so much Emily for being a part of it.
Emily Caruso: All right, thanks Bjork.
Alexa Peduzzi: And that my friends is that, we hope you love this Q&A with Emily and learned some tips for creating your own awesome recipe videos. I’m also here to bring you the reviewer of the week and this review comes from iTunes and it is from Emily from the beautiful blog layersofhappiness.com. Fun fact, I actually get my baked French fry recipe from this blog, so I definitely love this blog, and their review says, “So informative, I love everything these two do. So down to earth and really, really helpful. I can’t give enough praise.” Thank you Emily so much for that review, and if you’d like to be featured on an upcoming episode of the Food Blogger Pro podcast, in this reviewer of the week section, all you need to do is leave a review for us on iTunes.
Alexa Peduzzi: Simply go to iTunes, type in the Food Blogger Pro podcast, and give us a review. We’d really appreciate it and it really helps the podcast gets seen. Thanks again for tuning in this week. For our listeners in the US, we hope that you have an awesome Thanksgiving and from all of us here at FBP HQ, make it a great week.