
Welcome to episode 188 of The Food Blogger Pro Podcast! This week on the podcast, Bjork interviews Simon Duduica about optimizing images on your website.
Last week on the podcast, Bjork chatted with Chelsea Cole from A Duck’s Oven about the process of self-publishing a cookbook. To go back and listen to that episode, click here.
Optimizing Your Website’s Images
We know that optimization is important when it comes to building a website, so today’s interview focuses on optimizing images.
Optimizing images on food blogs is especially important. Food blogs are typically heavy-handed with their use of images, and for good reason: people eat with their eyes. That said, it’s just as important that your images look good as it is to optimize them for site performance and speed.
That’s where ShortPixel comes in. They help you optimize your images in a way that doesn’t compromise quality or that “drool-worthiness” we all want to see in our images.
ShortPixel’s Head of Technology, Simon, is here to chat through what optimizing your images means and how you can make sure the images on your site are optimized.
In this episode, Simon shares:
- How they started ShortPixel
- Why image optimization is important for website owners
- How images load
- How you can tell if your images are optimized
- The difference between optimization levels
- What retina images are and how you can optimize them
- How you can start optimizing your website
Listen to the Food Blogger Pro Podcast below or check it out on iTunes, Google Play Music, or Spotify:
Resources:
- Register for the Growing Your Food Blog Q&A with Bjork and Lindsay!
- ShortPixel
- WP Engine
- Cloudflare
- GTmetrix
- Google PageSpeed Insights
If you have any comments, questions, or suggestions for interviews, be sure to email them to [email protected].
Thanks to our Reviewer of the Week, Brenda from Become Betty! If you’d like to be featured, leave a review for us on iTunes and include your name and blog name in the review.
We’d like to thank our sponsors, WP Tasty! Check out wptasty.com to learn more about their handcrafted WordPress plugins specifically made for food bloggers.
If you’d like to jump to the comments section, click here.
Transcript:
Alexa Peduzzi: In this episode, I chat about a free event where you can ask Lindsay and Bjork your questions about blogging, and then Bjork interviews Simon from ShortPixel about optimizing images on your website.
Alexa Peduzzi: Hello, wonderful listener. You are listening to the Food Blogger Pro Podcast. How is it going this fine Tuesday? I am doing particularly well because we are experiencing a warm spell here in Pittsburgh, PA. The sun is shining, and I’m actually recording this with, wait for it, my window wide open. I hope your day is equally as awesome.
Alexa Peduzzi: Today’s episode of the podcast is sponsored by WP Tasty, a food blogger’s go-to site for WordPress plug-ins. If you’re interested in learning more about WP Tasty’s recipe plug-in, their Pinterest optimization plug-in, and their keyword auto-linking plug-in, be sure to head on over to wptasty.com.
Alexa Peduzzi: For today’s tasty tip, we wanted to let you know about an incredibly exciting event happening in just a few weeks. It’s a free virtual live Q and A with none other than our fearless leaders, Bjork and Lindsay Ostrom, and it’s all about growing your food blog in 2019. You can ask any blogging-related questions during this Q and A, and Bjork and Lindsay will answer them live on Tuesday, February 19th, at 1:00 p.m. Easter, 12:00 p.m. Central. It’s going to be so much fun. We are all just so excited and jazzed up to see you there at this live Q and A, and you can learn more and register at foodbloggerpro.com/register.
Alexa Peduzzi: Now, the interview. We all know that optimization is important when it comes to building a website, so today’s interview actually focuses on optimizing images. Optimizing images on food blogs is especially important because, well, people eat with their eyes. It’s just as important to make your images look good as it is to optimize them for site performance and speed. That’s where ShortPixel comes in. They help you optimize your images in a way that doesn’t compromise quality or that pop that we all want to see in our images. ShortPixel’s Head of Technology, Simon, is here to chat through what optimizing your images actually means and how you can make sure that the images on your site are optimized. So, without any further ado, Bjork, take it away.
Bjork Ostrom: Simon, welcome to the podcast.
Simon Duduica: Thanks.
Bjork Ostrom: Yeah.
Simon Duduica: Thank you.
Bjork Ostrom: We’re excited. Before we hit record here, I was talking to you, and I said I’m really excited to share this episode with our audience because I think that there’s going to be some really great concepts and some things that they’ll learn, and also, really excited selfishly because this is something that we’re going to be doing. This is something that we’re in the middle of for our food blog, and so we’re going to learn from the process as well, and it’s something that we’ve needed to do for a really long time, so I’m excited to move forward with that.
Bjork Ostrom: But before we talk about the behind the scenes of what ShortPixel does, can you take us back? It’s probably about four years now, and share a little bit about when ShortPixel was in the very beginning stages. When your company was just starting up, what were you doing? What was the problem that you were trying to solve?
Simon Duduica: Yeah. Well, it started, all started in 2014. We were working at a different project to which somehow was using servers to process, to do thumbnails of the websites, and these servers were used in … There were peaks of usage, and then the servers would not be used for a long time, so we started a bit not from the problem, but from the availability of resources we had, and we thought, “What should we do to put the servers to work?” The same time, we noticed sites … We had a colossal problem with the site, which loaded slowly because of the images, and this is how the ideas come. We head outside …
Bjork Ostrom: Then, you said, “We have these servers, and we have these really big images,” and then paired those things together.
Simon Duduica: Right.
Bjork Ostrom: It’s interesting. I don’t know if this is true, but I’ve heard that it was the same story for Amazon Web Services. For those that aren’t as into the tech world, Amazon has this entire really successful branch that is all like server-based stuff, and the story that I heard was there’s this executive meeting, and it’s the same exact thing that you’re talking about where they were like, “Hey, there’s times where it’s not Christmas or Black Friday where people aren’t buying stuff like crazy from Amazon and our servers are not being utilized. What do we do?” and they launched AWS out of that, so kind of a similar story with you in ShortPixel where you have these servers available, and you say, “Hey, what should we do with this?” “Hey, let’s optimize images. It’s a really intense process, takes a lot of server power,” and so you connect those two things up.
Simon Duduica: Yeah.
Bjork Ostrom: Was it the kind of thing where you said, “Hey, let’s do this,” you started to work on it, and then soon, that kind of side project grew into … you realized it was a really big problem, and then it grew into the main thing? Is that the main focus now, or are you still working on the other business?
Simon Duduica: Yeah. Yeah. Now, it’s the main focus.
Bjork Ostrom: Got it. Cool. For those that aren’t familiar, can you talk a little bit about what ShortPixel is and what it does? It can work for any website, but the nice thing is the majority of people that are listening to this are probably WordPress users, so we can use that as context as we have the conversation. For somebody who has a WordPress blog, how does ShortPixel help them, and why is it important?
Simon Duduica: If you have a blog, which has … Most blogs have a lot of images. Then, your page loads with the speed of the images because you have two things for the page loading, which are important. One is page rendering, which is on server, and then you have the part, the transfer of the image to the user’s browser.
Bjork Ostrom: Mm-hmm (affirmative).
Simon Duduica: For the first part, which is rendering, it’s important to have a server, which is able to render the page fast. This is what does engine side and server side. But then, once the server gets the page ready, it can use also cache plug-ins, which will serve the page already rendered or you can speed things up on your server side, but then you’re … for getting the things to the user’s browser, in a way, you are powerless because you depend on his connection, internet connection, so what can you do? You can make things smaller. You can make your CSS smaller. You can make your HTML smaller. But then, you come to the images, and you look at the statistics, and your page is 65 two-thirds images, so you can optimize a lot your text side of the page, but then you will hit this part, which is you cannot optimize the same way, and it’s a big lump of your page.
Bjork Ostrom: Yeah. It’s interesting, all of those different components that … I think of it as like a soup, and how do you make the tastiest speed soup? We’re going to use food analogies as much as possible. Like you said, so first, there’s the actual server that your site is on, and for us, we use WP Engine, so this is a hosting company that is … and then this is for Pinch of Yum, the food and recipe blog that we have, so this is a hosting company that specializes in WordPress websites, so that’s an example.
Bjork Ostrom: Obviously, there’s lots of hosting companies, and then the other thing you talked about is caching and being really intentional with that. It would be another podcast episode. It’s a little bit technical, but just for people that are interested, the service that we use is Cloudflare, which is a popular and well-known service, so those are all things that aren’t related to the optimization about … with images. They’re things that you need to do in order for yourself and for your site, and things that you can control, but the one thing that you said that’s so interesting is you can’t control the speed of the internet of somebody that’s accessing you website.
Bjork Ostrom: One of the things that was such a learning experience for me was we live in a major metropolitan area, so we have fast internet, and we pay for the top plan because we’re on the internet all the time. It’s our business, but we did a vacation with my wife’s family in this area in the Northwoods, and it’s a place where people go not to work, but to get away, and I went to the local library to do some work, and I was like, “The internet is so slow,” and I went to our website, and it took forever to load, and it’s because of those things that you said where the … It was a reminder to me like, “Hey, everybody doesn’t have LTE internet and a hundred megabyte download speed for their internet,” and a lot of people are using their daily internet on something that’s a lot slower.
Bjork Ostrom: The thing, like you said, that was taking so long to load was the images, and for food blogs, for recipe blogs, we have so many images. People love to include three, four, five, six images in a post, and so it’s important to know that if somebody has slow internet and they go there, it’s going to take a long time for them to load, and they might leave, so my question for you would be … Let’s say somebody is listening to this podcast and they say, “Oh, that makes sense. I need to have images that load really quickly that are optimized.” How does somebody know if the images on their website are actually optimized or not? Is there a test you can do?
Simon Duduica: Yeah, there is a test, several ways to test them. First, I would say there’s no fully optimized when you talk about the images because when you have your image, the original one, in order to optimize it, you can optimize it losslessly, which is you make sure each pixel is identical to the original, or you can go further and just change it in a way that is not noticeable for the eye. It’s not noticeable for the average eye.
Bjork Ostrom: Mm-hmm (affirmative).
Simon Duduica: You really make it smaller, but then actually, if you do this over and again on the same image, and then you compare it with the original, you do it several times. Then, you will notice the difference as they come. They get bigger differences.
Bjork Ostrom: Mm-hmm (affirmative). Got it.
Simon Duduica: You can go on optimizing it and make it smaller, and smaller, and smaller, but with the trade of quality.
Bjork Ostrom: Got it.
Simon Duduica: This is why optimizing images is not something really … like there’s no silver bullet, or should I say, there’s no easy way to do it and to make sure it’s optimal.
Bjork Ostrom: Yeah. Mm-hmm (affirmative).
Simon Duduica: This is why we are also … How should I say? We are having a complex algorithm to find the sweet spot.
Bjork Ostrom: Mm-hmm (affirmative).
Simon Duduica: Right.
Bjork Ostrom: It seems almost like there would be … It’s an art as much as a science because you are presenting an image and trying to keep the quality as high as possible, try to make it as identical to the original as possible while also trying to make it as light as possible, so the image itself isn’t as heavy.
Simon Duduica: That’s right.
Bjork Ostrom: Is that something that ShortPixel is doing? Do you as the user of the plug-in in the process and using ShortPixel, do you have to decide how much of that you want to do, and what would your recommendation be for somebody who’s coming in and saying, “Hey, I don’t want to tweak this. I don’t want to mess with it?” What would be a good starting place where somebody can get some really good improvements without as much impact on the actual quality of the image?
Simon Duduica: At ShortPixel, we’re trying with the plug-in to take this burden out of choosing. There are some plug-ins where you go into settings and you have like the plain control panel with switches everywhere. But then, if you lose any … You can do some very good optimization with that, but you should, I mean, learn everything there. You don’t have time to … I mean, you’re not supposed to do this. We want to take this off the shoulders of the user, so we offer some very straightforward settings for this.
Simon Duduica: You have three levels of compression. One is lossless. I mean, if you’re really trying to avoid any minor change of the image, you can stick on that. Then, you have on the other side, we have lossy, which actually is perfect for most of the cases, which I recommend. It’s recommended in the plug-in. You get lossy default and recommended, which gets the best trade-off between optimization and difference of the image, which actually … So, the case is if you take a picture outside, and you put it on the website, and you optimize it lossy, you won’t see a difference. You don’t.
Bjork Ostrom: Mm-hmm (affirmative), but there also won’t be as much improvement to …
Simon Duduica: No, no, no. This is the one with most improvement.
Bjork Ostrom: Oh, I see, so lossless is the least amount of improvement and the …
Simon Duduica: Lossy is the …
Bjork Ostrom: Yeah. Lossy is the most. Got it.
Simon Duduica: Yeah, that’s right.
Bjork Ostrom: But most people, even with lossy, won’t see the impact?
Simon Duduica: Yeah. In most of the cases, the impact won’t be seen. I mean, most of the images more than most of the people. You have lossy. A picture taken outside with your phone or something like this. You put it on the website. You won’t see a thing. I mean, you won’t see a difference.
Bjork Ostrom: Mm-hmm (affirmative). You’ll still see the image, but not a difference.
Simon Duduica: Yeah, that’s right.
Bjork Ostrom: Yeah.
Simon Duduica: Between the two, we didn’t have this initially. There’s a setting which is called glossy like the glossy magazines, which was developed together with photographs … photographers, which wanted their images optimized on their websites, but are most … more picky, especially for images shot with very high-end cameras, which are very sharp to the detail, and especially for these images, you can spot the difference at maximum resolution, so we developed this mid-range optimization, which still has very good percentage of optimization and is okay for those cases where you really want the image to look sharp, perfectly sharp.
Bjork Ostrom: Mm-hmm (affirmative). That’s really interesting, so my wife, Lindsay, who does all the photography for our food blog, that’s one of the hardest things when we’ve done image optimization and looked into doing it in the past is that she’s so particular about the impact that the optimization process has on the image, and so it’s really hard for her to spend so much time really being intentional about getting the exact colors and the sharpness, and then to put it through a really aggressive image optimization process, so it seems like for people who are extremely particular about how their images look, that would be a good middle ground, the glossy, where you’re still optimizing, but maybe retaining some of that, that sharpness, and the colors, and things like that that you are so intentional to get originally, so is that …
Simon Duduica: That’s right.
Bjork Ostrom: In ShortPixel, is that an option where you can go and pick lossless, glossy, or lossy?
Simon Duduica: That’s right. That’s right.
Bjork Ostrom: Got it.
Simon Duduica: It’s the first option after the … It’s actually the first option because, first, the API key, which is not option. I mean …
Bjork Ostrom: Yes. Yeah. Got it. That’s really interesting, and one of the things … I think we did a little rabbit trail away from it, but we talked about … How do you know on your website if … What is the test that you can run and get a good idea of like, “Hey, I can do this much optimization,” or, “This is how bad my site is,” for instance? What would you recommend for people to learn about if this is something they need to do?
Simon Duduica: You can use one of the online services, which are doing this. You can just paste your website’s address in a tool like Gtmetrix or Google PageSpeed Insights, and they will analyze a lot of things and also, the images. Then, you can also go to our website, and you can paste your URL there, and ShortPixel will tell you how much it will optimize the page that you pasted there with a list of images.
Bjork Ostrom: Got it.
Simon Duduica: Yeah.
Bjork Ostrom: Yeah, so …
Simon Duduica: Regarding …
Bjork Ostrom: And we’ll link to that in the show notes just for people that are listening both of those things, but go ahead. You’re saying regarding?
Simon Duduica: Yeah, regarding … especially Google PageSpeed Insights, you need to take this with a grain of salt sometimes because when PSI analyzes your image, it starts from the image you have on your page, and linking to what I was telling you before, if you take an image and you optimize it again, they use lossy algorithms. Then, you will gain a little bit, and if Google PageSpeed Insights complains that your image is not optimize and you can gain 5%, then it’s okay because … Well, many images, you can get … Sometimes, it is being too aggressive.
Bjork Ostrom: Got it, so point being for people that are using the PageSpeed Insight type stuff, the tools from Google, to be aware that there might be times when Google says, “Hey, you need to compress your images even more,” but in general, the feedback is going to be … from them is going to be pretty aggressive in terms of what they view as a fully optimized image?
Simon Duduica: Yeah. It happens sometimes that you don’t have your image optimized with ShortPixel. You go to Google PageSpeed Insights, and Google PageSpeed Insights says you can optimize it with 30%. You optimize it with ShortPixel, and it optimizes it with 60%, and then you go to PageSpeed Insights, and it will say again you can optimize it by 3%, 5%. Something like this.
Bjork Ostrom: Got it, so …
Simon Duduica: Even if you did double what …
Bjork Ostrom: Yeah. Yeah, so they’re saying you could … Like if you run the Insights and the tool says, “Hey, you could optimize this image by 30% still,” and then you go back to ShortPixel and say, “Hey, I want to optimize it by 60%,” doubling what the recommendation was, that doesn’t necessarily mean that you’re going to go back and the Insights will say, “Hey, 0%. You’ve done everything you can.” Potentially, there will always be a little bit more that you can do in terms of optimization. It’s not going to bring it to zero essentially.
Simon Duduica: Yeah, because it’s not comparing with the original image.
Bjork Ostrom: Yeah.
Simon Duduica: It’s just taking the image it has there and try to optimize it.
Bjork Ostrom: Got it.
Simon Duduica: But then, the image optimized several times would have visual artifacts, which are not okay, and we’re making sure this doesn’t happen.
Bjork Ostrom: Got it. Great, so can you talk about … Let’s say that somebody installed ShortPixel and they have a WordPress site. They have it up and running on their site. What does the actual process look like in terms of when they hit the button to optimize their images? I would assume for some people, it’s this scary thing where it’s like, “Ah, are all my images going to be ruined?” Can you talk about what happens when people hit that button and the general … You don’t have to get into the super technical details. I know that you could, but the general process of what happens to people’s images.
Simon Duduica: Yeah. First of all, I would like to emphasize the fact that with default settings, each and every image is backed up before doing anything.
Bjork Ostrom: Got it.
Simon Duduica: You have the option to restore it. It’s not that you’re doing something, you’re jumping into the void.
Bjork Ostrom: Yes. Right, right.
Simon Duduica: You have a safety net.
Bjork Ostrom: Mm-hmm (affirmative).
Simon Duduica: Then, what ShortPixel does when you start bulk-optimizing your former images is that it takes each image, one by one, going back in time from the most recent images to the older ones, and then for each image, it sends a request to the server with the list … with the image and its thumbnails. It’s important also to optimize the thumbnails. You have options not to do that, but usually, they are the most displayed versions of the image. Not the big image, but the thumbnails. It sends the request to server, server optimizes, and the images are put … are replaced on the server, on your server.
Bjork Ostrom: Mm-hmm (affirmative).
Simon Duduica: Okay? On your site. First step was to copy the old images. I mean, the image and its thumbnails to the backup folder, and then it displays on the screen … If you are in the bulk page, it displays the two … the original and the optimized image next to each, one … left and right, so you can see that they look the same. We have a lot of customers which gave us a feedback that are addicted to a certain look that the image is slightly …
Bjork Ostrom: Yeah. Yeah. Right, and you can see that on the homepage like a sliding to compare what it was and what it is, so essentially, reassuring people that this is what the change will look like, so people can feel comfortable making the change.
Simon Duduica: Yeah, that’s right. That’s right. That’s all that happens. Then, you have a lot of advanced options for optimizing the images which are not in the media library, for removing EXIF info or keeping it. Actually, the default is to remove it.
Bjork Ostrom: Mm-hmm (affirmative). Can you talk about what that is because I think there are a lot of people who aren’t familiar with the fact that their images carry around this extra information, this extra data within the actual image file itself, and there’s some weight to that. Like does that EXIF data load if you have an image with EXIF data on your website?
Simon Duduica: Yes, the EXIF data is part of the file, so it gets downloaded to the client … visitor’s browser.
Bjork Ostrom: Mm-hmm (affirmative).
Simon Duduica: What is EXIF is information structure, which is embedded in the image, which can contain a lot of things. It can contain location, device … Yeah, camera information. It can contain thumbnails, so smaller versions of the same image. Then, all this image or all this information is packed … Then, it contains also a color profile, which is important, so on one side, you would want to clean it up because it can be personal information there, right?
Bjork Ostrom: Mm-hmm (affirmative).
Simon Duduica: The GPS position of where it was taken or something about your phone model because of the model of the camera, so you have this information. Then, it takes space, especially for a small image. This is an important part of the image, which the image carries around, so it gets downloaded as well because of it. Then, the color profile. We are removing the EXIF, but we are keeping the color profile because this is important.
Bjork Ostrom: Got it.
Simon Duduica: Sometimes, if you remove the color profile, you see that the image changes colors. Not totally from green to red, but the red is not the same or the green is not the same. A bit different.
Bjork Ostrom: Mm-hmm (affirmative). Yeah.
Simon Duduica: The logic behind is if the image is small like a thumbnail, we’re removing it because in our experience, it’s not a problem for small images. The most problem is for big images, and so …
Bjork Ostrom: Yeah, it’s interesting. I think that will be a big realization for a lot of people that if you … and for me, I’m using Apple computers, so I right-click, and then I can say, “Get info,” on an image, and that’s what you’re talking about, and if that … If the images don’t have that EXIF information removed, it’s essentially like that extra data removed, it’s possible that it could show like when the image was taken. Like you said, if it’s with your phone or some DSLR cameras, it can show the location, so like the latitude, longitude of like maybe your house if it was there, which isn’t ideal in most situations.
Bjork Ostrom: It could also show what camera it was that took it, and then you said the color profile, which I can see … I just pulled one of the images off of our website, and so it shows that RGB … additional information about the color profile, and like you said, hey, that’s really important to keep that there. You want that as part of it because that data is important, so it keeps that in, but otherwise, this data is just floating around with the image, and there’s no real positive to it especially on the web.
Bjork Ostrom: Obviously, if you’re using it just personally, it’s okay because then you can see like in your phone, “Hey, this is where the image was taken.” We did a trip to Europe last year, and so I can see like, “Hey, this is when we were in Austria, and we went up this … to the top of this mountain,” and I have that information because of the GPS, but when you put that on your website, you want that removed, and it sounds like what you said is the default for ShortPixel is to remove that.
Simon Duduica: Right, right.
Bjork Ostrom: Got it. Cool.
Simon Duduica: We have an option for this in order to keep it because there are cases when, for example … The most common example is for the records. They put on purpose in the EXIF information about them.
Bjork Ostrom: Oh, sure.
Simon Duduica: Author and also some information like this, copyright. Things like that. They wanted that.
Bjork Ostrom: Yeah.
Simon Duduica: They know what they’re doing. They’re removing things which they don’t want, and they keep what they want, so we have an option to this, “Keep my EXIF information.”
Bjork Ostrom: Got it.
Simon Duduica: Yeah.
Bjork Ostrom: Got it. For people that want to include a little disclaimer or copyright within the image itself saying, “I own this. Here’s my website. Here’s my information.” And professional photographers, obviously, that would be an important part of what they do. One of the questions that I have that I would assume some of the audience members would be thinking about. A lot of people that listen to this podcast are really intentional about optimizing their images. Not from the sense of like the actual image file size, but from an SEO perspective are really intentional to include a really strong alt text, and so they’re describing the image. Some of our users use a plug-in that we created called Tasty Pins, which also allows users to put in a Pinterest description into the code of their image, and users don’t actually see that, but that’s a part of the image code.
Bjork Ostrom: One of the questions that I’m sure will come up is, “Hey, when an optimization process takes place, is there anything that’s changed on my website, on my blog post in terms of the actual code for the image, or even like does the image filename change, or does that stay the same?” If somebody is intentional about naming the file in a certain way, does the optimization process with ShortPixel impact that at all?
Simon Duduica: The short answer is no. The page remains the same. The URL of the image remains the same, except you have … There is a case. You know about WebP images? WebP images are an algorithm developed by Google, so it’s a different image format, which makes the file smaller for the same visual quality, but it’s not compatible at all with a JPEG, for example, or PNG. Currently, not all the browsers are displaying this type of image.
Bjork Ostrom: Got it.
Simon Duduica: We are also generating WebP versions of the image with an option. It is not by default, and we are also implementing a change in the pages in order to use this image. Only with this situation ShortPixel changes the HTML of the page, but then only in some specific case because we have two ways of doing it. The first way, which is under development right now … Actually, it would be the second way, but it will become the first way is without this modification. In second way, which is the current way, it is possible now to use an option which changes the page HTML. Only in this particular case. Otherwise, there’s nothing that changes in the website.
Bjork Ostrom: Got it.
Simon Duduica: Just the images being smaller.
Bjork Ostrom: Yup, and that’s really interesting. This is like internet 2.0 or internet 3. … not 2.0, 201, so we’re taking the advanced class in blogging, and it’s a really interesting piece of information. What you’re saying with WebP is that if you look at an image and it’s a JPEG or a PNG, those are all different types of images. Normally, people would look at it, and it would just be … An image would be an image, but there are certain file format for an image, and what you’re saying is Google has developed a new type of image for the web called WebP, and my guess would be that this is a high-quality, really lightweight type of image that is made specifically for the web. Is that right?
Simon Duduica: Yeah, that’s right. Actually, it is not that new. It’s not the only one. JPEG was developed a long time ago. For the web, it’s a long time ago. It was in the ’90s or even before, but it was developed a long time ago, and the developers of JPEG improved the algorithm. There is also another version of JPEG, which is paired shoulder to shoulder with the WebP. The only thing is that Google with WebP and with Chrome, they were able to push it forward. Apple also has a JPEG-GT or something like this, which is they’re supporting, and there’s also an advanced format, which pairs with WebP.
Bjork Ostrom: Got it.
Simon Duduica: We choose WebP because of … it started from our customer. We’re listening a lot to our customers. When they have a problem, they write us about something they encountered or either a problem, either a need. We’re making sure we listen to them because this is how we got a lot of things into the plug-in and now our service, which really helps for them. The WebP came up in the same manner from customers, which said, “Well, we heard about this. Is it possible to have it in your plug-in?” and we did it.
Bjork Ostrom: Got it, and you were saying that this is an advanced feature.
Simon Duduica: Right.
Bjork Ostrom: For people who are listening to this and they’re like … Maybe their head is spinning a little bit. They’re not technical. There are some people that will listen and say, “Hey, this is so cool. I want to learn more about it,” and they’ll make a little note about it, and they will do a lot of research about it, and then there are some people who are like, “Ugh, this so technical and overwhelming.” You were saying, “Hey, the one instance where something might change would be if you get into the really advanced area of the plug-in and decide that you want to do some optimization or use WebP images, then there are some things that we’re doing in the background.” But if you go through the default process, nothing will change. Your image filename will stay the same.
Simon Duduica: Nothing.
Bjork Ostrom: The file type will stay the same. Everything will stay the same other than the fact that your images will be replaced with an optimized version of the images, which I think people say, “Hey, great. That sounds good,” but let’s say that … People are always a little bit nervous about making a change to their website. If somebody says, “I’m going to go through this process,” I want to know if it’s possible to undo it. Is that something that’s possible? If you go through the process and … I’m sure it would work out well, but people just like to know. Is there an “Undo” button for whatever reason, an escape patch if something happens?
Simon Duduica: Yes, of course, of course. We are optimizing images and making backups for each image, and as you are able to optimize with only one click, then you are able also to restore everything with one click.
Bjork Ostrom: Got it.
Simon Duduica: You can also restore only one image, or you can just change the setting for one image from lossy to lossless. This is a situation which can happen. For example, if you have images, you took a picture outside with nice landscape, and you wrote with your image editor, you put a text on it, which the text has very sharp edges, and the image with the landscape is more gradual. the changes of colors are more gradual.
Simon Duduica: In this case, if you apply a lossy compression, you will notice around the text visible changes. Very, very tiny. I mean, if you look carefully, you’ll see them. Otherwise, not. In this case, you might see differences. This is a particular situation. You mix two different types of image in the same image, and then for this one, you will notice it, and you’ll say, “Okay. Hmm, um, I want this sharper.” You will go push the button, change it to lossless compression.
Bjork Ostrom: Got it. That’s a really interesting point because there is a lot of people that will … I think of an example. On our blog, we have a post called “How to Cook Chicken,” and it’s just this really in-depth awesome article that one of our team members, Emily, worked on, and the very first image is an image optimized for Pinterest, and it has this block of text, and it says, “How to Cook Chicken.”
Bjork Ostrom: What you’re saying is if you’re going to really aggressively optimize that image, because it has text and a box with really hard lines, you might notice some … that those edges are soft instead of hard, and you want those hard edges on text, so you’re saying you can go in after and choose one of these other less aggressive methods of optimization, and you might want to go lossless, which is still compression and optimizing it, but it’s not as aggressive as a lossy compression would be, so to think strategically …
Simon Duduica: Usually, glossy is already enough. I mean …
Bjork Ostrom: Got it. Yup, so you could do the middle ground.
Simon Duduica: Right.
Bjork Ostrom: We talked about lossless, glossy, and lossy. You could do the middle ground, the glossy, and that would be enough to have those sharp edges on the images?
Simon Duduica: Right.
Bjork Ostrom: Got it. That’s a really cool takeaway, so the idea being you probably want to go in and for your entire site, go through this process of optimizing all the images and just have ShortPixel go in and say, “Hey, optimize my site with these probably default settings.”
Simon Duduica: Right.
Bjork Ostrom: But then, to go in and say, “Hey, what are the small tweaks that I want to make with certain images that I want to make sure are crisp?” Usually, those would be text-based images that you want to do that with. It’s a great takeaway.
Simon Duduica: Yeah.
Bjork Ostrom: We’re coming to the end here. One of the questions that I want to ask about, and this is a little bit technical, but I think it’s still really important, and for people to … You don’t have to understand it perfectly for people that are listening, but I think it’s important. It’s this idea of Retina images, and why those are becoming more and more important, and then what people should think about as they think about having images that look good on a Retina screen, but are also optimized. If somebody is wanting to do Retina images, can you talk about what that is, how they can do it, but then also, how they can be smart about optimizing?
Simon Duduica: Yeah. Okay. Retina images. I would start with Retina display actually. It’s not that complicated. You have, for example, your computer display, which is 1,920 pixels wide.
Bjork Ostrom: Mm-hmm (affirmative).
Simon Duduica: But then, Apple says, “I have a screen, which is 1,920 double pixels.” I mean, for each … They’re doubling the resolution, but they’re making … They’re saying they have the one-time resolution, so for each pixel, they have two-by-two pixels behind. If they display a normal webpage that the text … They display this on a 1,920 screen display, but the images, they can’t display a double-side image which … double-size image which is, well, much sharper, so I can … If I have 600-pixel image on my normal display, then I could put inside there a 1,200 pixel image on the same size which, of course, is sharper. The image has much more details.
Bjork Ostrom: Mm-hmm (affirmative).
Simon Duduica: This is the display what can do for the viewer. Then, now, if the viewer loads a page which has the normal 600-pixel image, it will not be any difference, but for a user, for a visitor which is a … used with other sites which have Retina images would look sharp, and also for what happens around the picture like the fact that the text is sharper because the text takes advantage … The browser takes advantage of the Retina to display sharper text and sharper everything around like menus.
Simon Duduica: Then, the image will look a bit blurry just because it’s a 600-pixel image, and everything around is double resolution, so what you can do is to use a plug-in, a Retina plug-in. You can search on the marketplace on the WordPress plug-ins list, and you have the first one you encounter there is okay, and this plug-in will generate Retina versions of the image. Well, if you have a 600-pixel image, the original image is 600-pixel, it won’t be able to do much. It will double the image, but the image, you should take it from 600-pixel and double it. It will be a bit blurry because of this. It’s doubled.
Bjork Ostrom: Yeah. It’s stretching out an image that was already small.
Simon Duduica: Stretch it out. Yeah.
Bjork Ostrom: Yeah.
Simon Duduica: Yeah, but usually, it’s not like this. Usually, you have a big image, and the WordPress will generate smaller sizes.
Bjork Ostrom: Mm-hmm (affirmative).
Simon Duduica: The 600-pixel image is a thumbnail of the original image, so the Retina plug-in behind, make sure it takes the original image, which may be 2,000-pixel or maybe bigger, and also, generates a 1,200-pixel image, and then you will have on your server the two images, the one with 600 and the one with 1,200 pixel. Also, together with the team, the plug-in will serve … This is a change in the HTML, which usually the team does, but the plug-in, the Retina plug-in provides the information that there is a Retina image or just provided the Retina image, and the browser will receive two URLs for the same image, the normal one and the retina one, and the browser will decide to load the Retina image, which is bigger and will look sharper.
Bjork Ostrom: Is the browser smart enough to know and to see, and for those that want to get into the nitty-gritty details of it, would that be source set? Is that the … When you talk about serving the multiple sets of images, is that the code that it’s serving is a source set code?
Simon Duduica: Right.
Bjork Ostrom: Okay.
Simon Duduica: Right.
Bjork Ostrom: This is I think another really good takeaway for people to understand how their website is working and how WordPress is working and their blog is working. When you load an image, almost always what’s happening is that WordPress is taking that and creating multiple versions of that, so if you upload one image, chances are there’s maybe three, four … Depending on the theme you’re using, there could be five different versions of that image at different sizes, and they do that because, let’s say, if you have thumbnails like on Pinch of Yum, if you go to our homepage, what you’ll see is there’ll be a thumbnail of each of the … It’s under Latest and Greatest. A thumbnail of each of the recent recipes. That’s not the image we uploaded. That’s a smaller version of that image, and it’s loaded in there.
Bjork Ostrom: What you’re saying is that these different versions are created, and the browser is smart enough to say, “Hey, let’s load the full Retina image in this instance because I’m a browser that is on a monitor that is going to be able to fully utilize that and fully optimize for that.” If it’s on a smaller one, then it’s not going to load that same size, so what you said … Point being that there’s … You can use a plug-in for that. Is there one that you recommend or you said, “Hey, just search on the WordPress Marketplace and see if there’s a well-rated, continually updated Retina plug-in available?”
Simon Duduica: We are usually recommending WP Retina 2X, which is … works well with ShortPixel.
Bjork Ostrom: Okay.
Simon Duduica: By the way, the thumbnails, the Retina thumbnails are also searched or found by ShortPixel and they’re optimized, which is another feature that we provide.
Bjork Ostrom: Okay. Great and …
Simon Duduica: This WP Retina 2X is … That should be okay. It works well.
Bjork Ostrom: Okay. Great, and that’s in the … That’s available as a plug-in in the … You can search for the plug-ins area in WordPress, and you’ll see that. I just googled it, and it popped up right away as well. A great takeaway for people that want to have those Retina images and something … a note that I made as well because that’s something that we need to look into. We’re doing Retina images, but we’re manually putting in a larger image size, and then WordPress is generating those other sizes, so that’s another area. Actually, I just made a note on my personal to-dos to look into that and to optimize that on our site as well.
Bjork Ostrom: So, we’re coming to the end, and the last question that I want to ask you, Simon, after we talked through all of this is really about optimization. When you think about optimizing your website, there’s lots of stuff that you can do, but what would you recommend people do as the first step, the thing that they would do that’s really important as they get into it if they want to optimize their website?
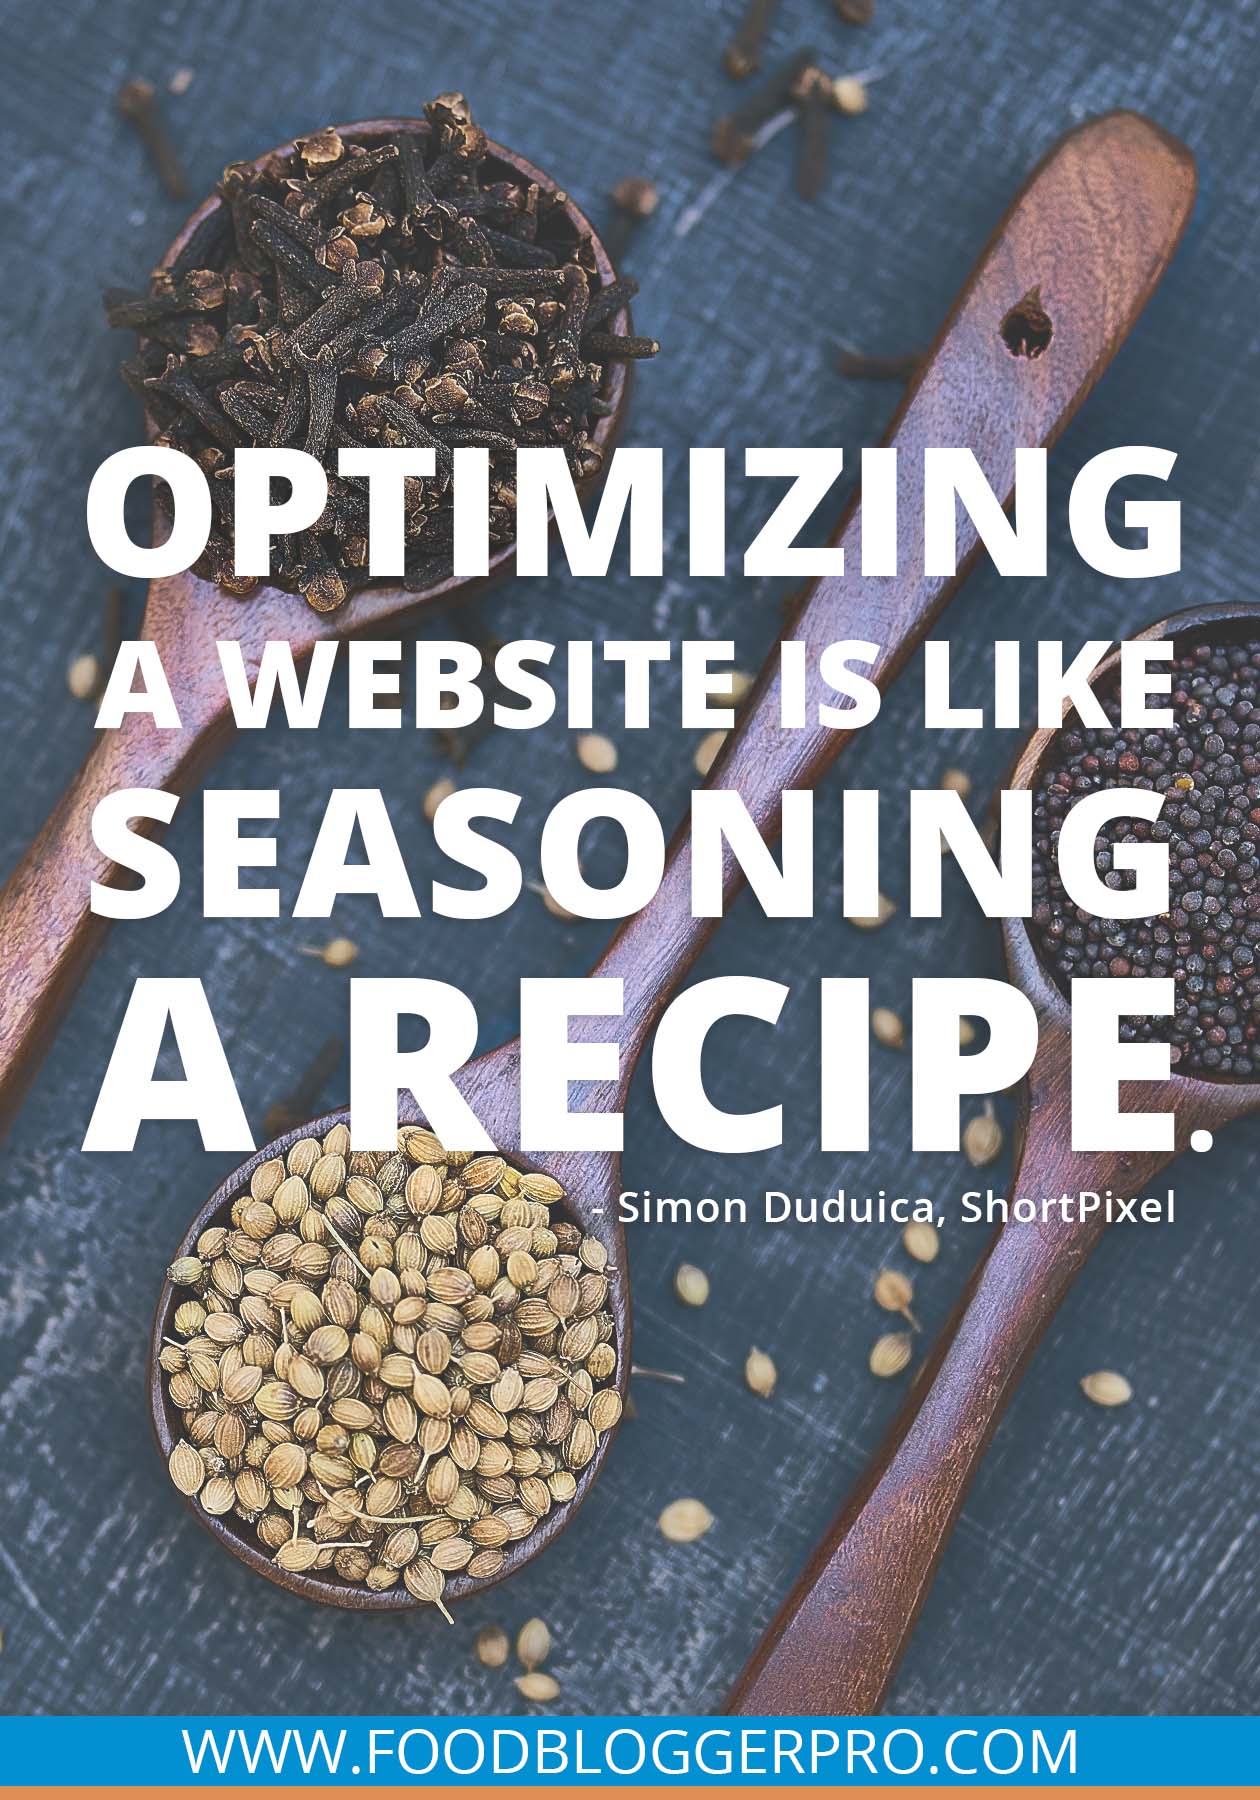
Simon Duduica: Well, let me pick up on what we said when we started this. Optimizing a website would be like seasoning a dish, a recipe.
Bjork Ostrom: Mm-hmm (affirmative).
Simon Duduica: Yeah, yeah. Let’s imagine you have a soup.
Bjork Ostrom: Sure.
Simon Duduica: You cooked a soup, and you need to add some seasoning.
Bjork Ostrom: Mm-hmm (affirmative).
Simon Duduica: What would be the one seasoning that you need to put inside most of the case? I mean, if you have to choose only one, which one would be that?
Bjork Ostrom: Sure. Yeah, so let’s say … So, the question is you have just one … You can only season it with one thing. You’ve made the soup. It’s ready to go, and sometimes, people would choose multiple different things to season it, but if you could only choose one, I would say … The go-to for probably most people would be salt.
Simon Duduica: Yeah, it makes sense. It makes sense. Well, if you would have to do your site optimization somehow and you have to choose only one thing, well, let’s say the first thing that you would do to optimize it in my opinion is optimize the images. They would give the greatest benefit on the average site. I mean, site which doesn’t have specific big problems, but generic optimization needs. Just go for image optimizing, and that would bring the most benefit on the site.
Bjork Ostrom: Mm-hmm (affirmative). Great. Yeah, and it’s … To use another food analogy, we often talk about low-hanging fruit, and I love that idea of saying, “Okay. Let’s …” You have your website. What is the … If you could only pick one way to season it from an optimization standpoint, what is the salt for optimization? You’re saying, "Hey, optimize those images to the low-hanging fruit. It’s something that you can move on and can have a really big impact.
Bjork Ostrom: After listening to this podcast episode, the great thing is people have some idea around how that works not only from a technical standpoint, but also, some of the recommendations that you’d have in terms of what types of settings they should select and how they should go about doing that. So, if somebody is convinced that they say, “This is something I know I want to do,” if they want to move forward with it, can you talk to them about how they can find ShortPixel and the best way to go about starting that process on their website?
Simon Duduica: Yeah. Well, it’s pretty simple. You go to shortpixel.com, and there, you can create your account. You find the tools for different types of website, and if you have WordPress, which is very frequent, you just search for ShortPixel in the plug-ins page and your admin interface, and you just find the ShortPixel and install it.
Bjork Ostrom: Awesome.
Simon Duduica: Then, just … Yeah, you install it. It automatically … Well, you have to push the button to create the account, but that’s all, and then you just start optimizing your images.
Bjork Ostrom: Great. Simon, thanks so much for coming on the podcast today and sharing your insights, not only starting ShortPixel, but also, how people can optimize their images. I know that a lot of people are going to get a lot out of this, so thanks for coming on and sharing your insight.
Simon Duduica: Thanks for inviting me, Bjork. It was very nice to be here.
Alexa Peduzzi: And that does it for us this week, friends, but before we wrap this episode up, it’s time for our reviewer of the week. This review comes from iTunes, and it’s from Brenda from the awesome blog BecomeBetty.com. Brenda reviews Trader Joe’s products like their new pancake bread that looks amazing, and she shares easy recipe and cocktail ideas. You guys should definitely check it out.
Alexa Peduzzi: Her review of the Food Blogger Pro Podcast says, “A binge-worthy podcast. This podcast is a great one to listen to not just once, but a few times through. Whatever stage you’re at with your blog, there is a lot of great relevant advice and wonderful guests. It’s a great guide whether you are just starting out or looking to continually grow and improve. I’m now on my second listen through all the episodes, and it’s still a helpful resource. Full of different perspectives on different areas of the food niche, but also blogging in general. Thank you so much for putting this out there to 1% infinity and beyond.”
Alexa Peduzzi: Thank you so much, Brenda. It’s amazing that you’re listening through all of our episodes for the second time, and we love that you’ve deemed the podcast binge-worthy. If you, dear listener, want to be our next reviewer of the week, all you need to do is leave us a review on iTunes and include your name and blog URL in the review. Simple as that. Thank you so much for tuning in this week, friends. We’ll see you here same time, same place next week, but until then, make it a great week.
Test comment.