If you’re a food blogger getting started or looking to grow your audience, creating a freebie can be an incredibly powerful tool. A freebie, whether it’s a downloadable PDF, mini email series, or guide, can help you grow your email list, establish trust with your readers, and offer value that brings people back to your site again and again.
Why Should You Create a Freebie?
If you’re wondering whether it’s too soon to create a freebie, it’s not! Even with a small audience, a helpful freebie can:
Grow Your Email List
Email is still one of the most powerful ways to connect with your audience directly, it gives people a reason to opt in to hear from you regularly, not just stumble across your content once and forget it.
Build Trust + Authority
Offering something valuable for free (especially something that helps to solve a problem) shows that you’re here to help, not just to promote. It positions you as a resource and that builds loyalty with your readers.
Give You Something to Share + Promote
A freebie can double as content. It gives you something to talk about in your posts, Reels, stories, and emails. You can mention freebies on Instagram to drive people to your blog, on your blog to drive people to your email list, and so on.
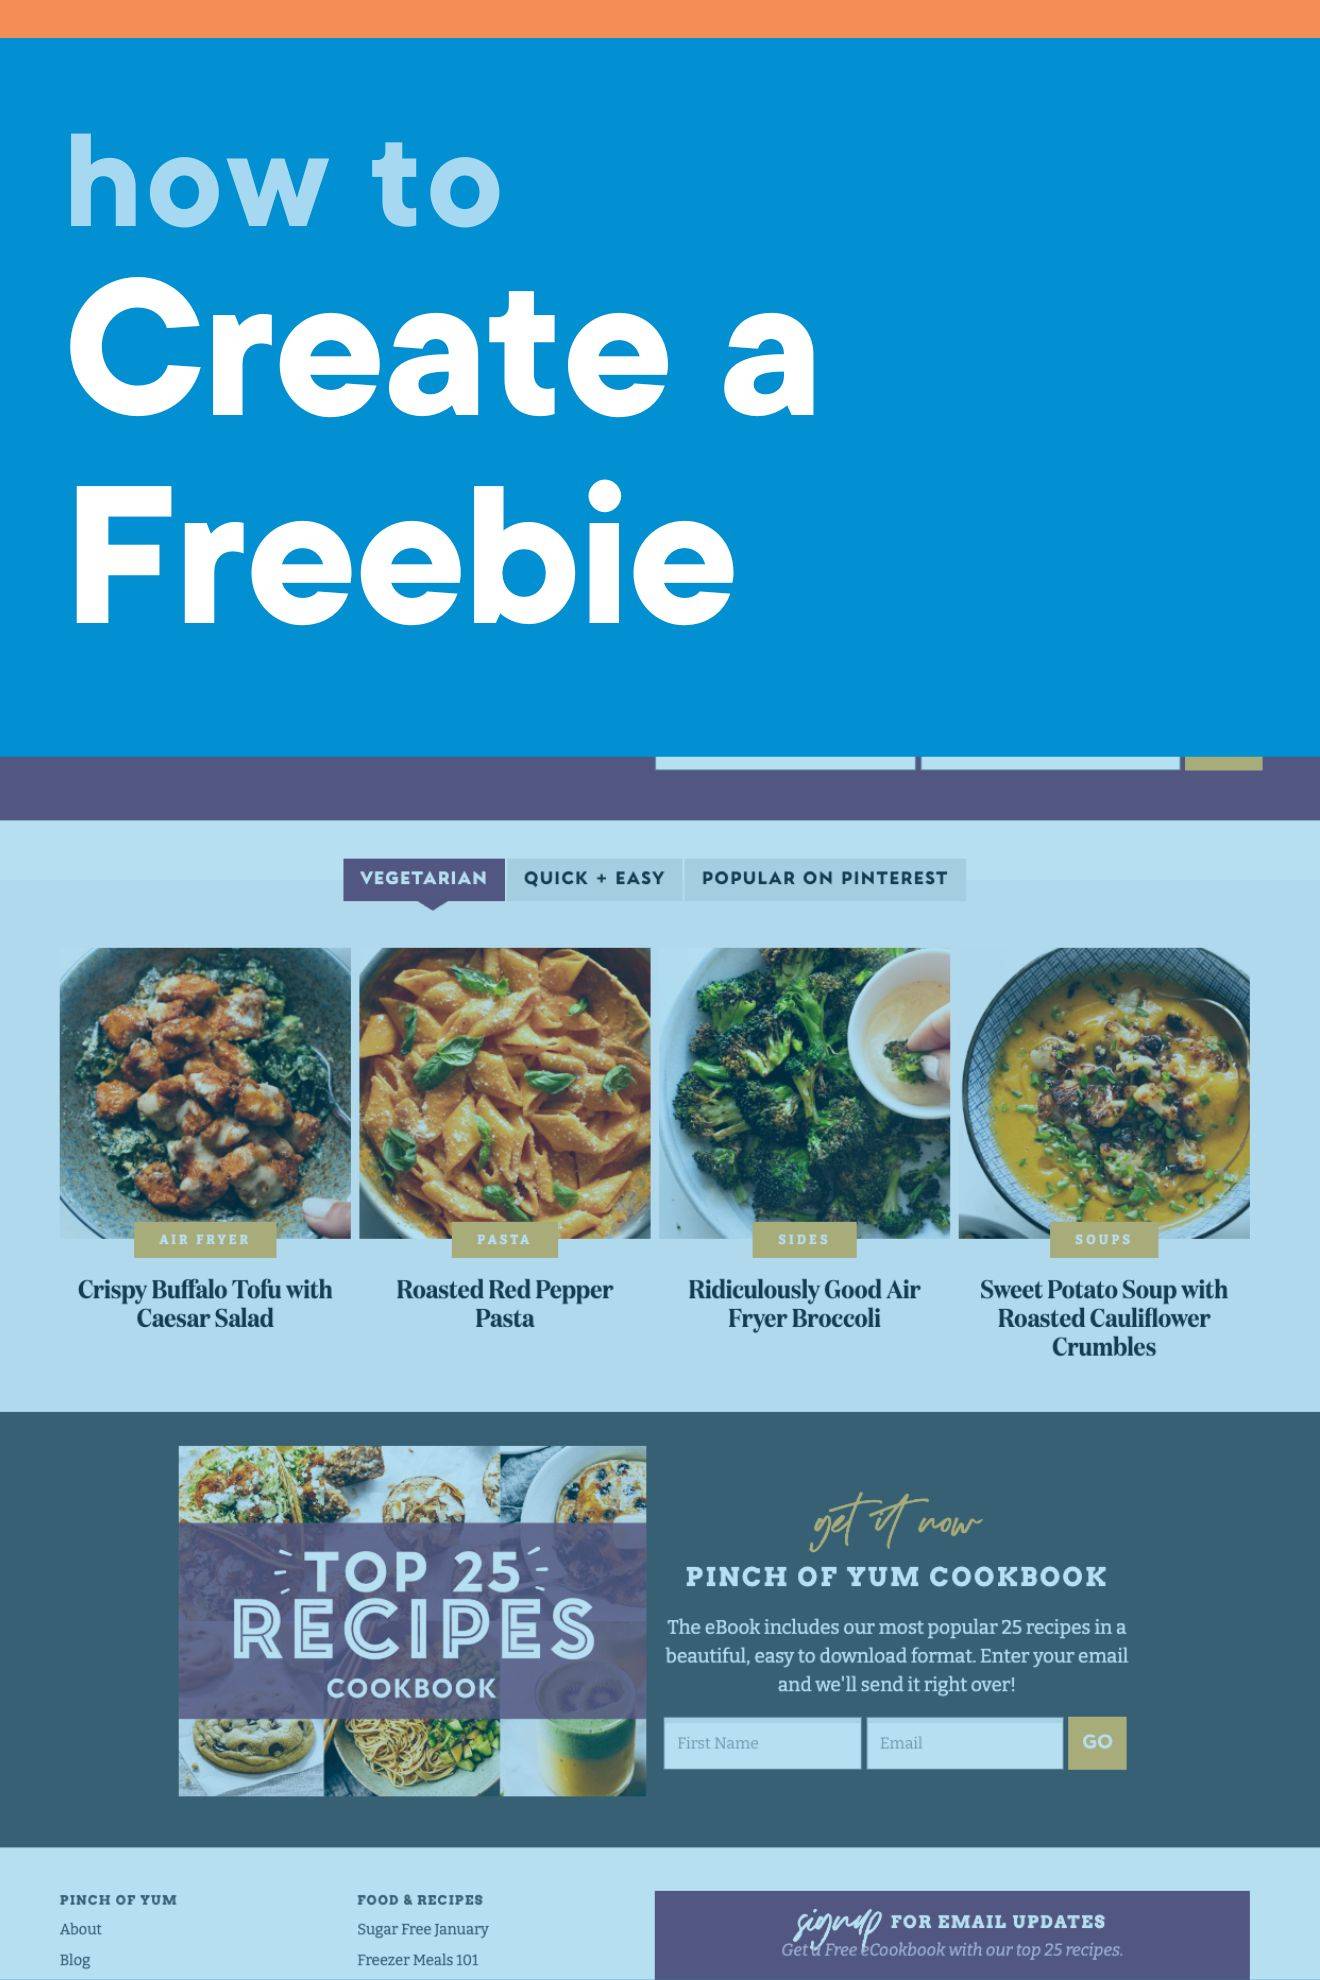
Examples:
- A free mini eBook of recipes (e.g. “5 Easy Weeknight Dinners” )
- A seasonal produce guide with tips and recipes
- A meal planner printable or grocery list
- A 3-day email series teaching a skill (like how to make sourdough or knife skills)
Think about what kind of content you want people to come back for each week. Recipes? Inspiration? Choose your purpose intentionally!
How to Create a Freebie (Step-by-Step)
1. Choose Your Topic
Think about your ideal reader and ask yourself, “what are they always looking for help with?”. What questions do you get in your DMs? Start small and specific. The goal is to deliver value without overwhelming.
And don’t worry, it doesn’t have to be huge. A one-page checklist or guide can be just as effective as a full mini eBook.
2. Write + Design It
Once you’ve outlined your content, use a tool like Canva to design your freebie. They offer templates for eBooks, PDFs, checklists, and more. Make sure your branding (colors, fonts, tone) is consistent so it feels like an extension of your brand.
Keep your freebie:
- Visually clean and easy to read (avoid hard-to-read or super small fonts)
- Skimmable with headings, bullet points, and white space
- Actionable with recipes, links, or next steps
3. Export as a PDF
Once you’re happy with your design, export your freebie as a PDF (standard for email delivery). Double check file size and formatting, it should be easy to open and mobile-friendly.
4. Set Up Email Delivery
You’ll need an email platform (like Kit or MailChimp) to connect your freebie to a signup form. Most platforms allow you to:
- Create a form or landing page
- Set up an automated email that sends the freebie once someone signs up
- Add subscribers to a welcome sequence or tag
And of course don’t forget to test your form to make sure the automation works!
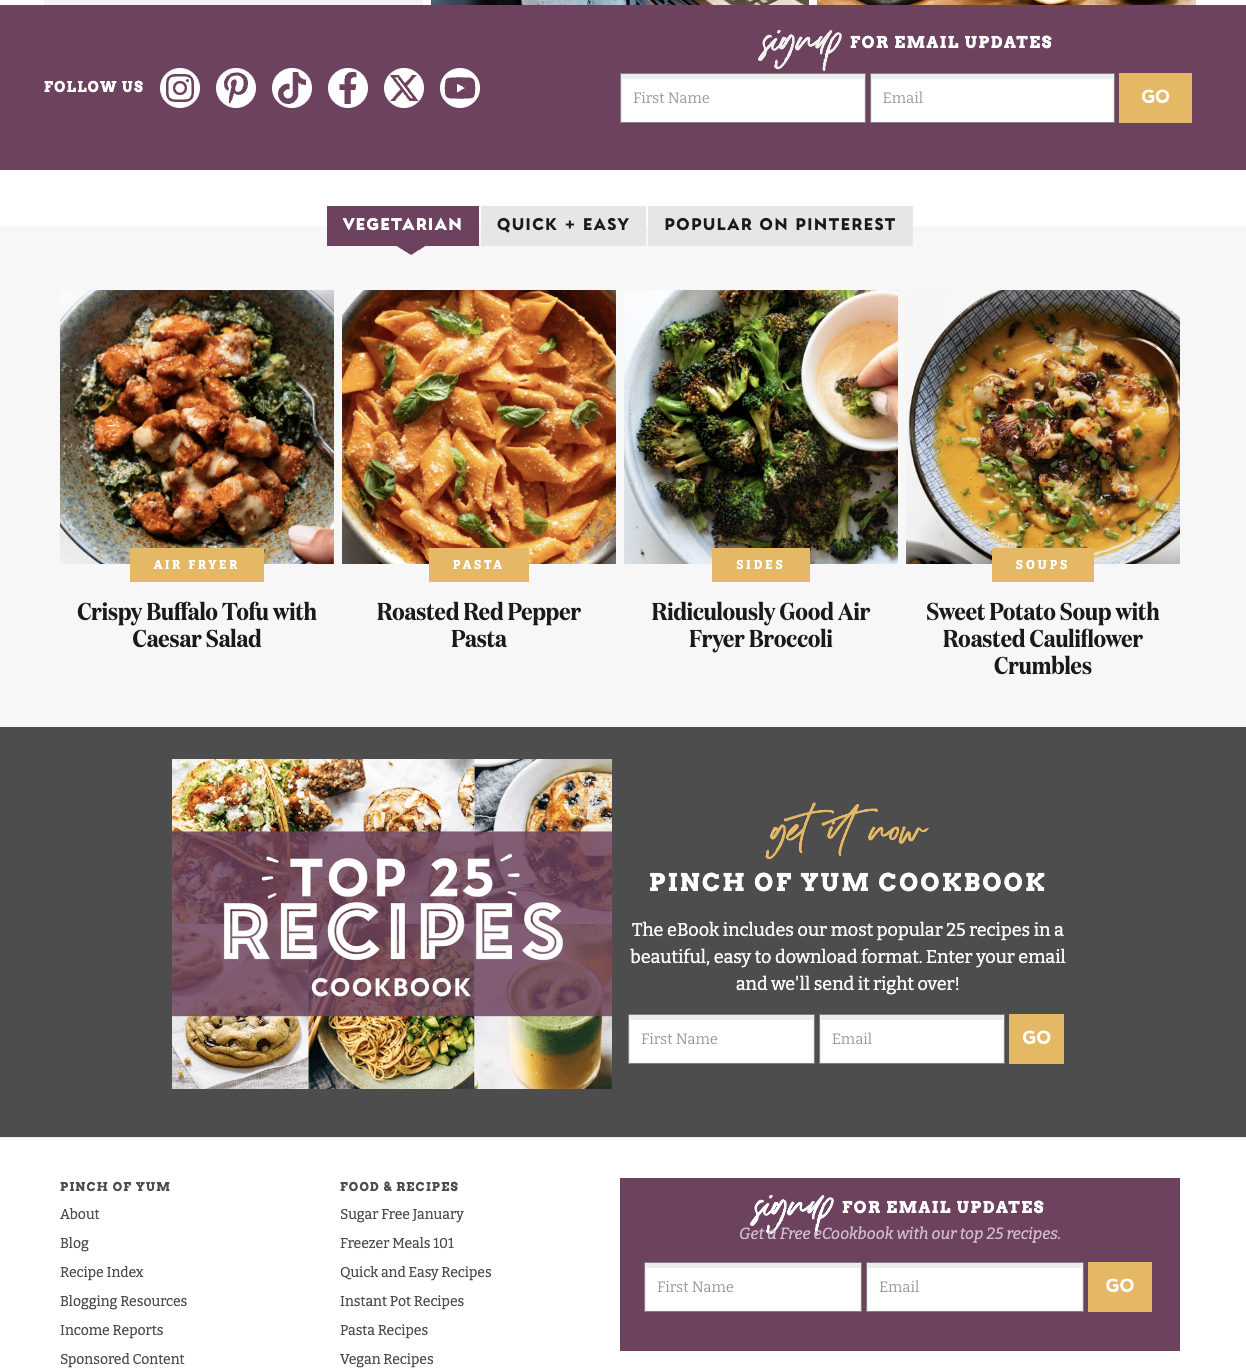
Want to learn more about creating landing pages, tags, and automated emails in Kit?5. Embed or Link the Form
Once your freebie is ready to go, add it where it makes sense:
- On your Instagram bio link or in Stories
- On your homepage
- In related blog posts
- As a pop-up or banner
- In your blog sidebar or footer
So, whether you’re just starting your food blog or looking to grow your email list, a well-crafted freebie can be a great way to grow your audience and build trust!
Want more help growing your food brand across platforms? Join the community at Food Blogger Pro where you’ll find courses, expert interviews, Live Q&A replays, and other creators on the same path.
Have a go-to freebie you love? Share it in the comments!