You know the saying, “We eat with our eyes”?
Whenever you’re sharing food content –– whether it be on your blog, on social media, or in a portfolio –– photography is a crucial part in conveying the texture, preparation, and overall experience of making or enjoying a recipe.
And, we’ll let you in on a little secret: food photography doesn’t need to be complicated, especially if you’re just starting out! But there are some tips and tricks that you can implement to take your beginner food photos to full-blown stunners.
If you want a quick place to start, check out this free ebook about our 7 top tips for taking and sharing viral food photos:

Download our free ebook for our top tips on taking viral food photos!
If you want to dive even deeper into the wonderful world of photography, you’re in the right place! Here are our top tips for food photographers:
📷 The Best Cameras for Food Photography
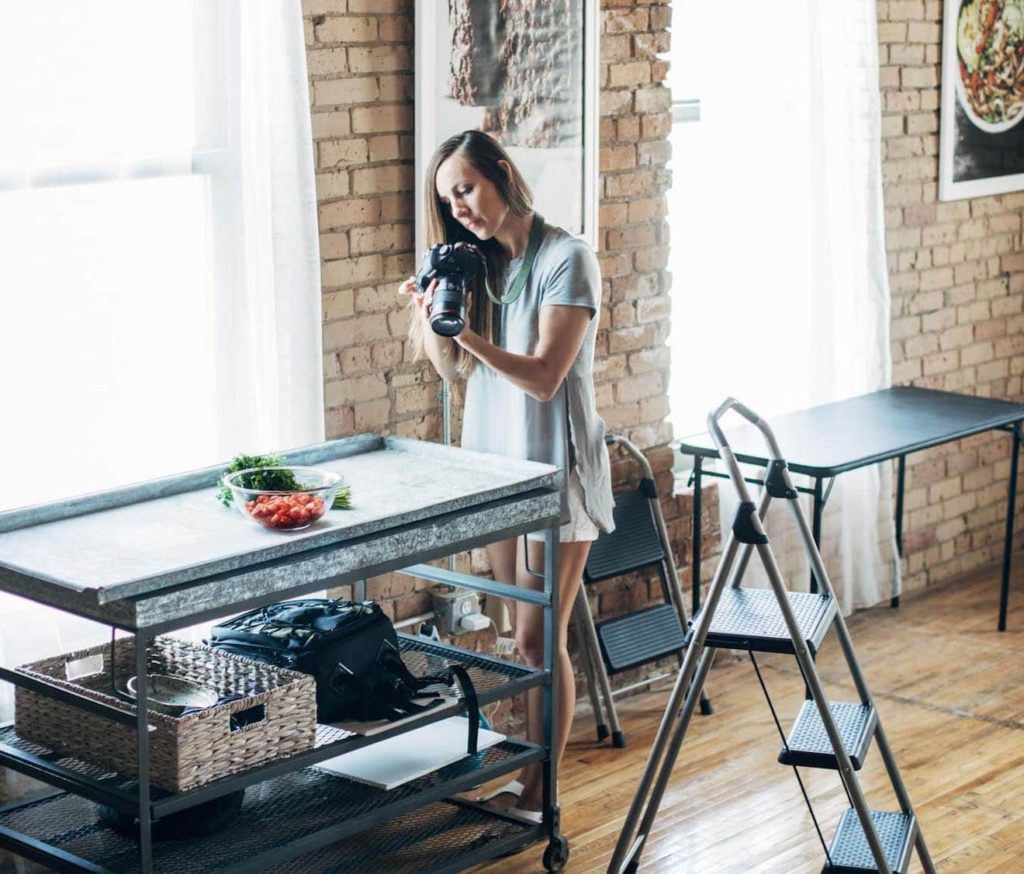
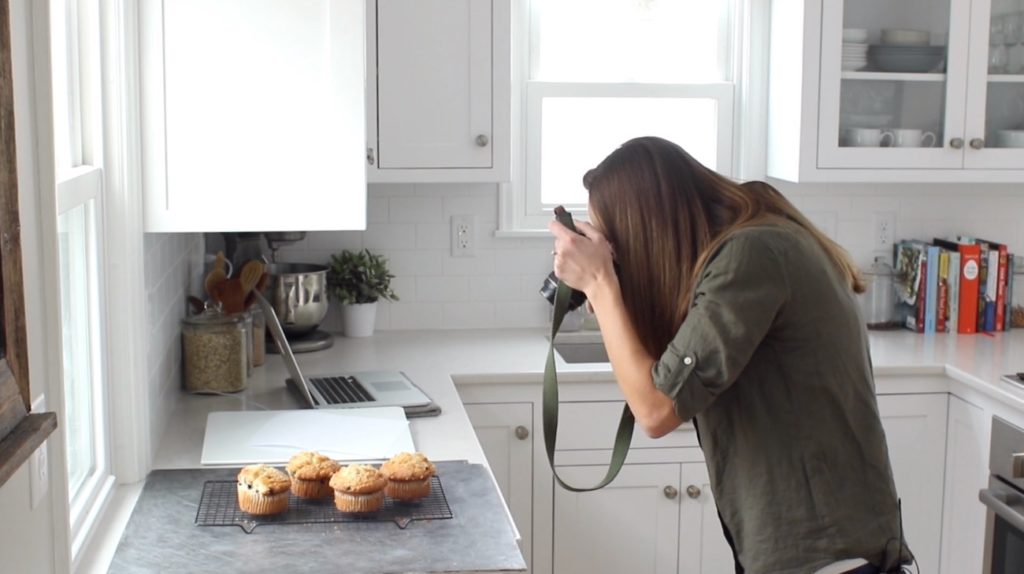
If you’re just starting with food photography, start with what you have! There’s no need to invest hundreds or thousands of dollars on a pro photography setup right at the get-go.
Why? Because you can still start figuring out your style and learning about lighting (more on that in a bit!) while using the smartphone or point-and-shoot camera you already have.
If and when the time comes that you’re ready to invest a little more into your photography setup, you can think about upgrading to a DSLR, or digital single lens reflex.
These types of cameras –– most commonly found from brands like Canon, Nikon, and Sony –– give you a great deal of control in terms of color balance, brightness, sharpness, and image clarity, and they’re typically sold separately from lenses (or sold in some sort of “bundle”). DSLRs can range from a few hundred dollars to thousands of dollars.
Since we get this question a lot, as of February 2022, Lindsay (from our sister site, Pinch of Yum) uses the Canon 5D Mark iV. Some other popular options from our community are the Canon Rebel T7, the Nikon D810, and the Canon D6.
⚙️ A Quick Recap of Important Photography Settings
There are four main camera settings that you’ll see as you’re learning about food photography:
- Aperture
- Shutter Speed
- ISO
- White Balance
Here’s a quick recap of each:
Aperture
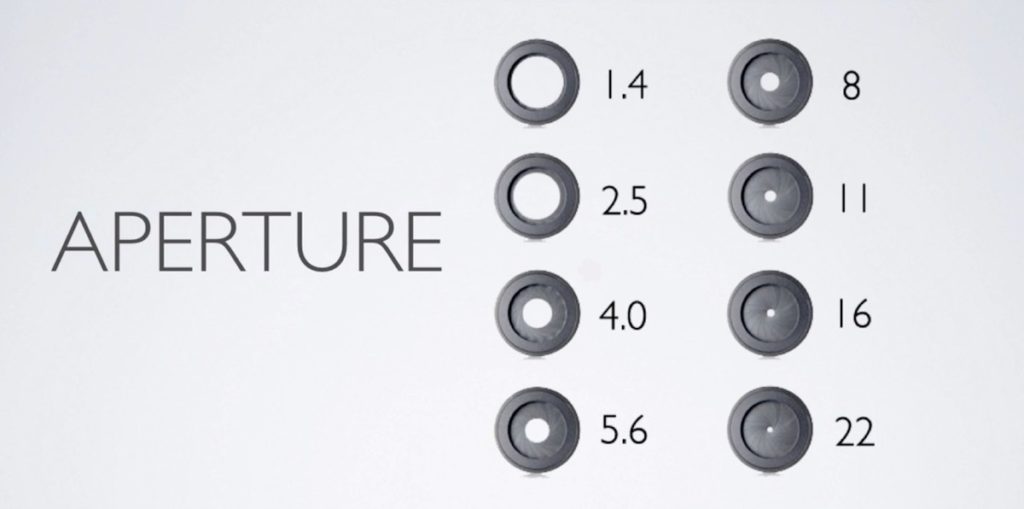
The aperture is an opening inside your camera that lets in light. The lower the number — like 1.4 or 1.8 — the more wide-open that aperture is, meaning you’re getting more light into the photograph. Lower apertures create more background blur (also known as bokeh).
As the number goes up — like 2.5, 4.0, or 5.6 — the aperture starts to close, which lets less light into your photograph. With higher apertures, more of your photograph will be in focus so you’ll have less background blur.
Aperture is typically expressed as an f-number, so f/1.4 or f/2.5.
Shutter Speed
Shutter speed is the speed that the shutter opens and closes. Usually, this is listed as a fraction of a second –– 1/100th of a second, 1/200th of a second, or it could be as low as 1/60th or 1/100th of a second.
Higher or faster shutter speeds (at that 1/100th or 1/200th range, for example) are going to be ideal for action shots when you want to capture something really quickly that’s happening, some movement so it doesn’t get blurry, so it’s nice and sharp and crisp.
Lower or slower shutter speeds (like 1/60 or 1/100) are ideal for letting more light in because the shutter is open for longer. Lower shutter speeds are actually really nice for food photography because you typically don’t have a ton of movement you need to capture in your food photos.

If your shutter speed is too low or slow, however, you may need to use a tripod to keep your camera steady while the shutter opens and closes.
ISO
The ISO refers to your camera’s sensitivity to light.
A lower ISO, like 100, will make your camera’s sensitivity to light much lower. Lower sensitivity to light preserves the colors in your photograph so they look more bright and natural. Ideally, this would be the best setting to use all the time.
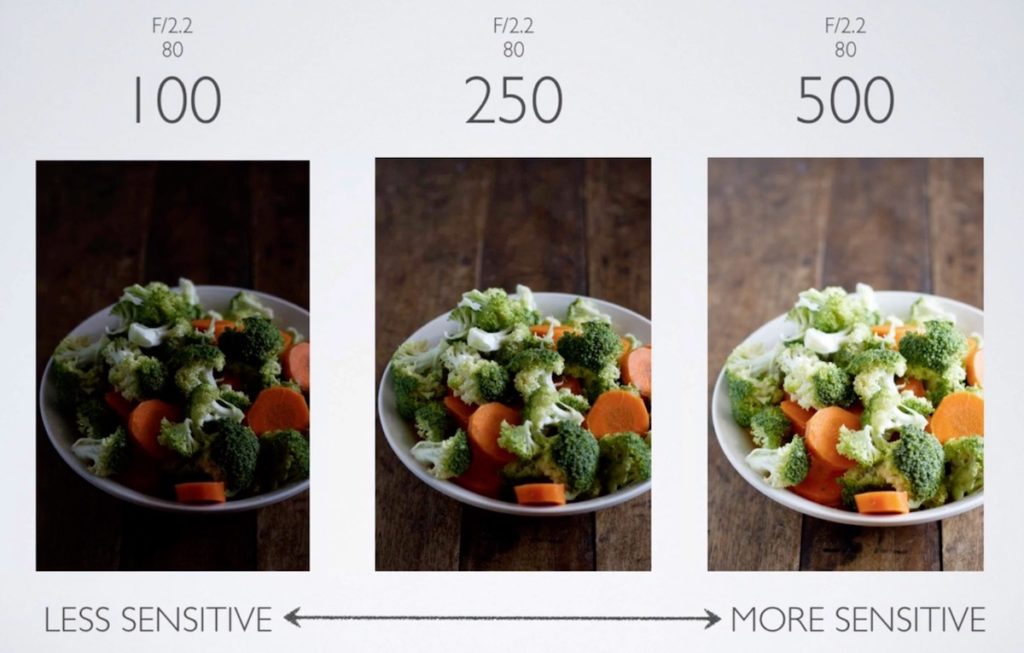
That said, we may be shooting in lower light situations where it may make sense to increase that ISO. That would mean that your camera is more sensitive to light, your photos will be brighter, and your colors will be a little less rich.
White Balance
If you’ve taken a photo that looks too “blue” or “cool” or too “yellow” or “warm,” your white balance may be to blame. White balance refers to the balance or temperature of colors and how natural the whites in the colors in the photograph look.
For most food photographers, we recommend keeping your white balance set to auto!
If you want to dive even deeper into the ins and outs of camera settings, we talk even more about them in our Using a DSLR course on Food Blogger Pro!
👓 The Best Lenses for Food Photography
There are a few decisions you need to make when you’re looking to outfit your DSLR with a lens:
Prime vs. Zoom
A prime or fixed lens has a fixed focal point. You won’t be able to zoom closer to your subject without physically moving the camera closer. A popular prime lens is the “nifty fifty,” which is a 50mm fixed lens with a low aperture like f/1.8.
On the other hand, a zoom lens will give you a focal point range. So when you see a 55-250mm lens, that lens can act like a 55mm lens, a 250mm lens, and everything in-between.
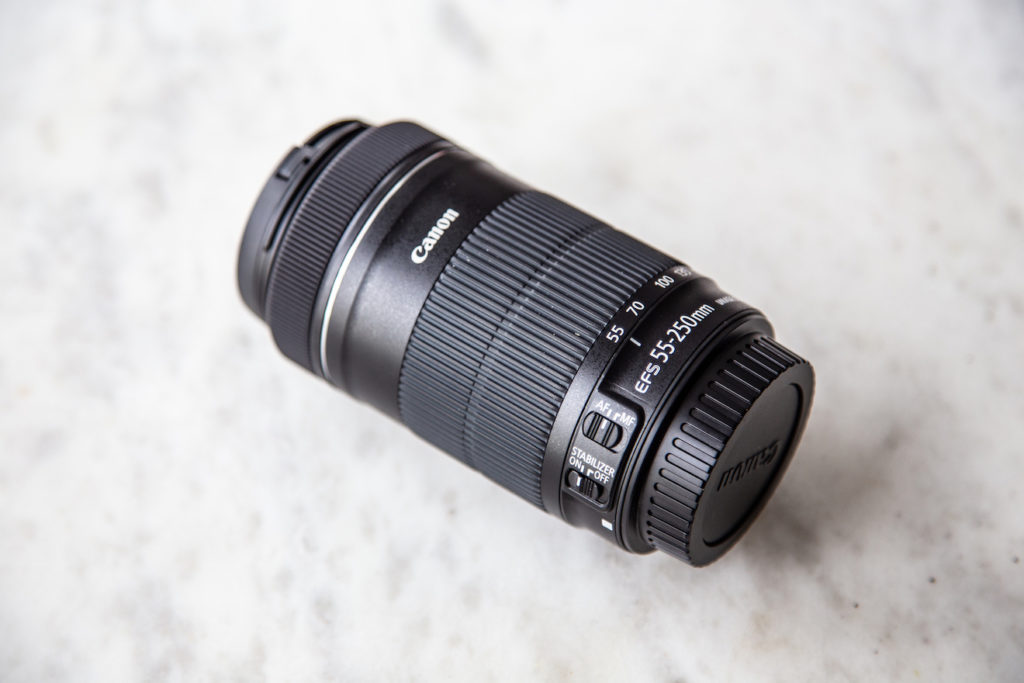
Prime lenses are typically a bit cheaper than zoom lenses, and since you’ll most likely be close to your subject when you’re photographing food, we’re big fans of prime lenses. But if you want some more versatility, a zoom lens might be best for you!
Recommendations for Prime/Fixed Lenses for Food Photography:
- Canon 50mm f/1.4
- Canon 50mm f/1.8 (one of Lindsay’s favorites!)
- Nikon 50mm f/1.4
- Nikon 50mm f/1.8
- Canon 100mm f/2.8 (another one of Lindsay’s go-tos; good for macro photos!)
☀️ Lighting for Food Photography
There are two main sources of light to consider when you’re thinking about food photography:
- Natural Lighting
- Artificial Lighting
We have courses on both for our Food Blogger Pro members, but here are some general pros and cons of each:
Natural Lighting
Natural lighting is great because, as the name suggests, it produces a natural look and feel to your food photos. And that’s because your light source is the sun!
For naturally-lit food photos, you’ll want to make sure you’re shooting in indirect light (meaning that the sun isn’t beating directly down on your subject) from a north-facing window.
You can diffuse the sunlight by hanging light curtains over your windows or by waiting for the natural diffusing power of some clouds.
And while natural light is great for producing beautiful food photos, it’s hard to control. Heavy clouds, rainy or snowy days, or direct sun can affect the end result of your photos by making them too dark, shadow-y, or cool- or-warm-toned.
If it’s really dark and dreary outside, you may need to use a tripod and decrease your shutter speed or just wait for better weather. If it’s too sunny, again, waiting for less direct sunlight might result in better photos.
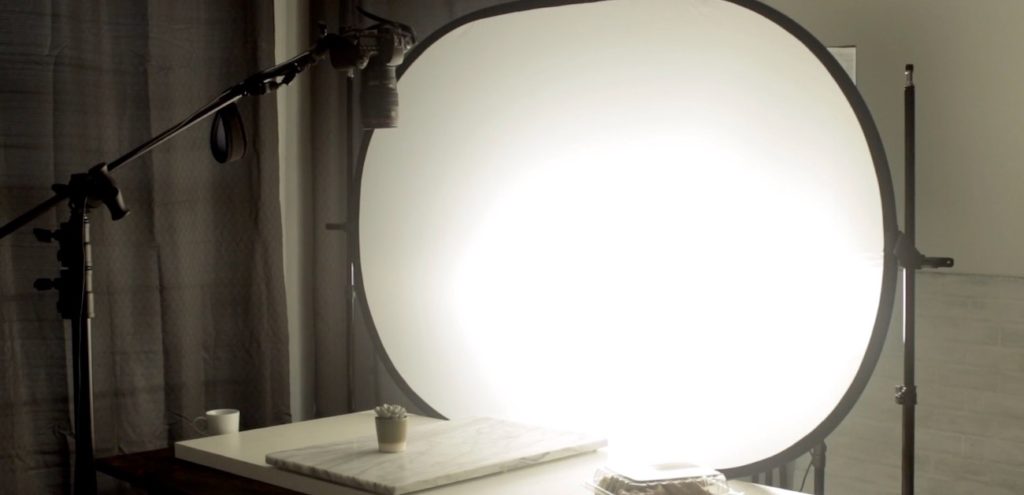
Artificial Lighting
Artificial lighting can take a few different forms like flash or continuous, and an artificial lighting setup can be a helpful way to combat some of the variables that make naturally-lit photography more difficult. A few common types of artificial lights include:
- LED panels like this kit from Westcott or this setup from Neewer
- Flash options like this from Godox
A huge benefit of artificial lighting is that you can shoot at any time! You don’t need to wait for the sun to be in the perfect position to snap your shot because you have full control over the positioning and strength of the light. Artificial lighting setups are also helpful when you need to shoot in notoriously low-lit places like restaurants.
That said, there’s a much larger “barrier to entry” when it comes to getting up and running with an artificial lighting setup. Not only do you need to purchase the lights, you’ll need to learn how to effectively use them once you have them!
Once you do figure out how to use your artificial lights, however, they can be an incredibly helpful tool to keep in your food photography arsenal!
If you’d like to learn more about artificial lighting, be sure to check out our courses on Food Blogger Pro or this episode of The Food Blogger Pro Podcast with flash photography queen, Joanie Simon!
🍴 Food Photography Props
You don’t need a ton of props to get started with food photography. And there’s actually something to be said about keeping your food photography props to a minimum.
Why? Props help define your style, so if you’re using the same or similar-looking props in each of your photographs, your food photos will be easier to identify as your own!
When selecting props, think about the colors, textures, and styles that match and mesh with your brand. Plates, bowls, fabrics, glasses, and utensils can all help you convey a very specific look and feel to your food photos.
Our Props for Food Photography course is a great one to review if you’re looking for some specific recommendations! And we talk a bit about props and those little “extras” that you can add to your photos to really help them shine in our “7 Ways to Take Viral Food Photos” ebook:
Get our “7 Ways to Take Viral Food Photos” ebook for free to learn about props, colors, angles, and more!
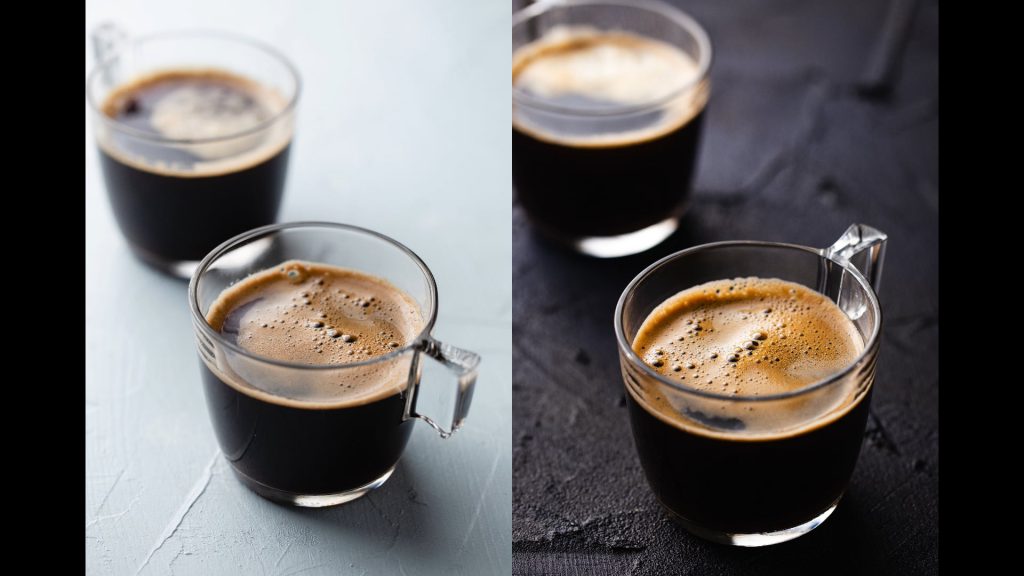
🎨 The Best Food Photography Backgrounds
Another way to help you define your photography style is through the backgrounds your food is showcased on! You can find so many different colors, textures, sizes, and styles in food photography backgrounds, but here are some of our (and our members’) favorites:
- Erickson Surfaces (Food Blogger Pro members can get 10% off on our Deals page!)
- Woodville Workshop
- Marble Pastry Slab (like this)
- Replica Surfaces
- Swanky Prints (Food Blogger Pro members can get 30% off on our Deals page!)
- Capture by Lucy (Food Blogger Pro members can get 10% off on our Deals page!)
If you’re crafty and want even more control over your backgrounds, we have a Quick Win lesson all about how you can make your own!
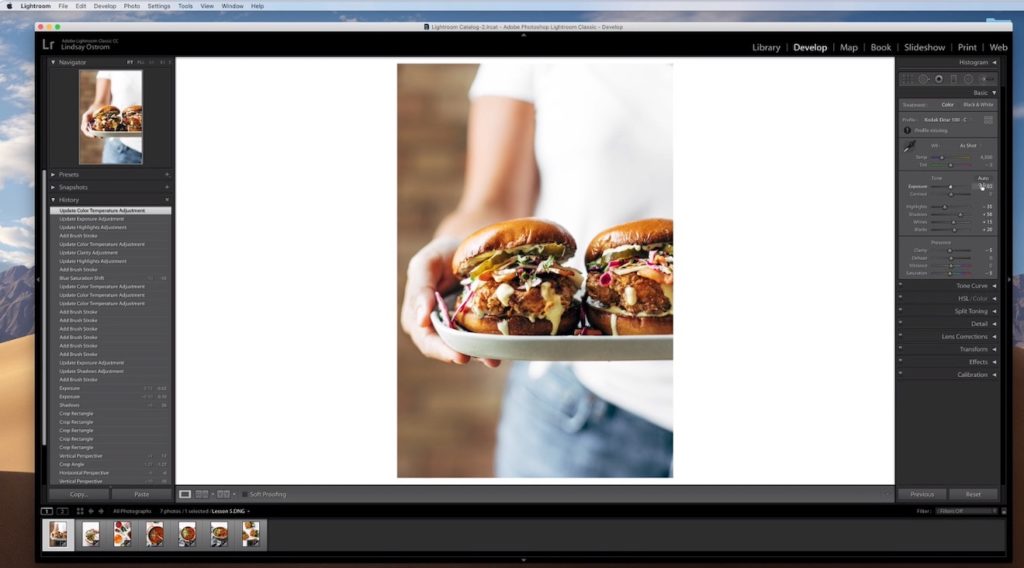
✍️ How to Edit Your Food Photos
When it comes to editing your food photos, two of the most common and widely-used programs are Adobe Lightroom and Adobe Photoshop.
In general, Adobe Lightroom is a bit more intuitive and easier to pick up, while Adobe Photoshop gives you much more control over your final photo. Instead of simply allowing you to edit a photo, Photoshop helps you manipulate the photo with pixel-sized fine-tuning.
Some food photographers use one over the other, while others use both. When it comes to choosing the photo editing software you want to use, it all depends on which program gives you the control and flexibility you need.
We have courses on both of these editing softwares on Food Blogger Pro to help you make up your mind and get a feel for how you can edit food photos in each.
Dive Deeper and Become a Food Photography Pro
Did you know that we have content that will help you dive even deeper into all of the topics covered on this page? It’s true!
Between courses for our members, podcast episodes, blog posts, and other resources, Food Blogger Pro is your one-stop shop to help you level-up your food photography skills:
Listen to Top Food Photography Advice
Every week on The Food Blogger Pro Podcast, we interview successful food bloggers and industry experts in an effort to surface strategies that can help you more efficiently grow and monetize your site and food content. If you’re at the point where you’re ready to start implementing some tips and strategies that will help you capture beautiful food photos, here are some podcast episodes that will help:
Read About Food Photography Tips and Strategies
Food photography can seem easier than it actually is. There are a ton of different decisions to make including photo sizes, styling, branding, and more.
These blog posts will help you make some progress on these types of questions!

A Community to Support and Guide You
With a Food Blogger Pro membership, you get immediate access to the courses, lessons, Q&As, and deals that will teach you about food photography and empower you to define your own photography style. Here are a few of our favorite member-only courses:

Styling for Food Photography

Composition for Food Photography
Editing in Lightroom
Remember! Download this free ebook for our 7 top tips for taking viral food photos!